Changelog posts
Detailed information about the changes implemented in Manage system
November 22 Updates
Nov 18, 2022
The latest release introduces the concept of roles. Roles when assigned to users dictate the functionality available to the users
Multiple users with different roles can be added to the system. There are four roles available in the system
-
Global Administrator - users with this role will have access to all functionalities in the system. The Global administrator can create and update the academy, term, venue, course, classes, students, record attendance, send communication, and can access all financial functionalities in the system.
-
Class Administrator - this role will be able to manage classes, students, and attendance. The class administrator can view the academy, term, venue, and course but cannot create or edit them. The class administrator cannot create classes but can clone classes. They can manage students, send communication from the system, and record attendance. These users will not have access to any finance-related functionality in the system.
-
Teacher - This role will be able to view the academy, term, venue, course, class, and student but cannot create or edit them. The teacher can only manage the reservation and attendance of students. Users assigned to teacher roles will not have access to any finance-related functionality in the system
Class administrator and teacher can be assigned to specific classes or all classes in the system
- Finance Administrator - this role has full access to finance features at the academy, course, class, and student level and read-only access to features that are needed to get to the finance features.
Steps to set up users are detailed in the Multi-user login for academy section.
Nov 6, 2022
The November update has three new functionalities - Extras and discounts that can be assigned to students, substitutes/one-offs at individual sessions, and Direct debit.
Changes in this version are
Direct debit using Stripe Connect Account
Before collecting direct debit, it is necessary to connect the academy/club’s stripe connect account to Classbees.
Once the academy is linked to the stripe account, the direct debit status for individual students can be seen at the academy level
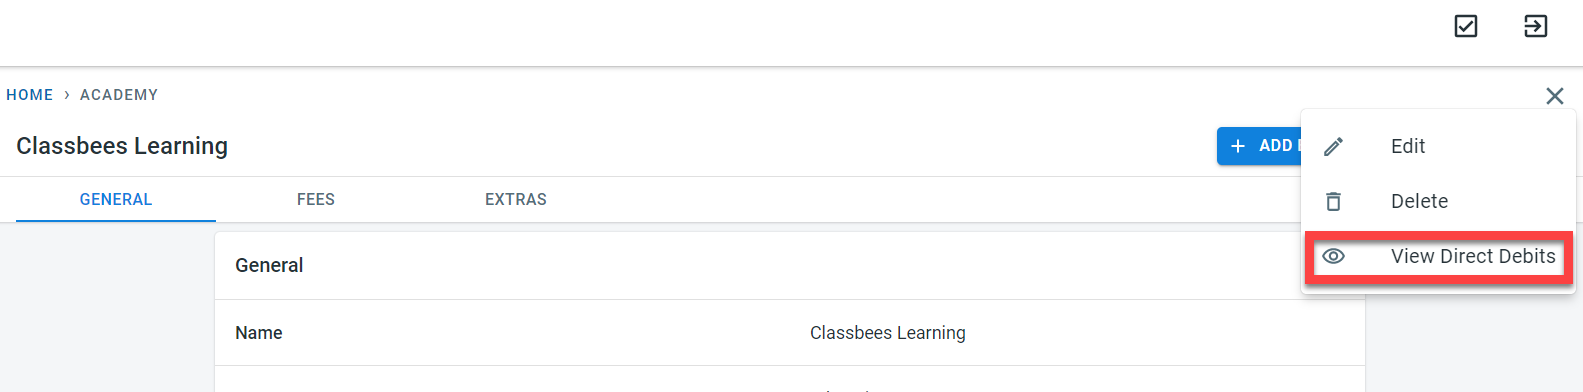
Select “View Direct Debits”. Direct debit status for all students in the academy/club will be displayed
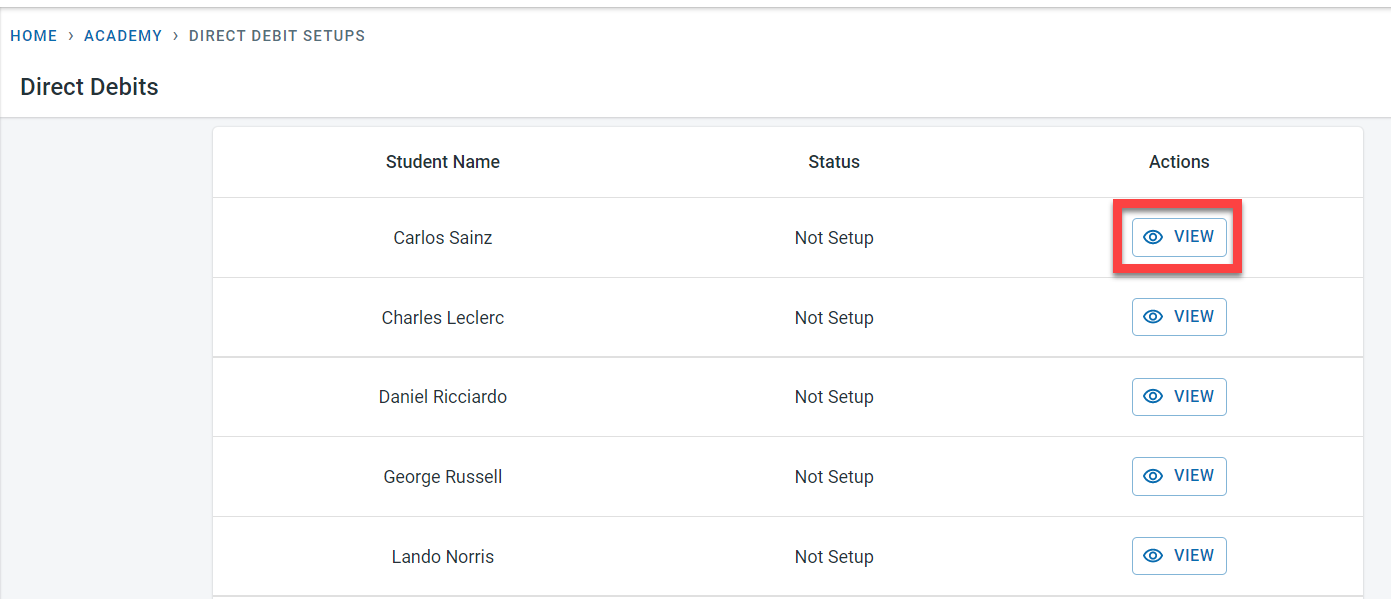
Click on “View” next to the student to see details of the direct debit.
The student’s direct debit can be viewed directly from the student as well.

If direct debit has not been set up for the student yet, the following screen will be displayed
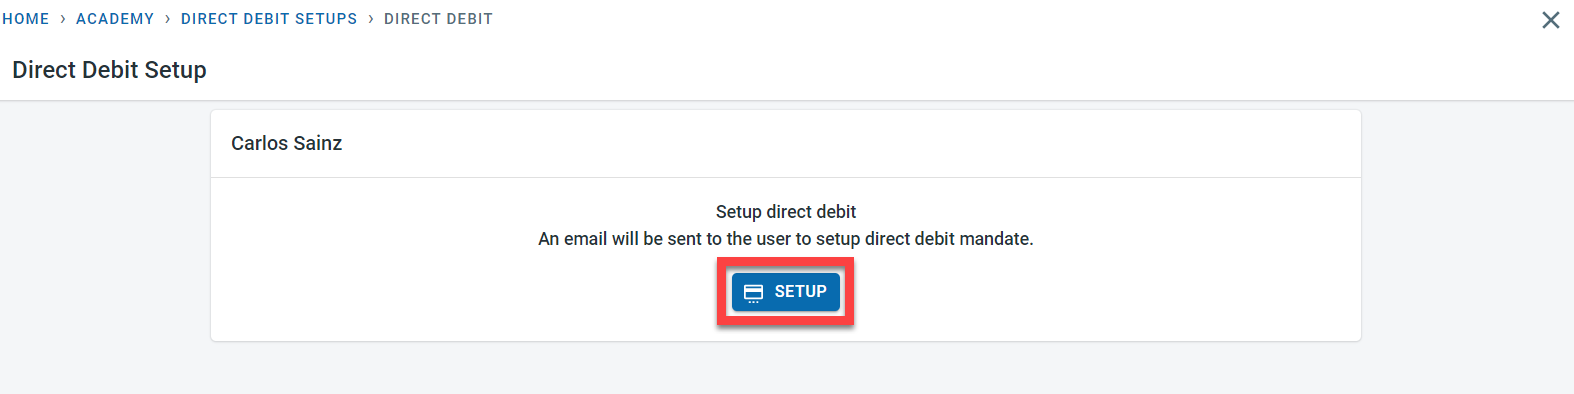
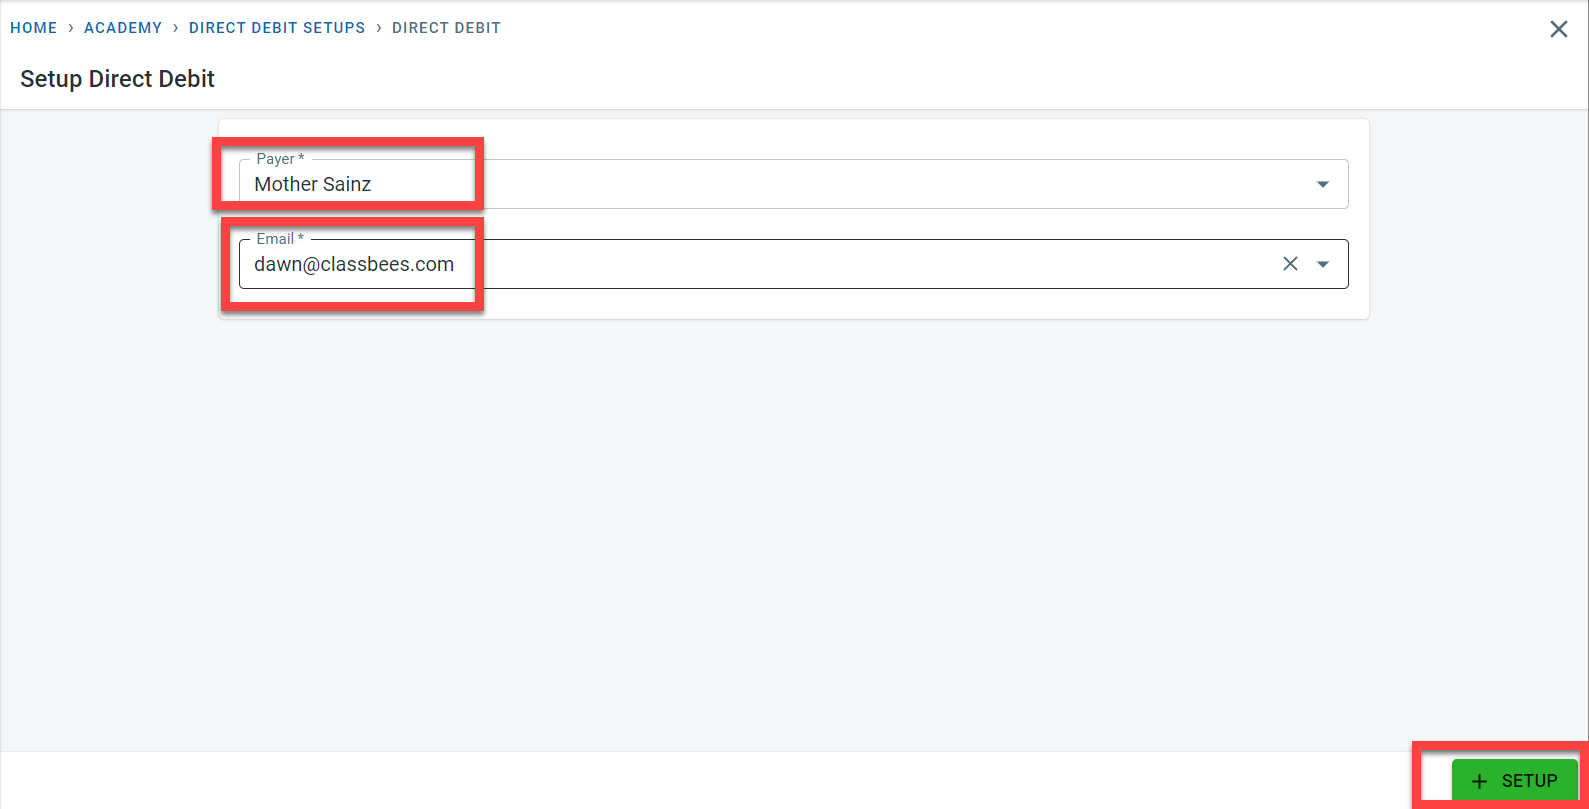
Click on “Setup” to initiate the direct debit for the student. Under the Payer column, select one of the finance contacts.
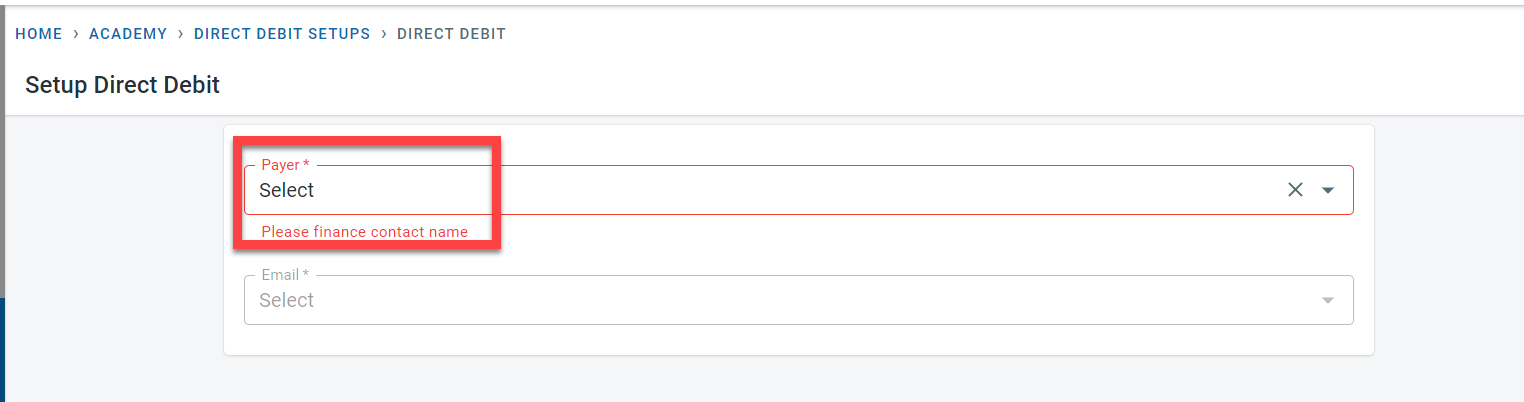
Select the email address for the finance contact and click on setup.
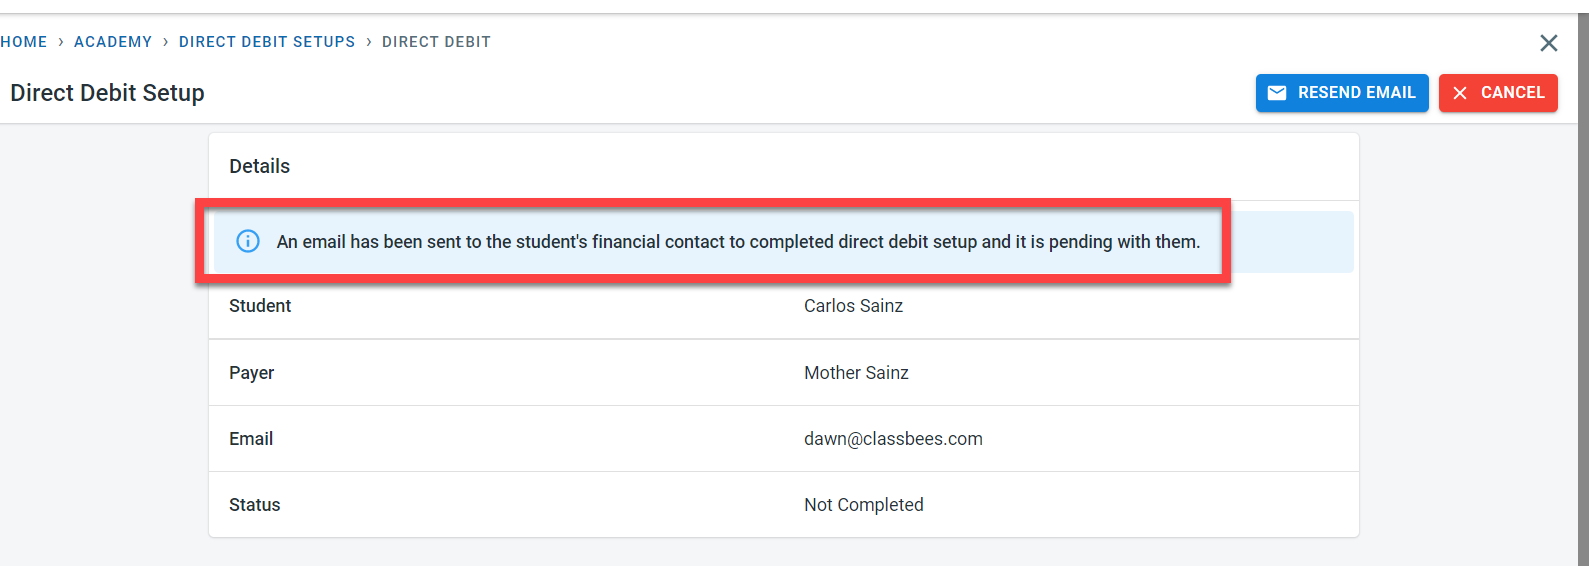
An email will be sent to the finance contact.
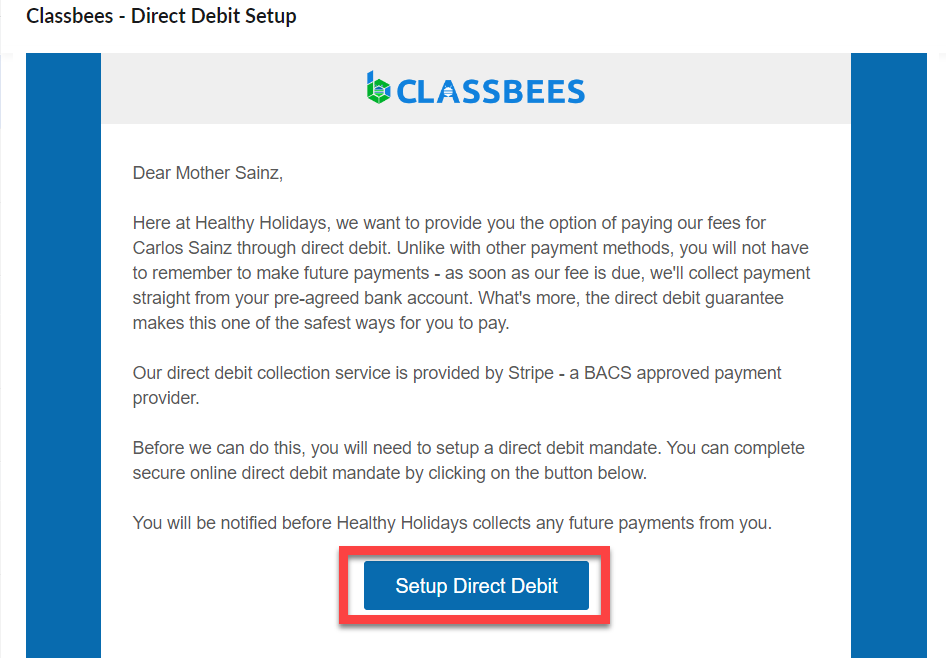
In the email, the finance contact for the student should click on “Setup Direct Debit”
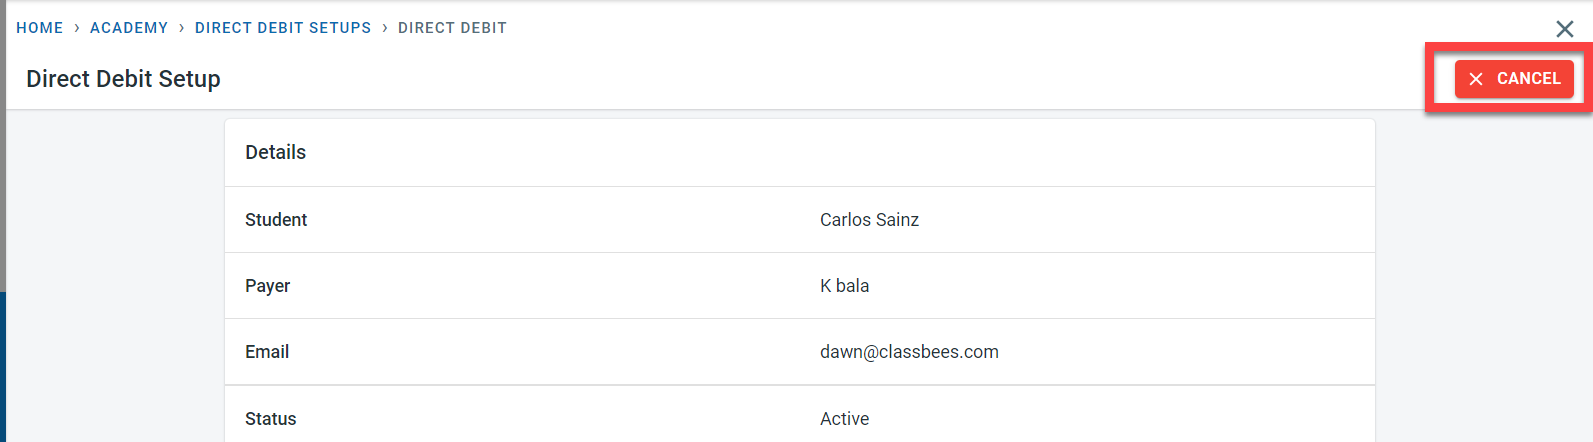
Once the direct debit is set up, the status of direct debit for the student would be “Active”

To cancel the direct debit, click on “View” next to the direct debit setup for the student. In the Direct debit screen, click on “Cancel”
Extras and discounts
In order to add extra fees automatically to student invoices, they have to be set up either at the academy level or at the course level. Extras added at the academy level are available for all the classes within the academy whereas the extras defined at the course level will be available only for the classes assigned to that course.
Adding extra at the Academy level
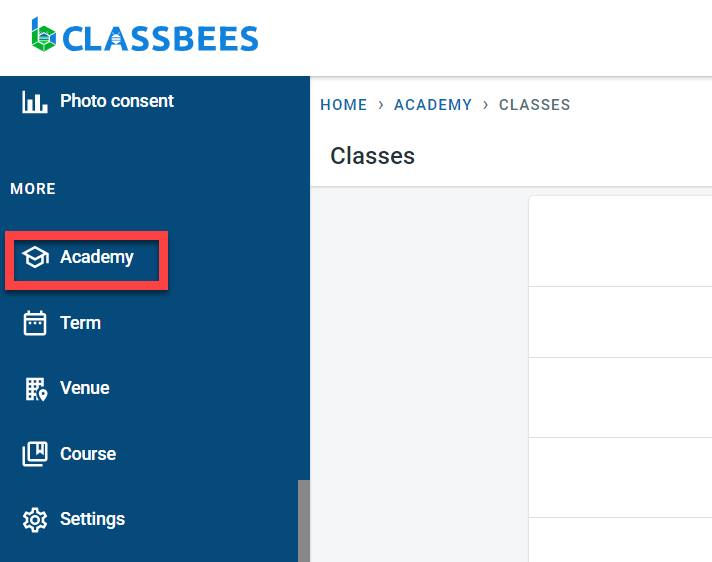
To set extras at the academy level, select the academy from the main menu
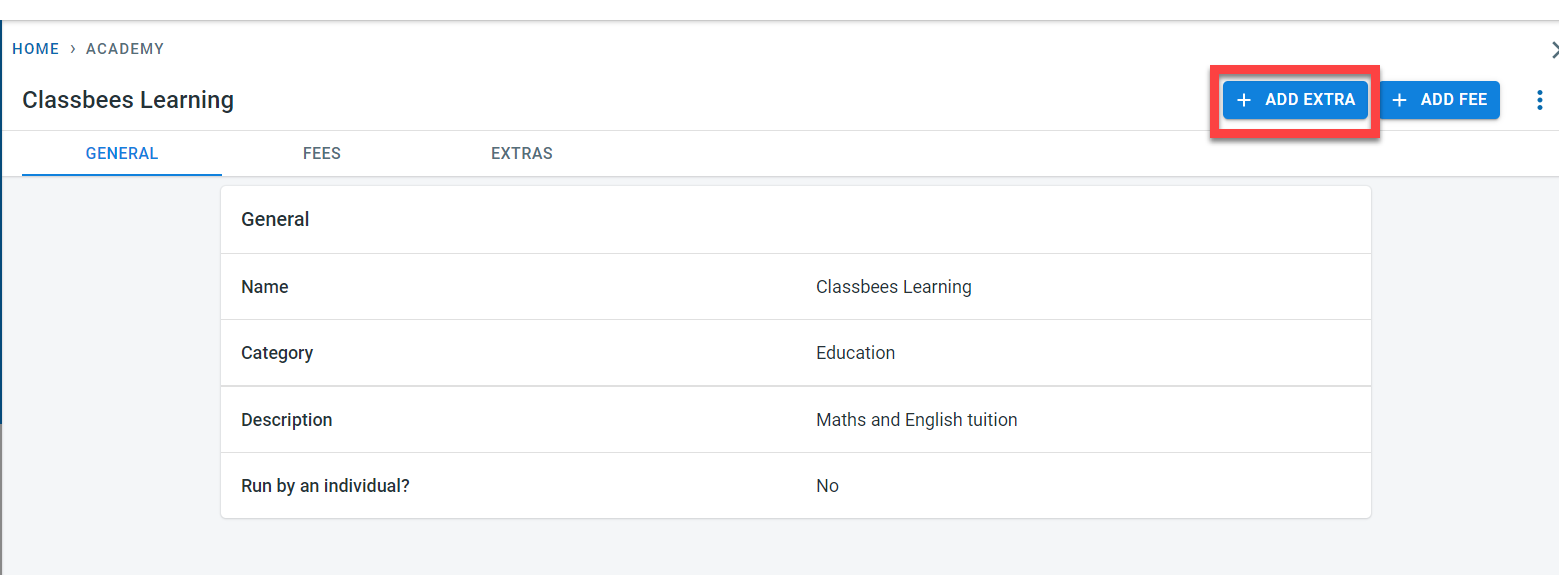
Click on “Add Extra” to create a new extra at the academy level
In the “Create Extra” screen, enter a name for the extra fees. If there is no fee to be charged for the extra, set the “Is Free” flag. Fees for the extras can be entered with the date from when the fees would be effective. Multiple effective dates can be added for extra fees.
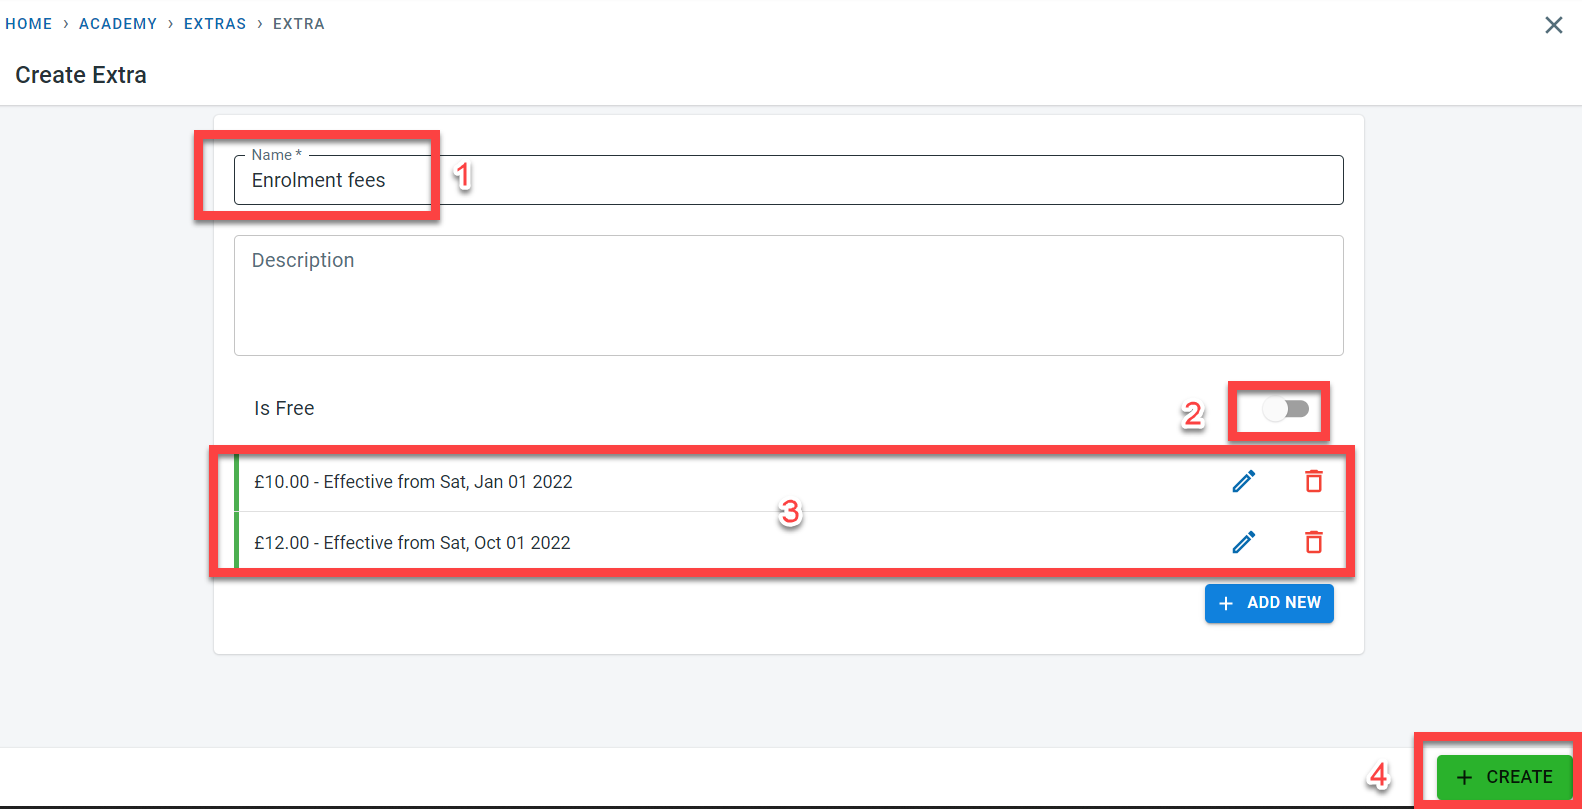
Click on “Create” to save the extra fees
To edit or delete the extra fees, click on “View” next to the extra.
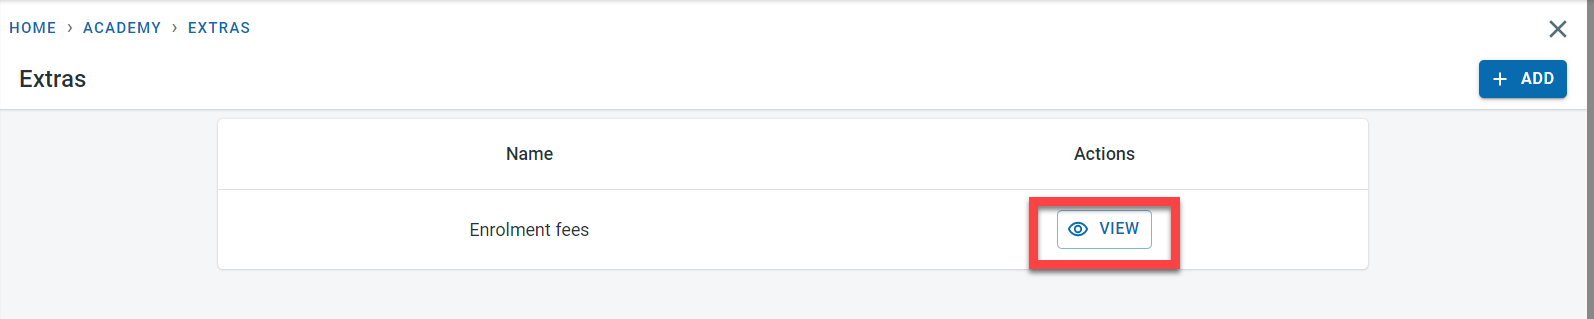
Click on “Edit” to make any changes to the extra fees and click on “Delete” to remove the extra fees from the system
Extra fee details cannot be deleted from the system once they have been added to classes and student enrolments. There are restrictions on the change of existing fees as well if the fees have been assigned to students and have been invoiced. New fee line items with future dates can be added as needed
Adding extra fees at the course level
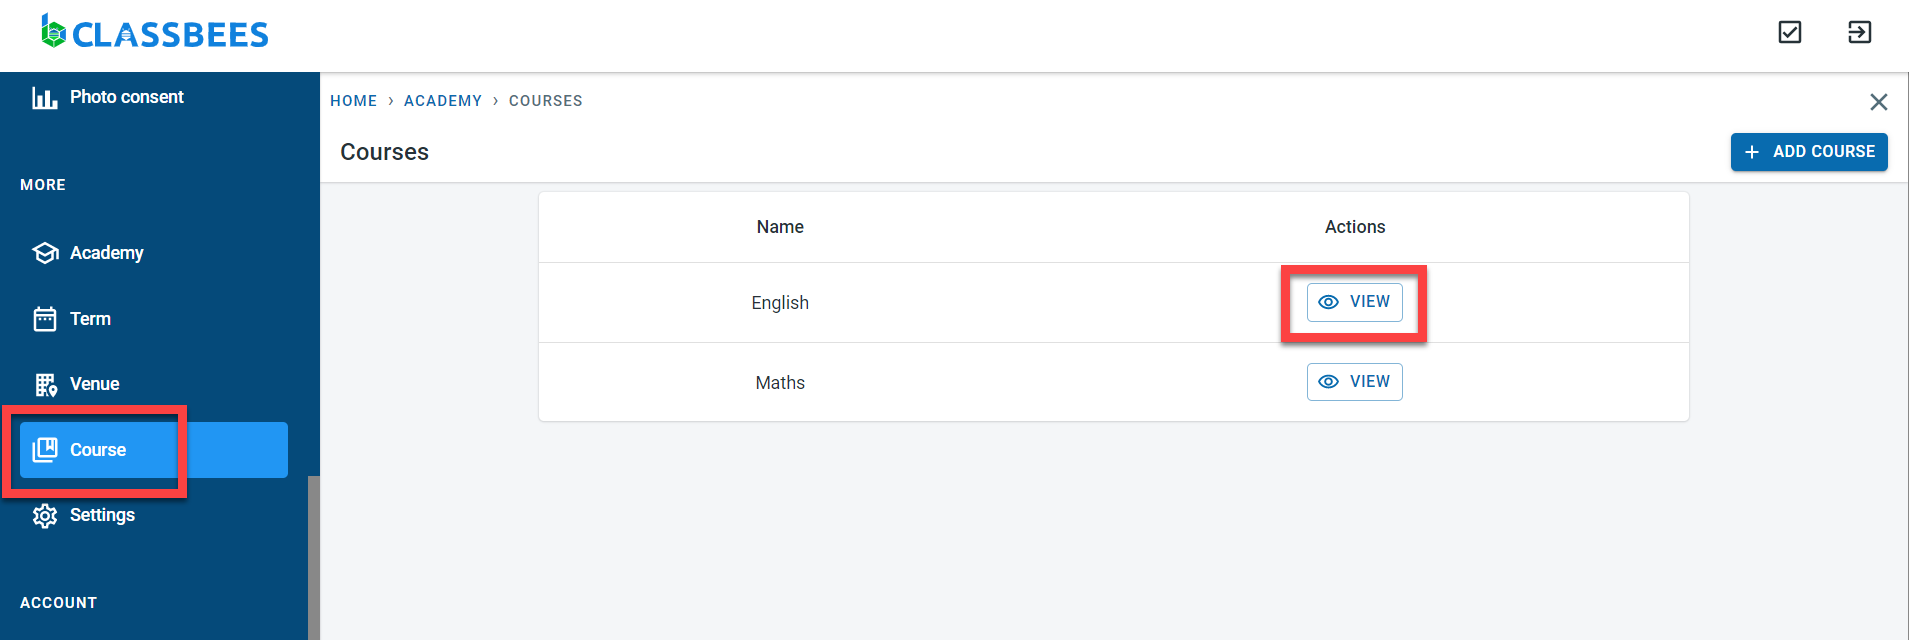
Extra fees added to the course level can be assigned only to classes created for the specific course. Navigate to the course from the main menu. Click on “View” next to the course
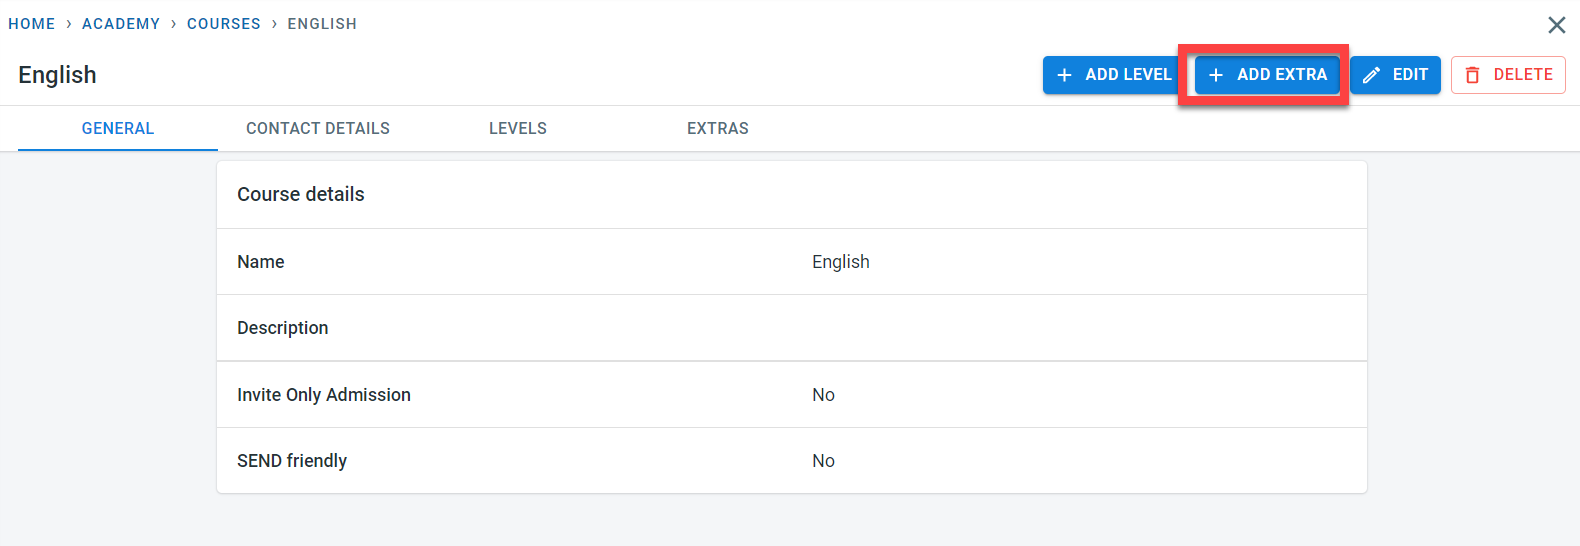
Click on “Add Extra” on the course
Steps to add, edit and delete extras at the course level are the same as those described for the academy.
Adding extras to class
Extras have to be added to classes which would then be applied to the students enrolling in the class. When adding extras to classes, it is possible to select when the extra fees have to be charged. It is also possible to apply discounts at the specific class level for the extra fees.
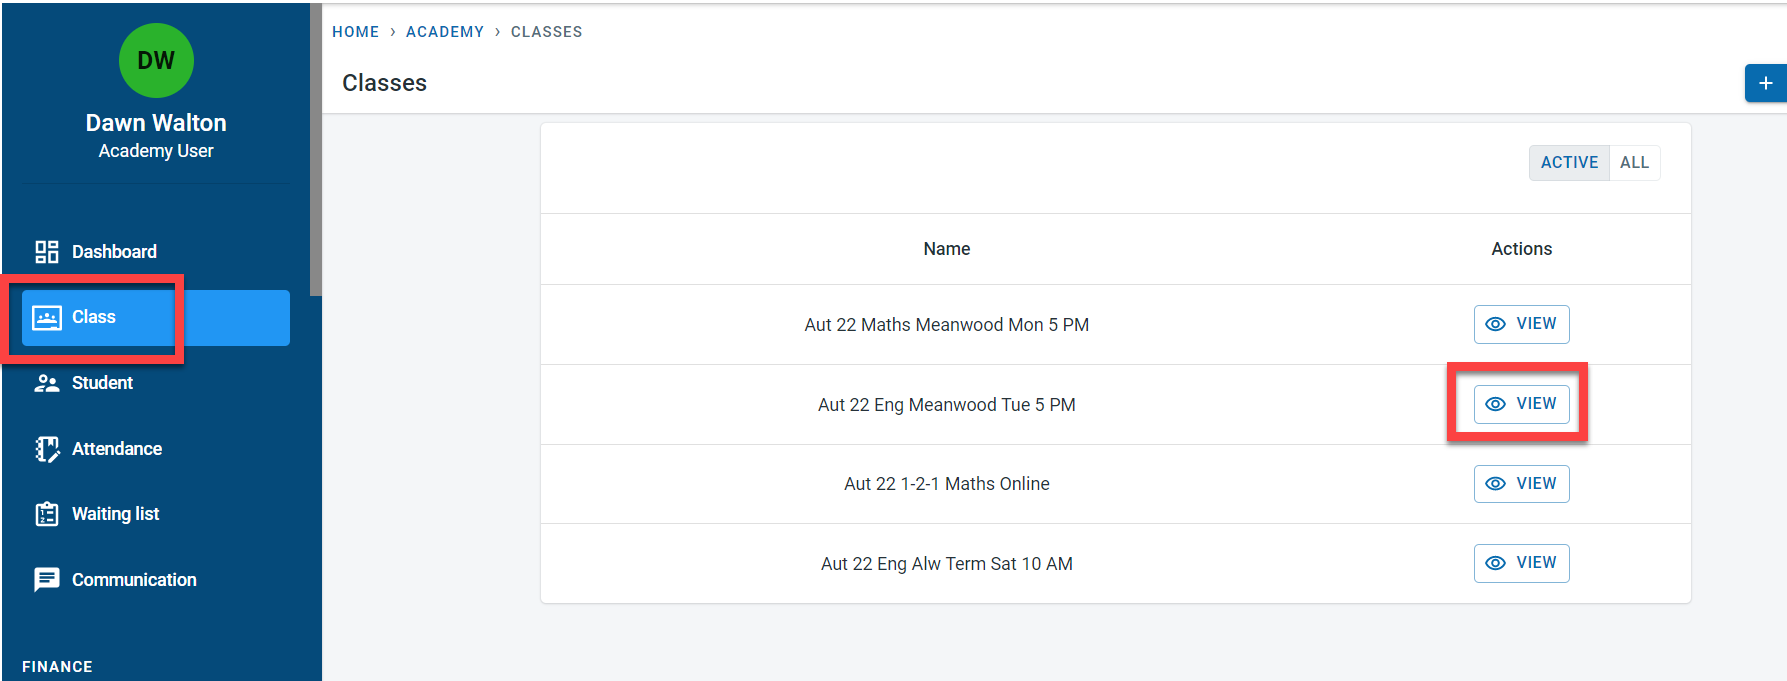
Navigate to the class from the main menu
Click on “Add Fees”
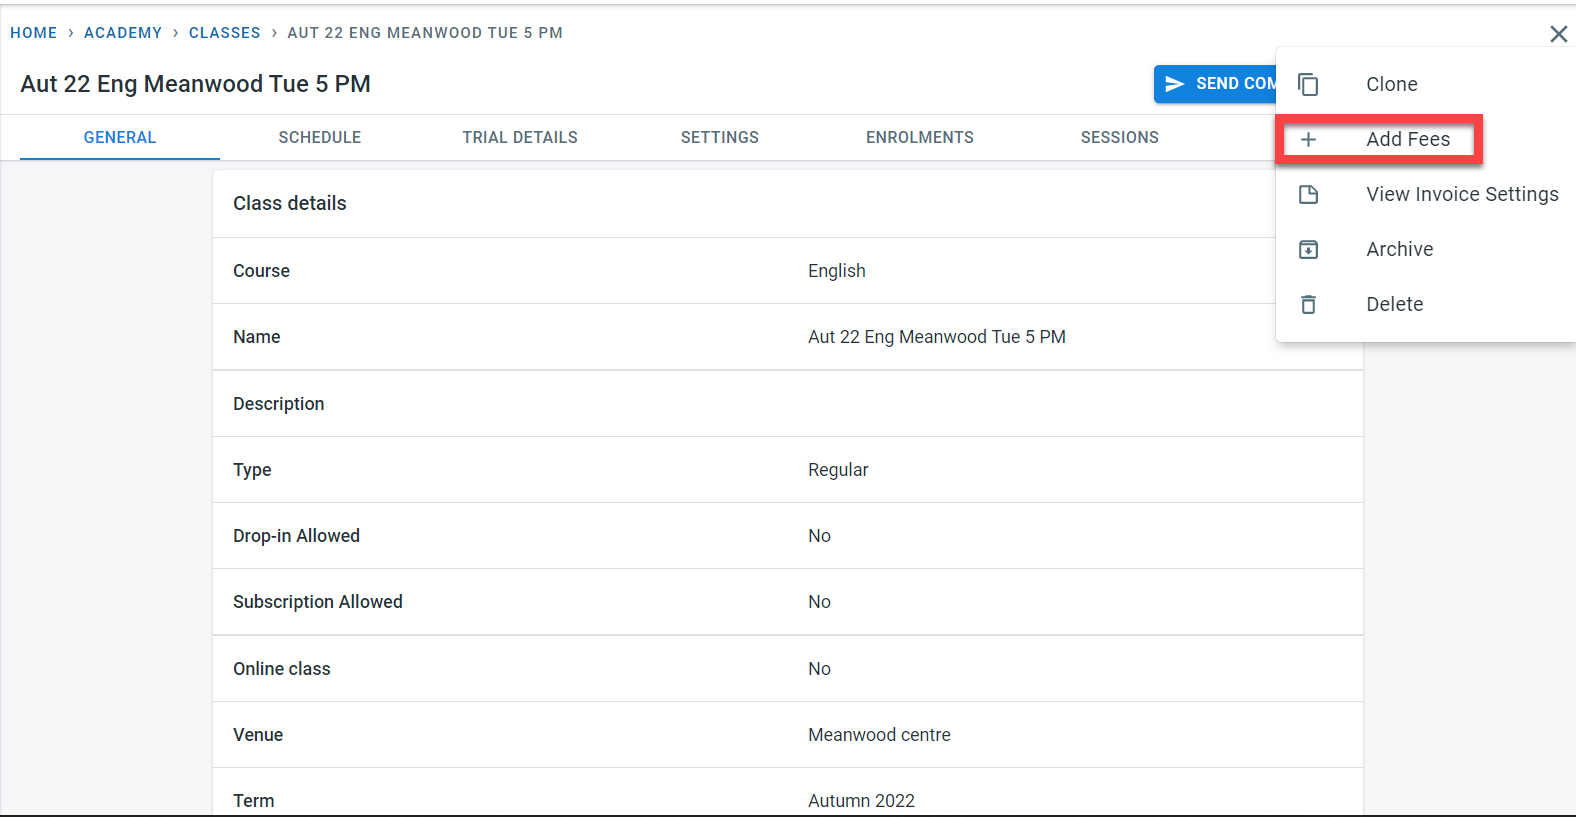
The “Add fees” button will be visible for free classes as well. it is possible to add extra fees to free classes as well
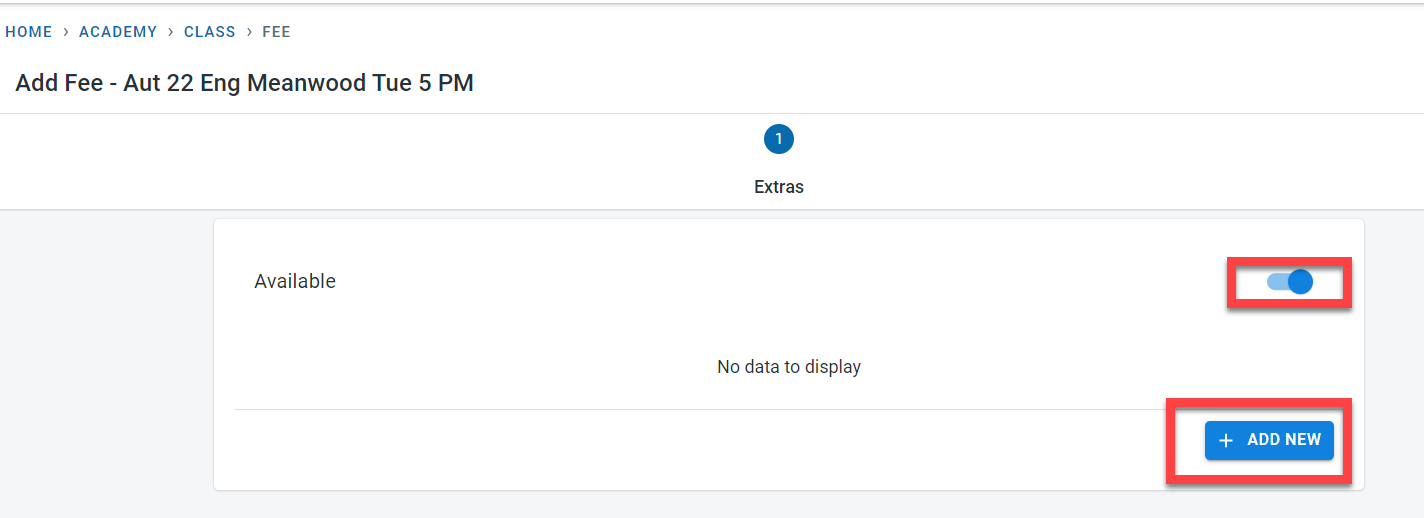
In order to add extras to the class, activate the “Available” flag. Click on “Add New”
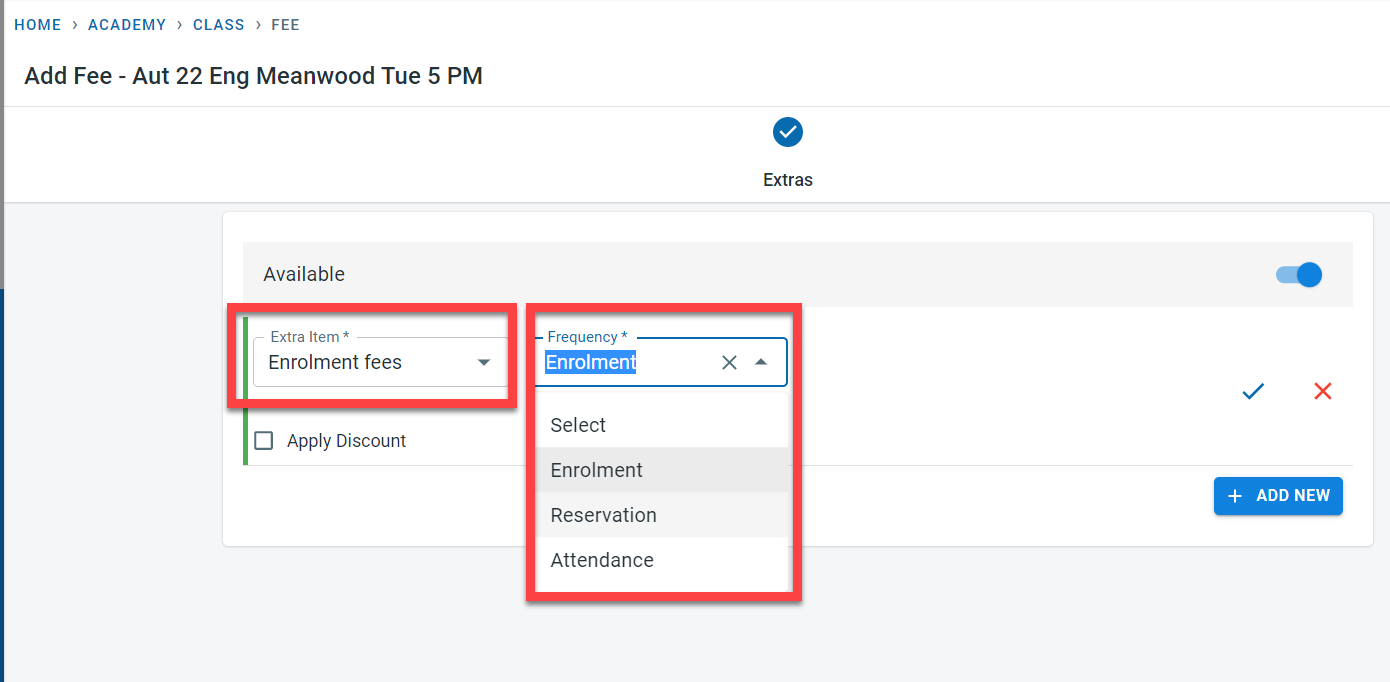
Select the “Extra item " (added at academy and course) and the frequency at which the extra fees have to be charged for the student. Options for frequency are
- Enrolment - the extra fee would be charged only once for the student enrolment to the class
- Reservation - here the extra fees would be charged for every session that the student has made a reservation for
- Attendance - extra fees in this case will be charged only when the student attends the session
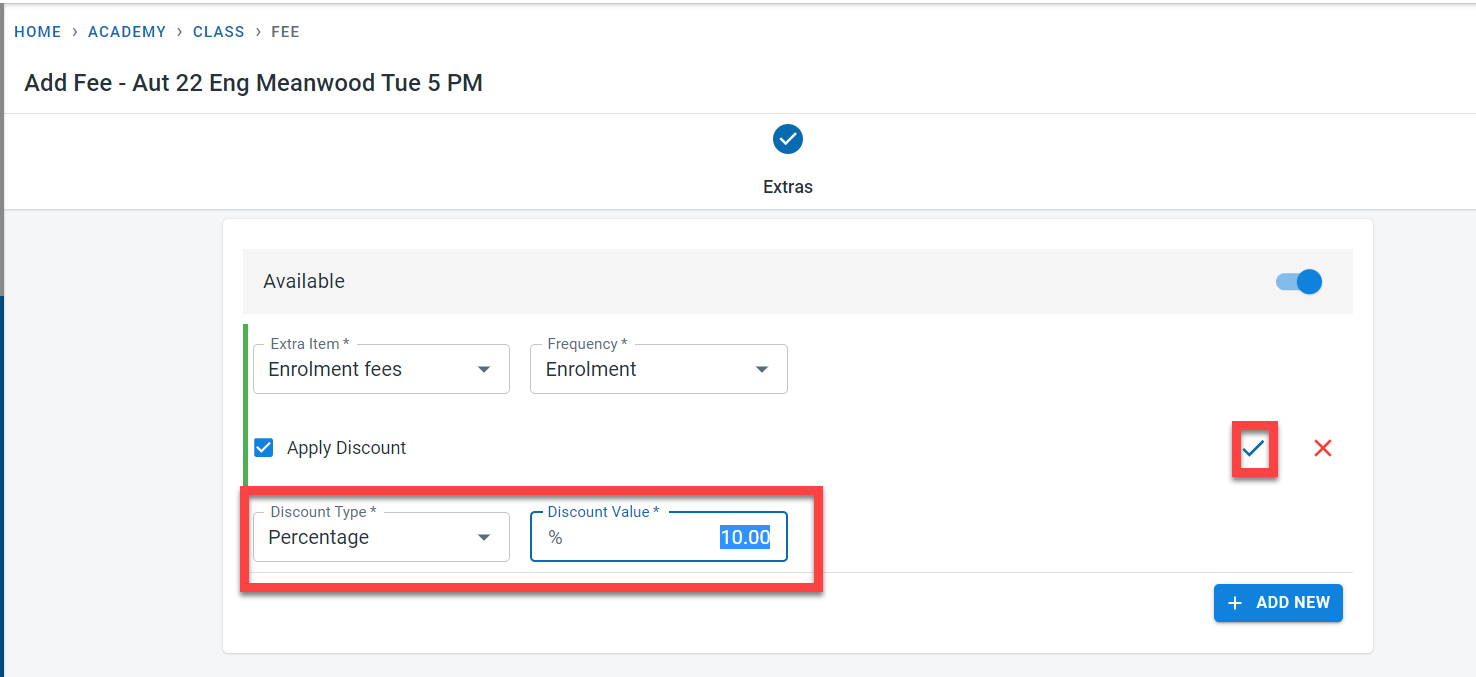
Discounts can be applied for extra fees at the class level. Click on “Apply Discount”. Discounts can be entered as a percentage or amount. Click on the green tick
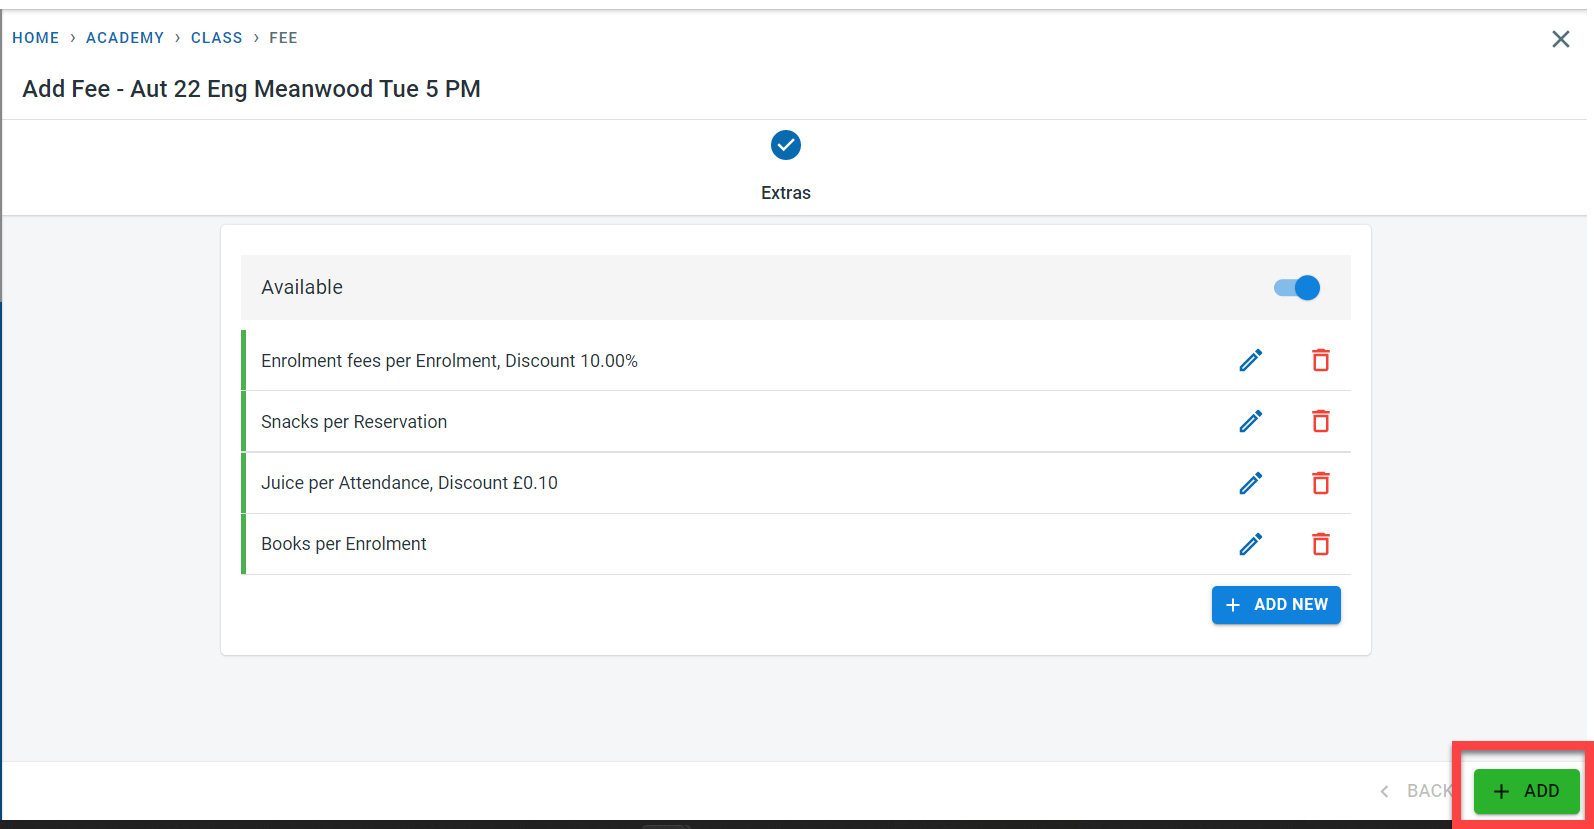
Once all the extras are added for the class, click on “Add” at the bottom of the screen to save the extra fees assignment for the class.
Extra fees for Students
When a student is enrolled in the class, the extra fees defined at the class are assigned to the student. Fees will be added to the student based on the frequency defined in the class.
The discounts applied to the extras at the class level are applicable to the student’s extra fees. Discounts can also be applied to the extras at the individual student level.
Navigate to the student. Click on “Enrol” in the “Enrolment” tab
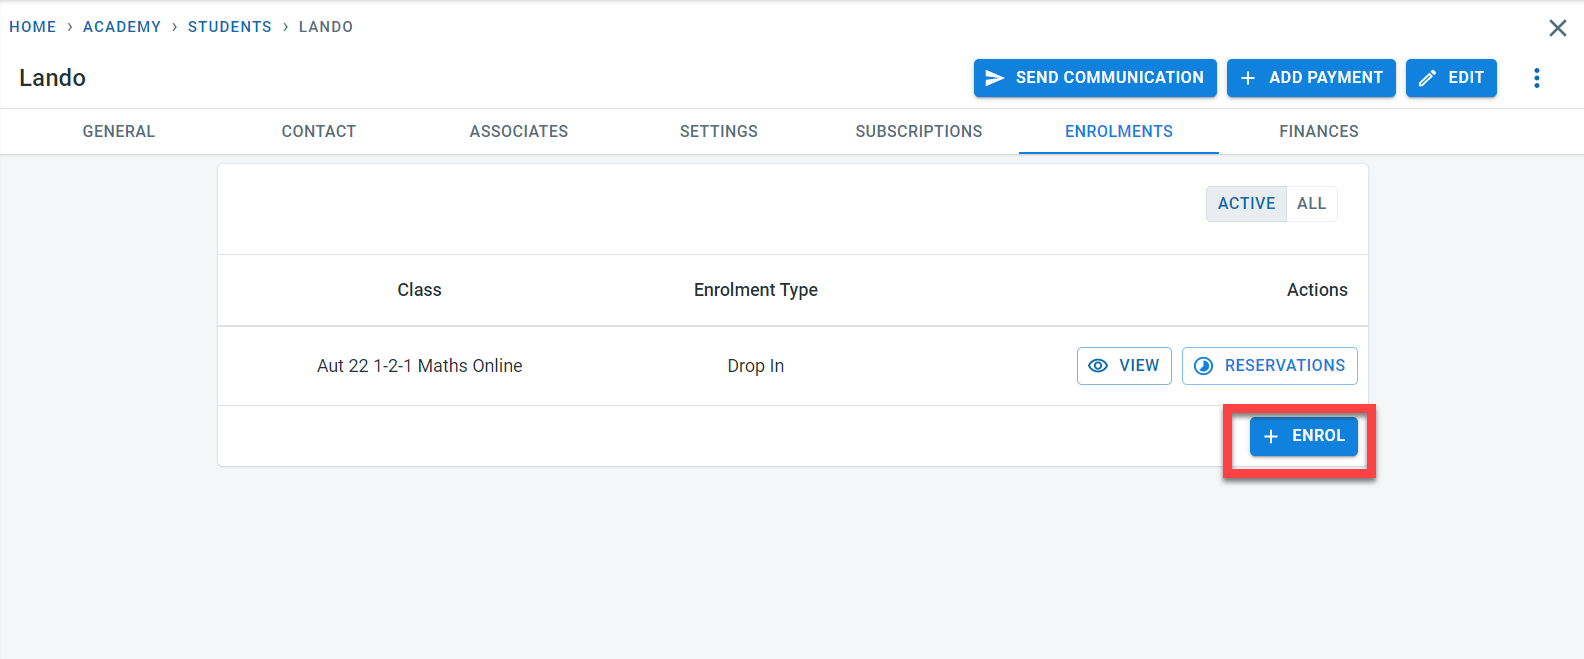
In the enrolment screen, the extra fees for the student for the class (set at class level) will be displayed.
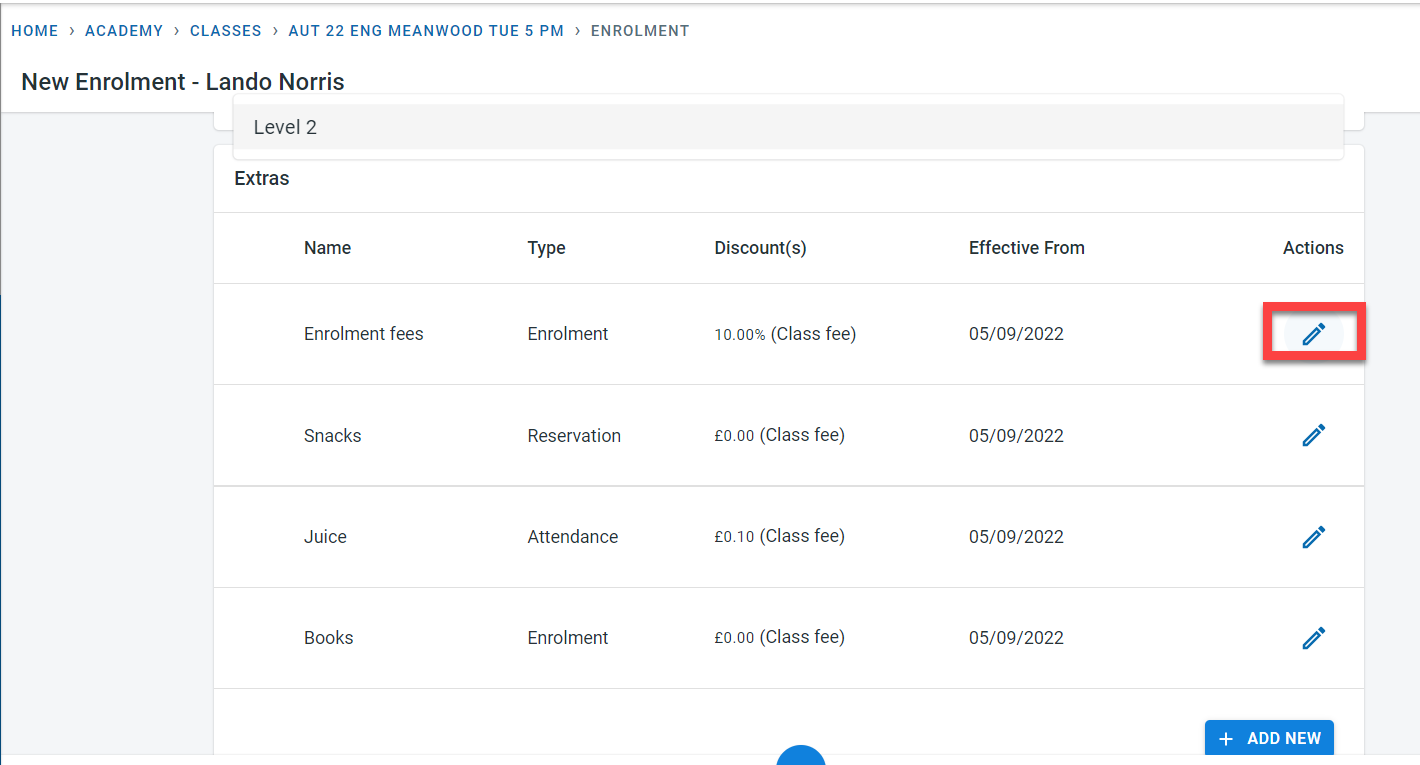
Click on the “Action” button next to the extra fees to add a discount at the student level
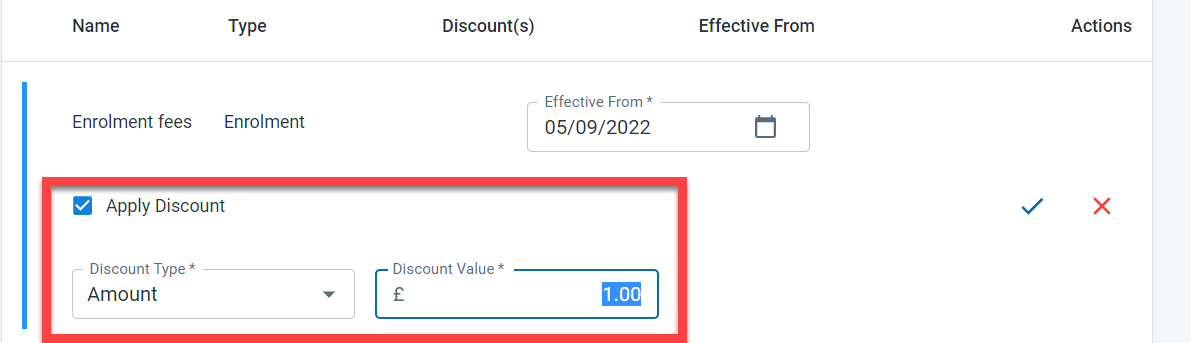
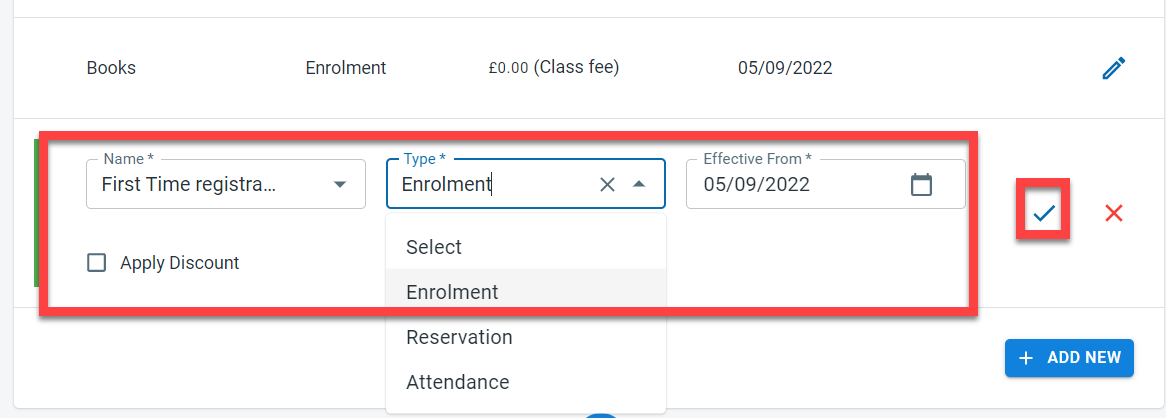
It is possible to add extra fees directly to the student as well. Click on “Add new” in the extra fees section under the student enrolment
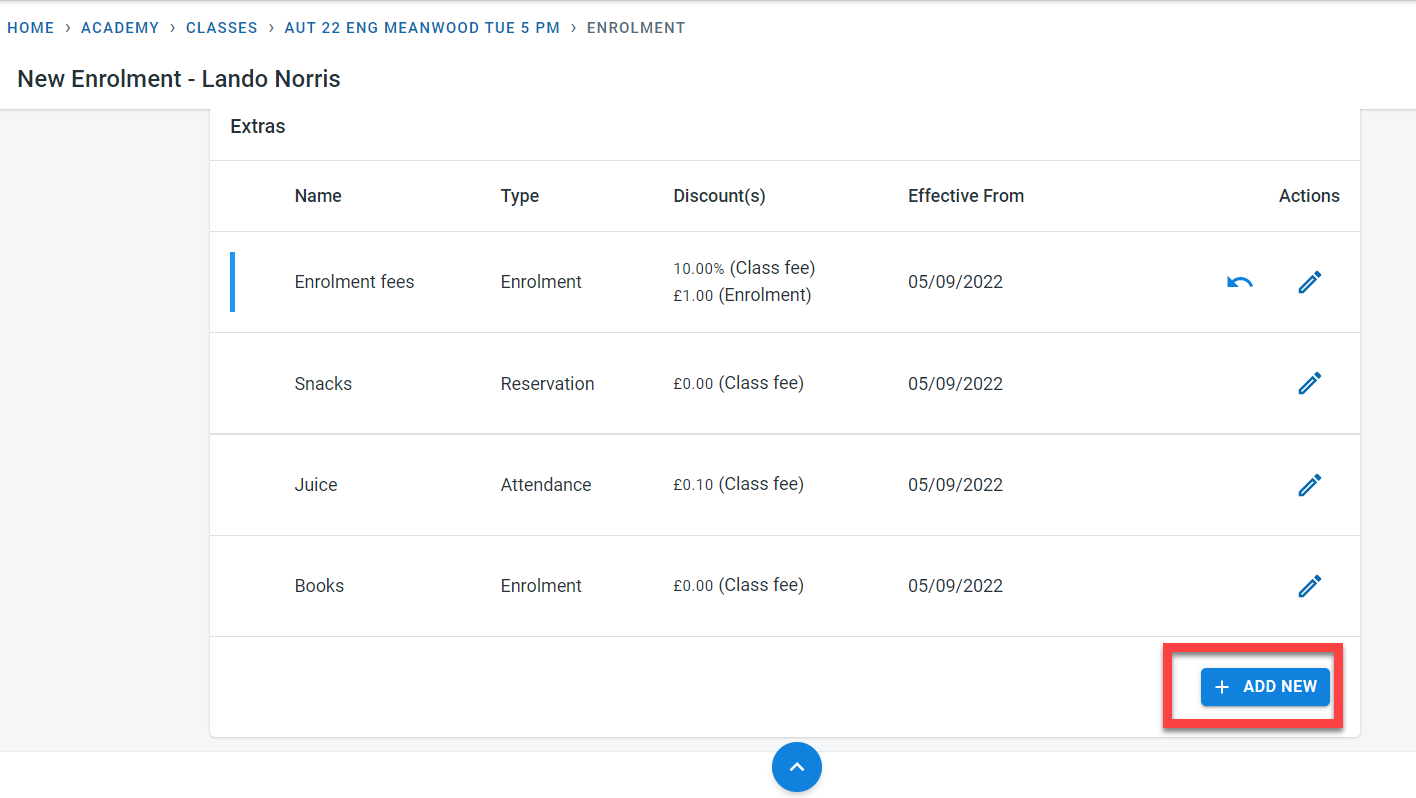
From the drop-down, select the extra fee (defined at the academy or course level), the collection frequency, and the effective date. A discount can be added to the extra fee if needed. Click on the green tick to save these details
Click on “enrol” to complete the enrolment of the student to the class.
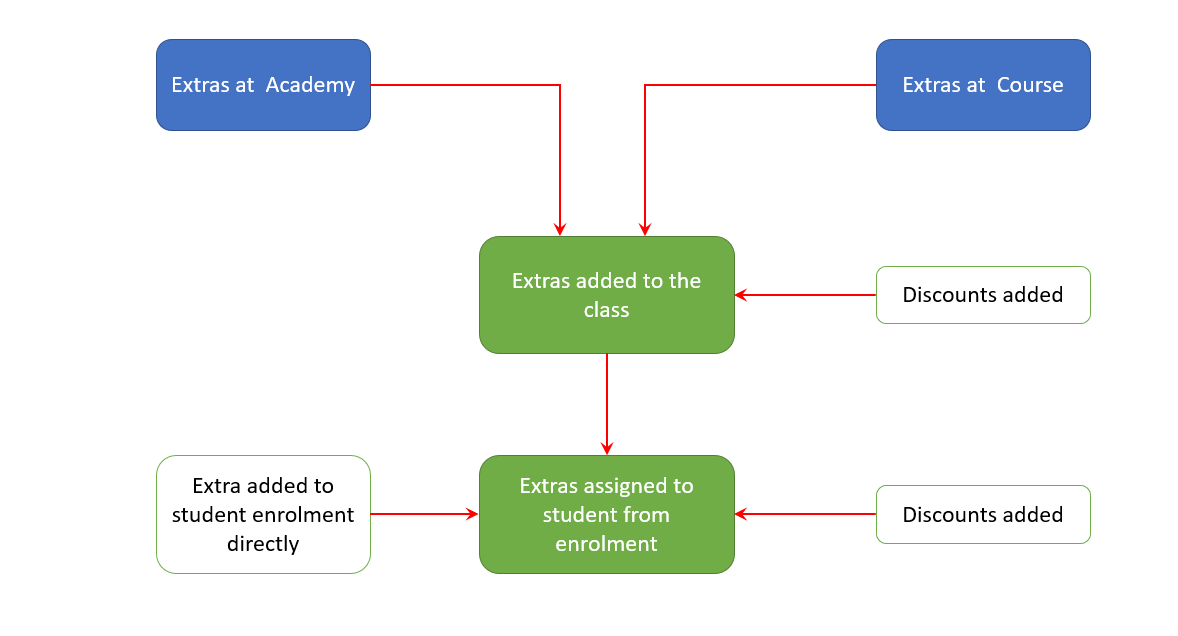
To summarise, the extras are added to the academy and course. When a class is defined, the extra fees from the academy and the club are added to the class along with the frequency and discount.
When a student is enrolled in the class, the extras defined in the class are copied to the student. Further discounts can be applied to the extra fees for the student. One-off extra fees can be directly applied to the student as well.
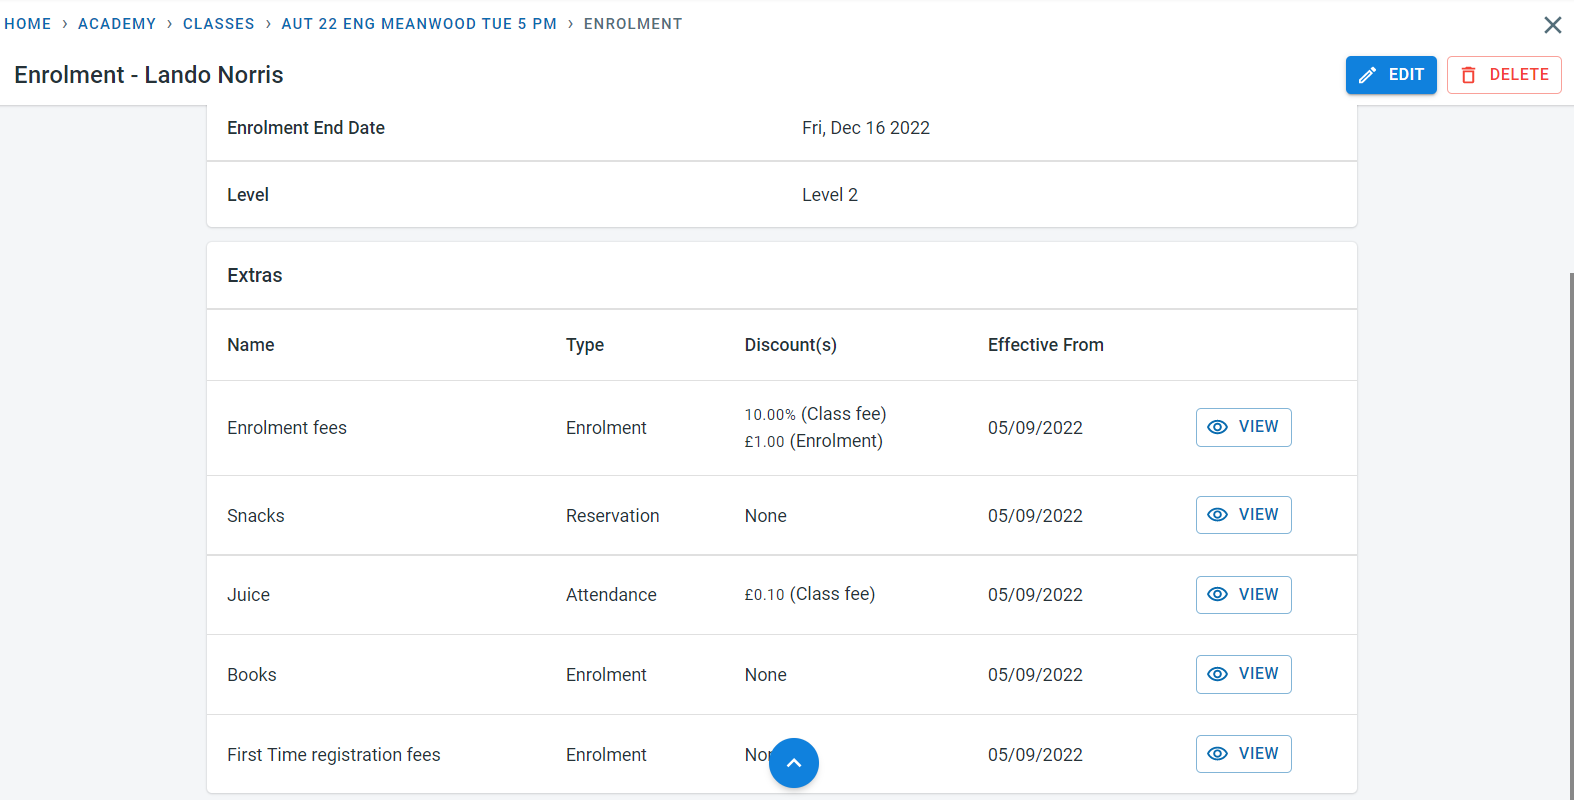
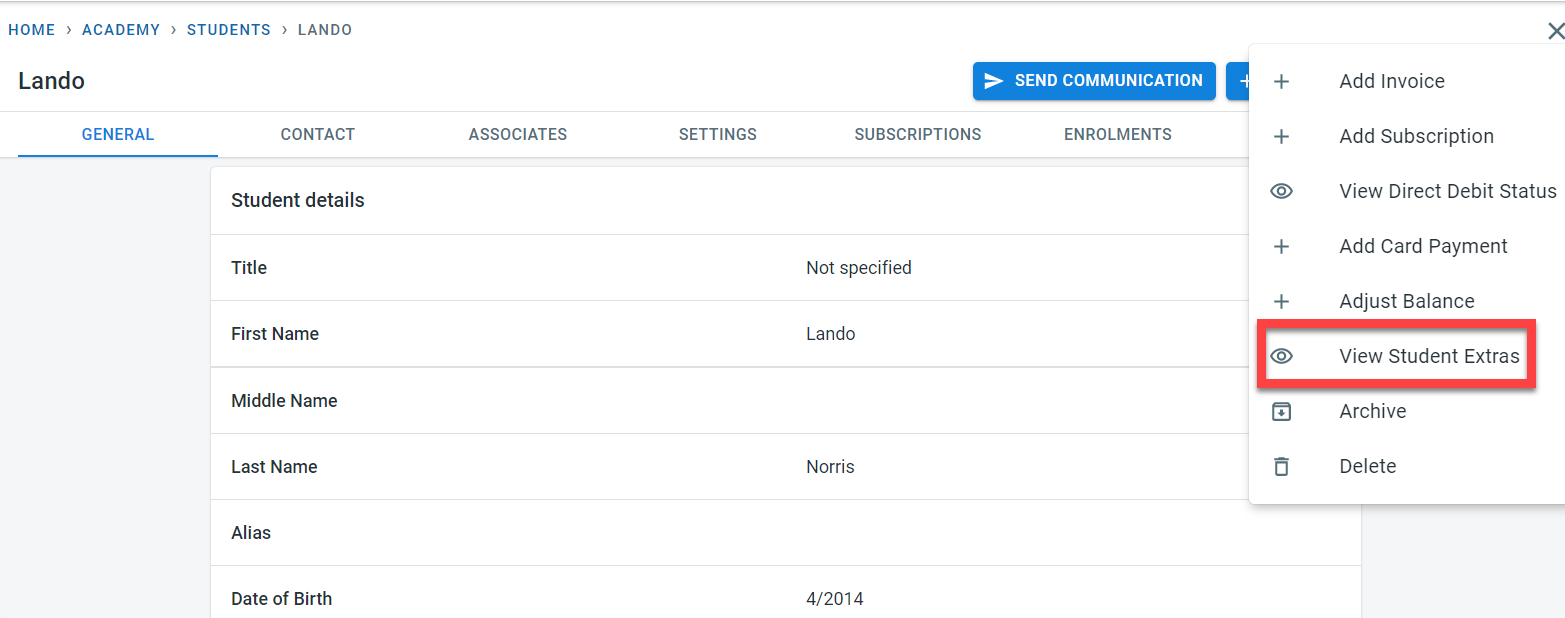
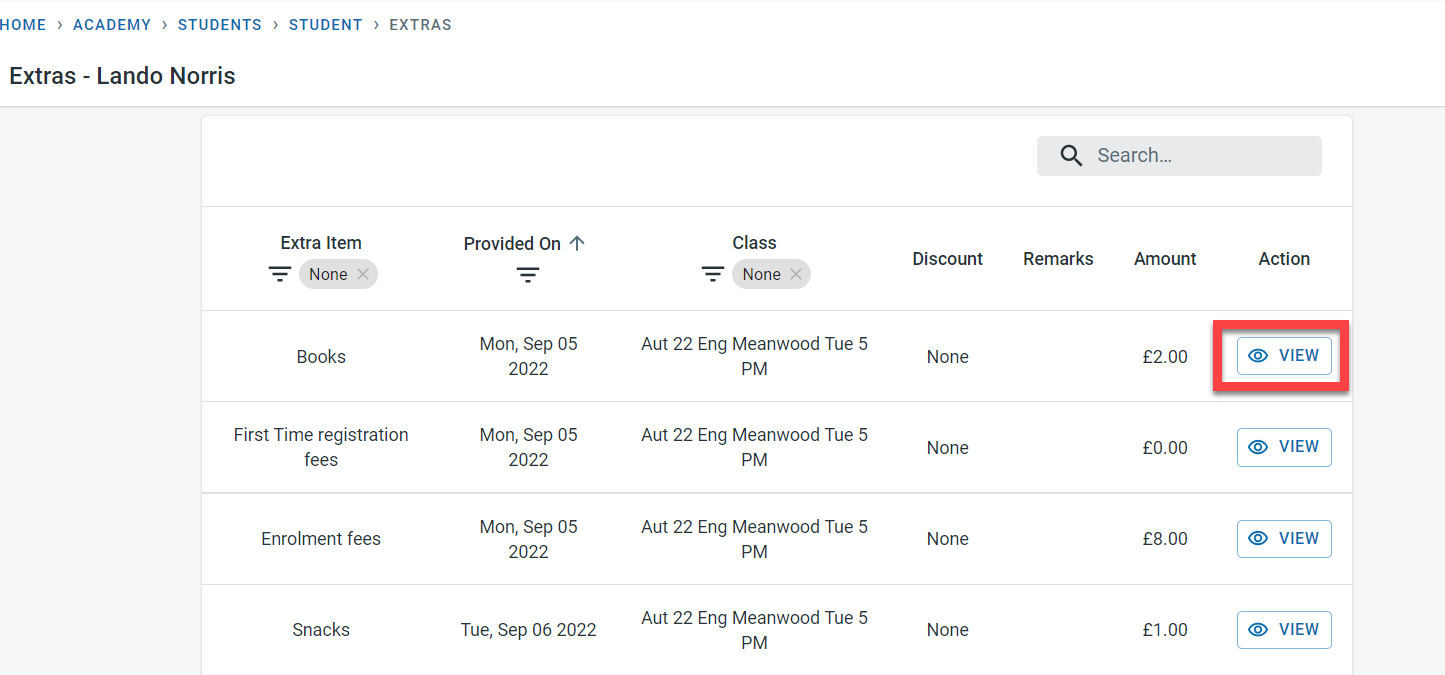
Extra fees are generated for the students based on the frequency. Details of the extra fees that are applicable to the student can be seen within the student detail. Select “View Student Extras” from the menu.
All the extras generated for the student will be displayed here. It is possible to add discounts to individual extra fees over here. In order to do that, click on “View” next to the instance of the extra fees.
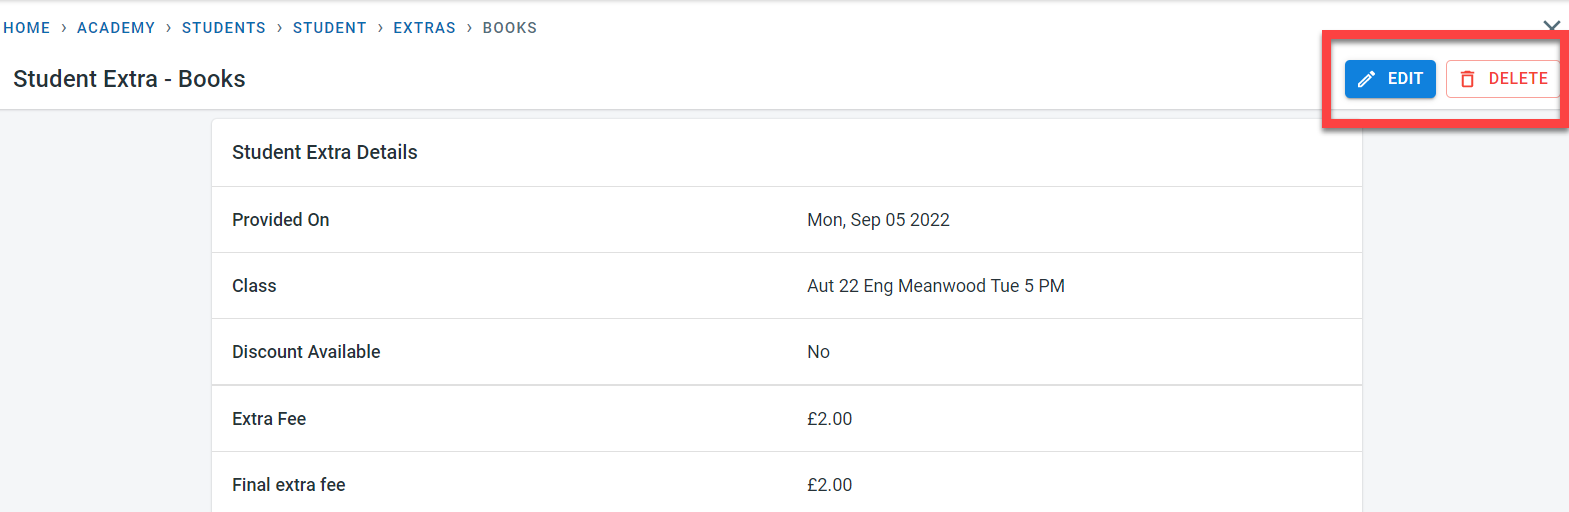
Click on Edit to make changes to the extra fees or delete to remove it
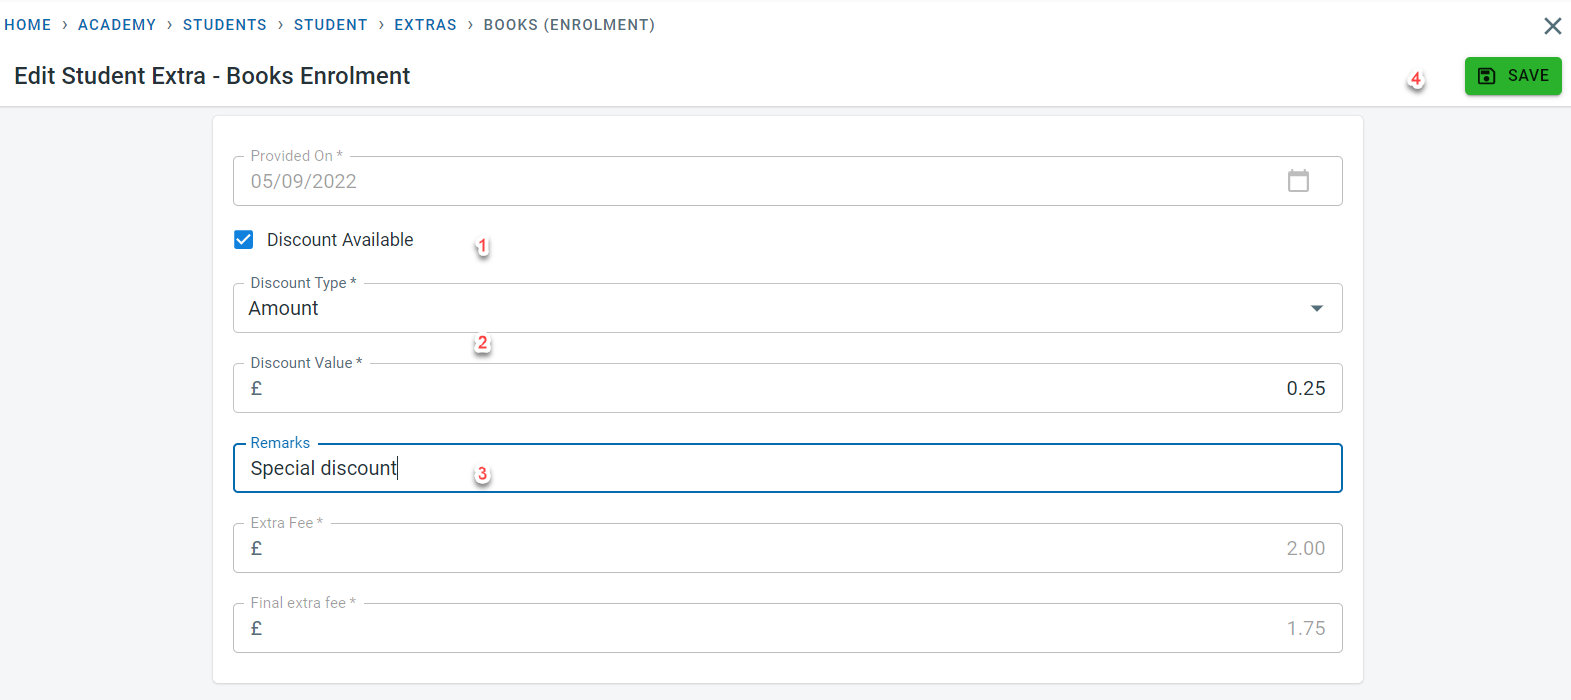
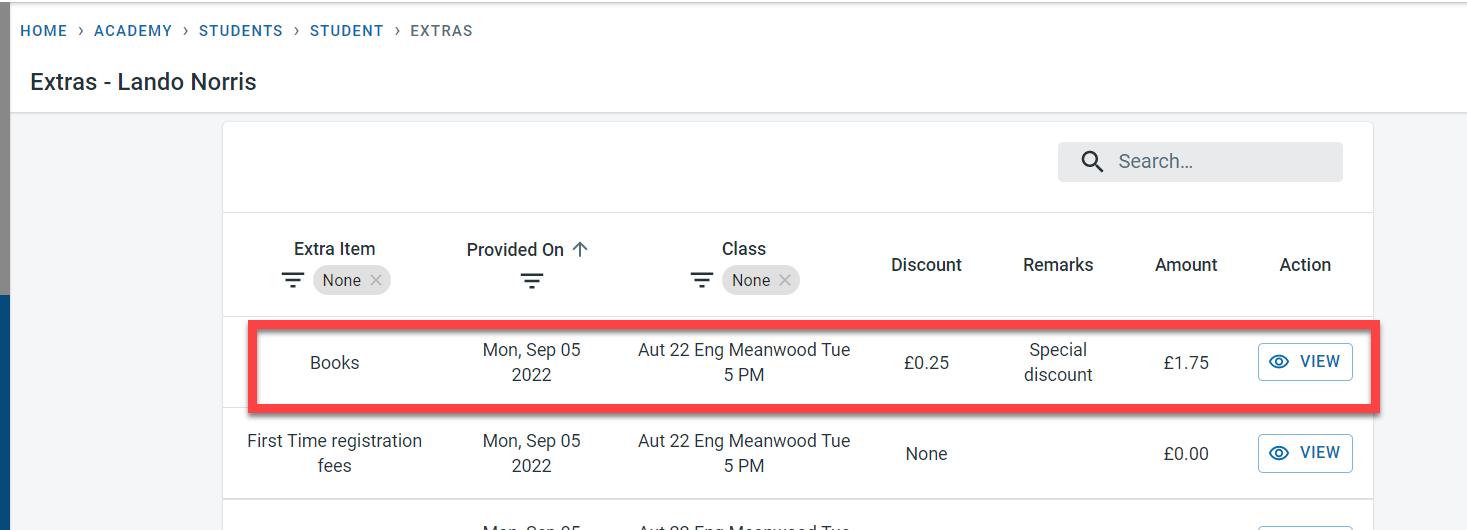
To add a discount, click on “Discount Available”. Select the discount type and enter the value. Click on Save.
Extras in invoices
Based on the frequency set for the extra in the class/ student, the extra fees would be added to the student.
Options for frequency are
- Enrolment - the extra fee would be charged only once for the student enrolment to the class and this would be the enrolment start date (unless amended manually)
- Reservation - here the extra fees would be charged for every session that the student has made a reservation for. The date for this extra fee would be the session date and would be set when a reservation is made for the class
- Attendance - extra fees in this case will be charged only when the student attends the session. the date for this again would be the session date and would be created when the attendance is marked for the student.
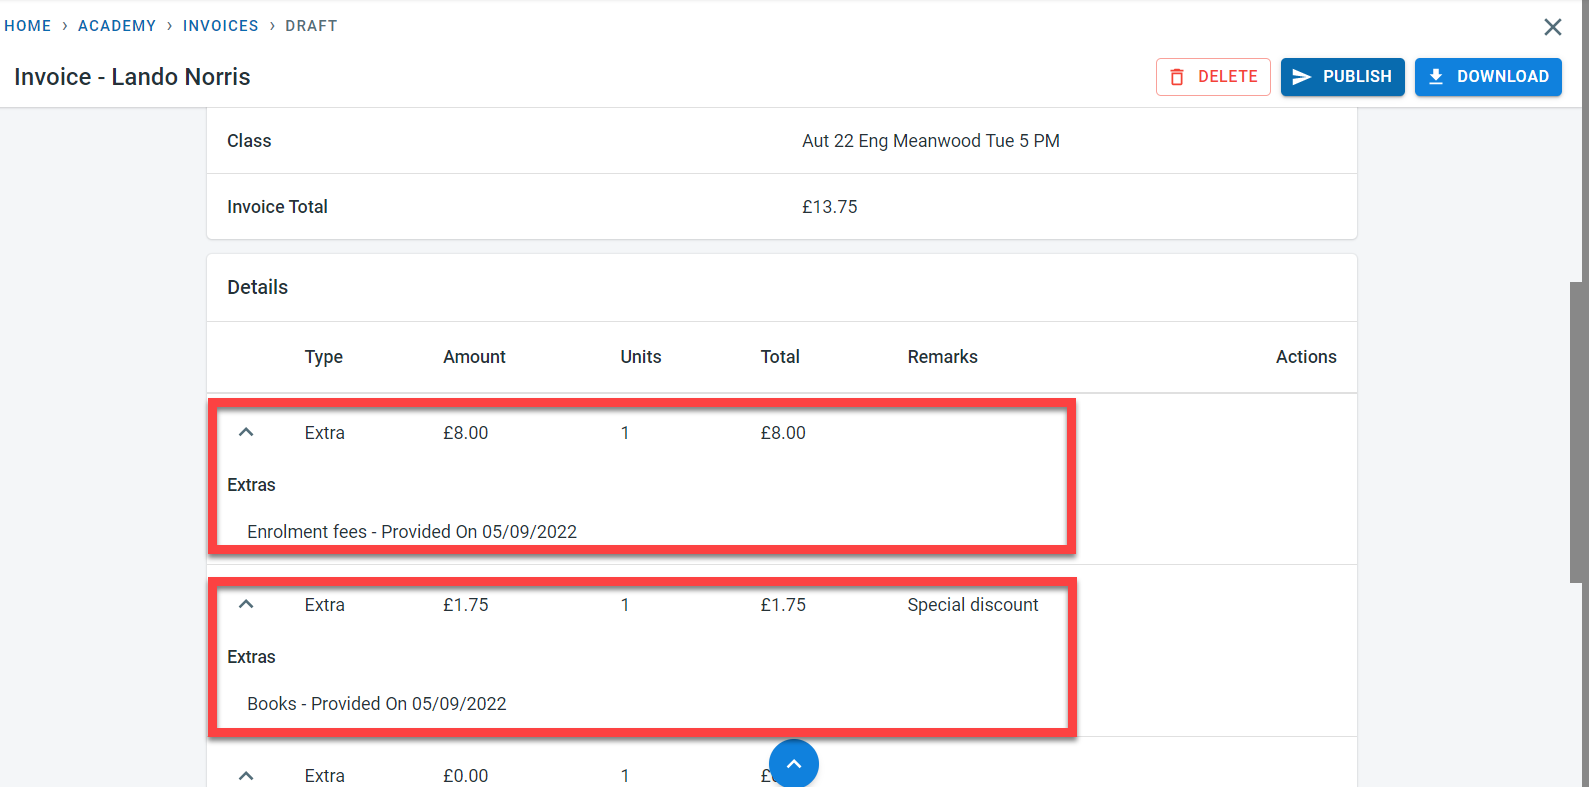
Extra fees details will be displayed in the invoice generated
Substitutes and One-offs
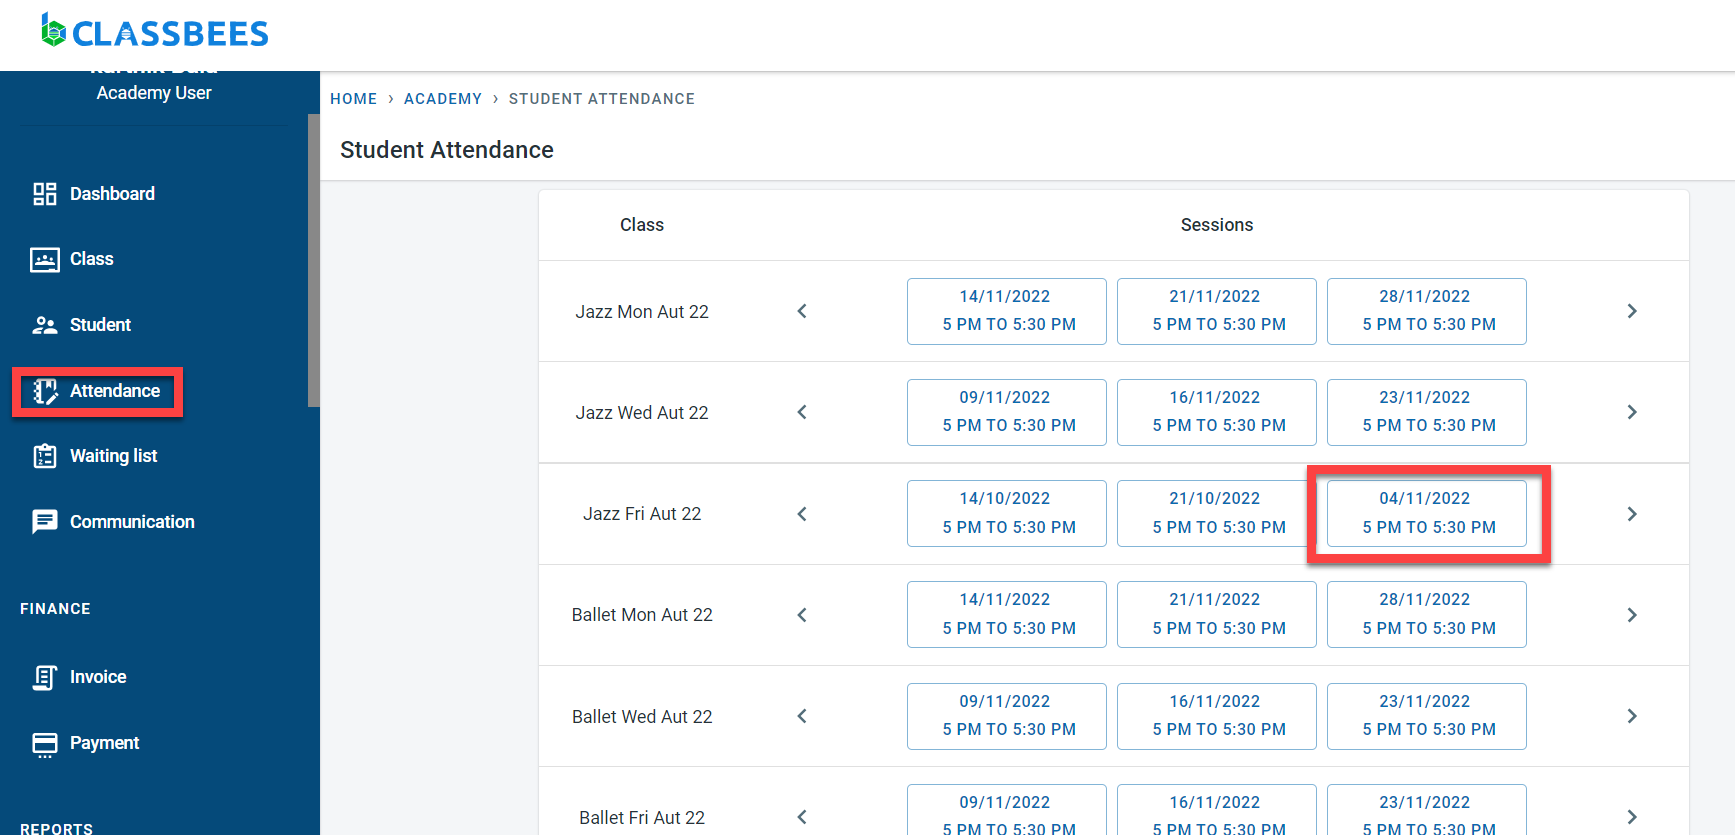
New functionality has been added to the attendance module to substitute a class for a student or to record a one-off class for the student.
To add substitutes or one-off, navigate to the class where the student attends the class (not the original class that the student attends in the case of substitute)
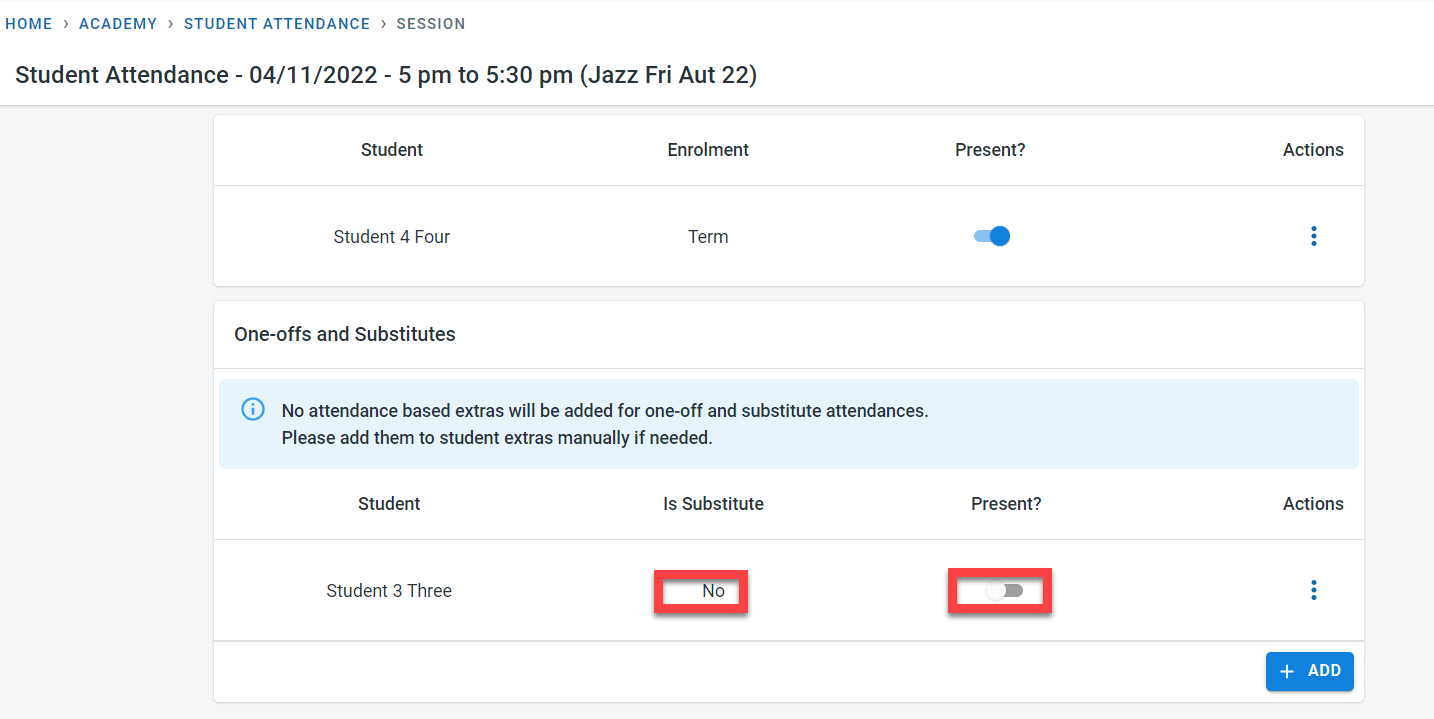
Click on “Add” in the One-offs and Substitute section
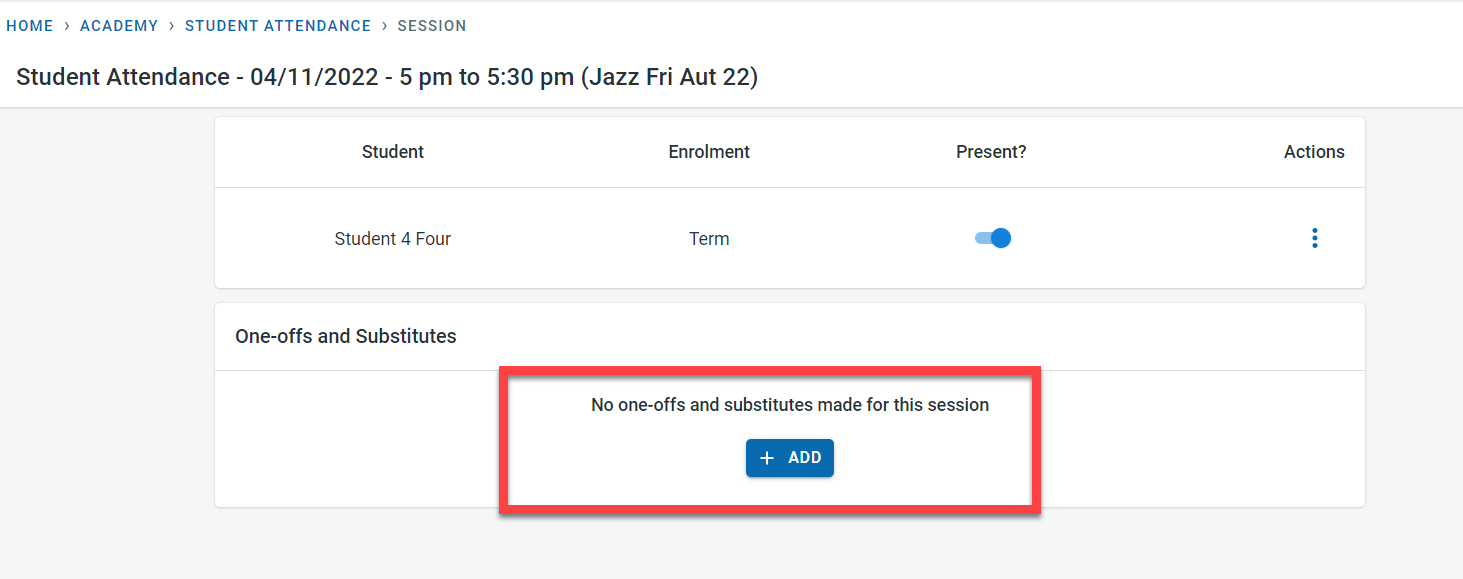
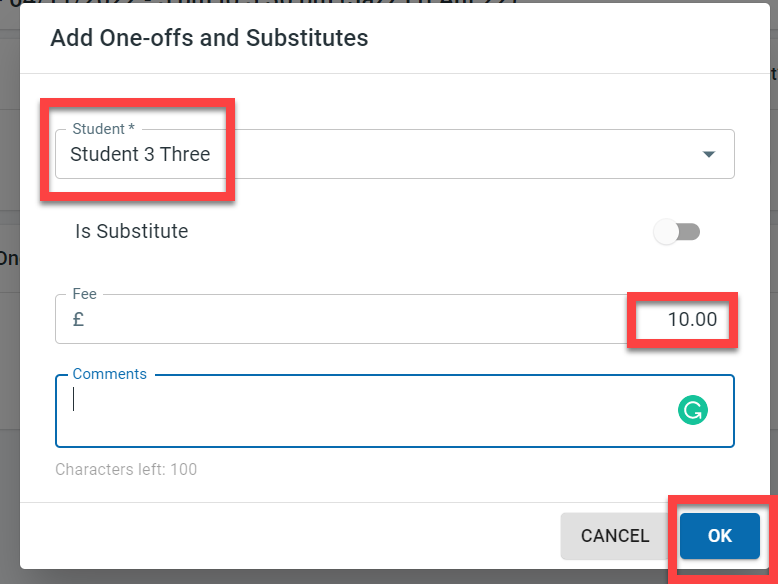
If the student is attending the session as a one-off, select the student and add the fees for the one-off session. Click on OK
A one-off record would be added for the student. Attendance would have to be marked for the student after adding the session
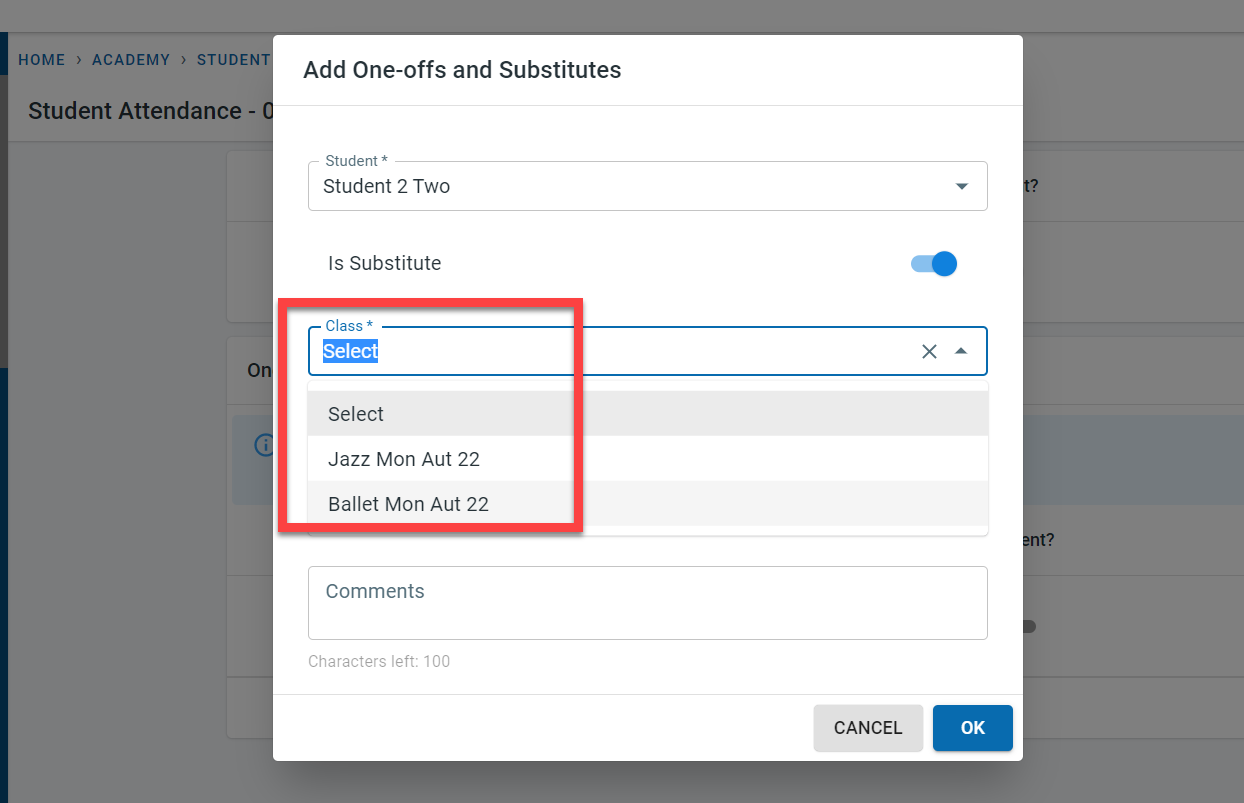
In the case of Substitute, when a student is added, enable the “Is Substitute” flag. The system would then propose the classes that the student originally attends from which one class can be selected
After selecting the class, choose the enrolment type for the class. Select the session which has to be substituted ( System will display only the sessions from the selected class enrolments that the student has not attended yet )
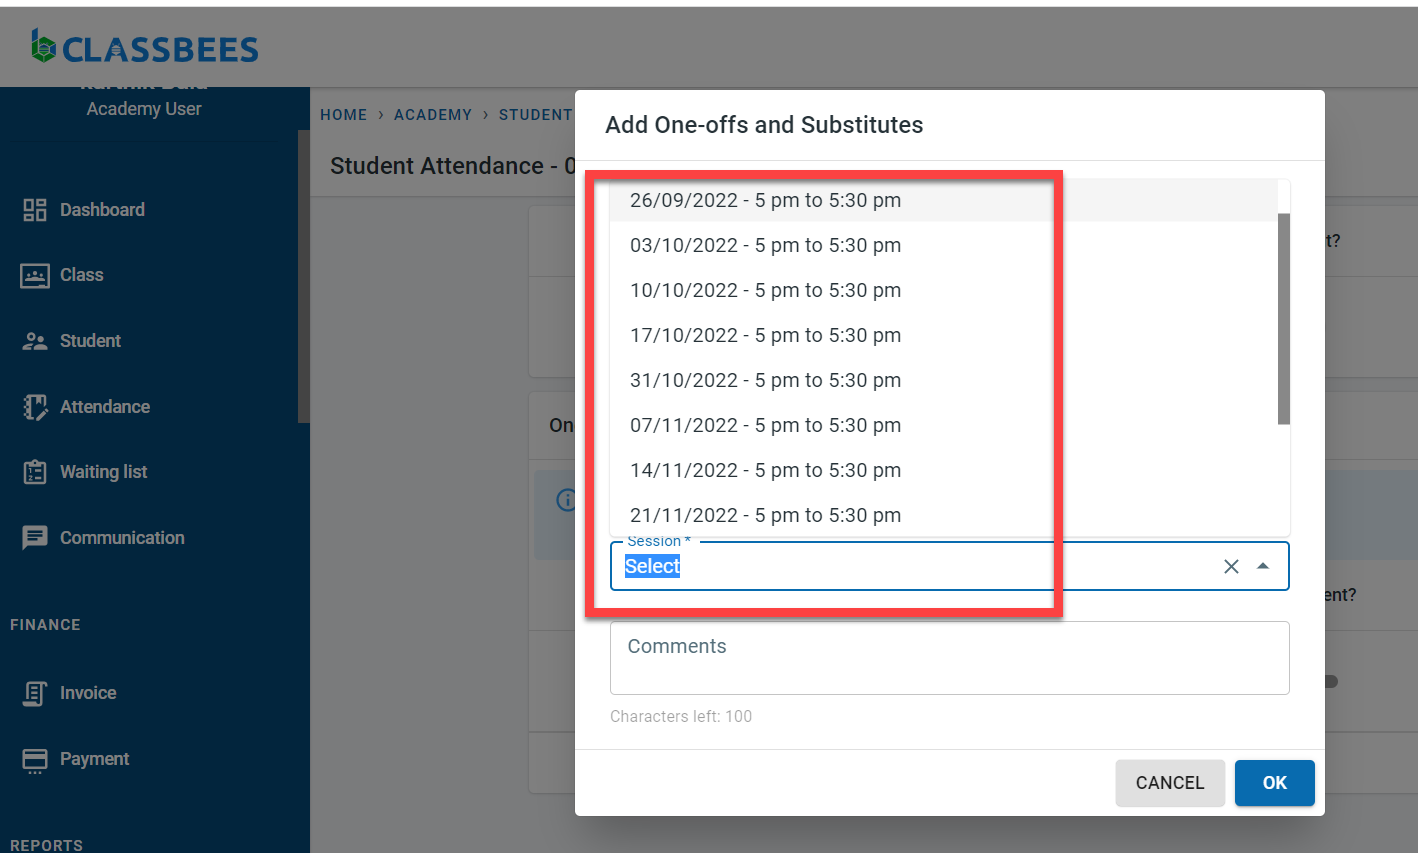
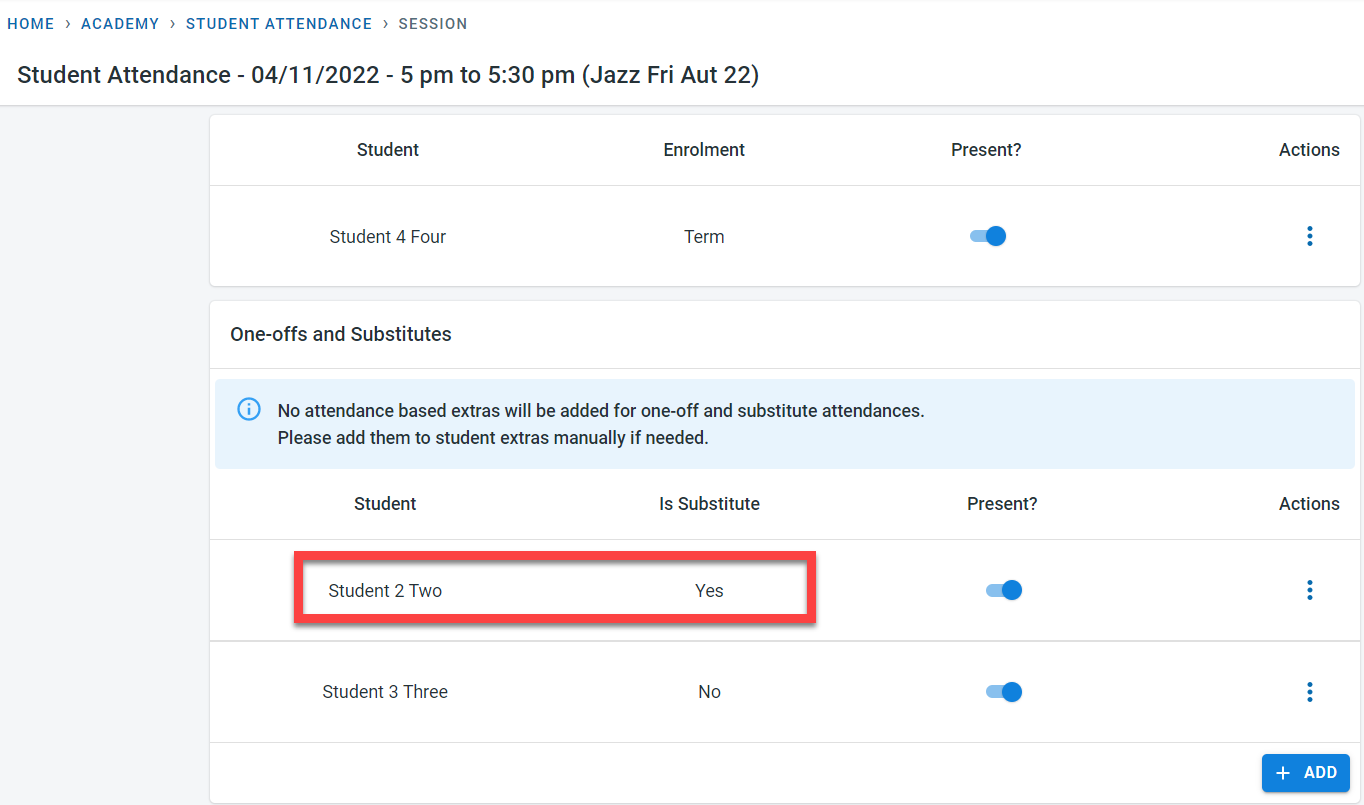
Click “OK” to add the substitute to the session
Invoices for substitute and One-Off: If a session is substituted and if the original session is a drop-off, then in the invoice the substituted session will be displayed instead of the original session.
If the session is a one-off, then the system would include the one-off session in draft invoices, if any else the system would generate a new invoice for the one-off session. Please note that one-off invoices are only generated by the system and it is not possible to generate them manually.
September 22 Updates
Sep 15, 2022
This version contains three major updates - communication by text messages, multi-user login, and the ability to accept card payments directly and also some minor enhancements and bug fixes
The changes in this version are
Setting up Stripe Connect Account for academy/club
With the new release, payments can be taken directly in the manage system.
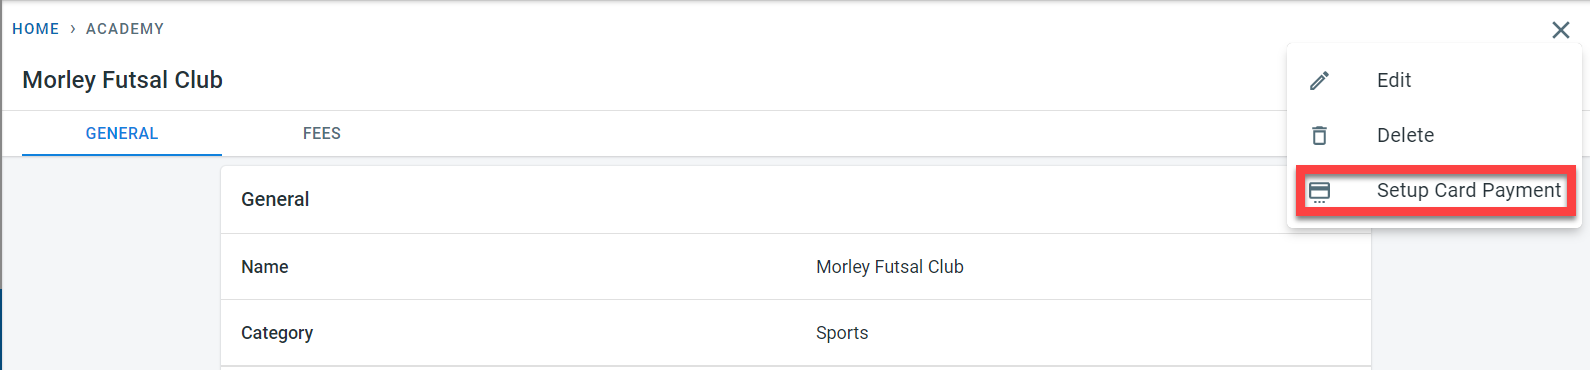
In order to activate the card payment, an account needs to be set up with Stripe . In the academy, click on the three dots and select “Setup Card Payment”
Click on “Setup Stripe Account”
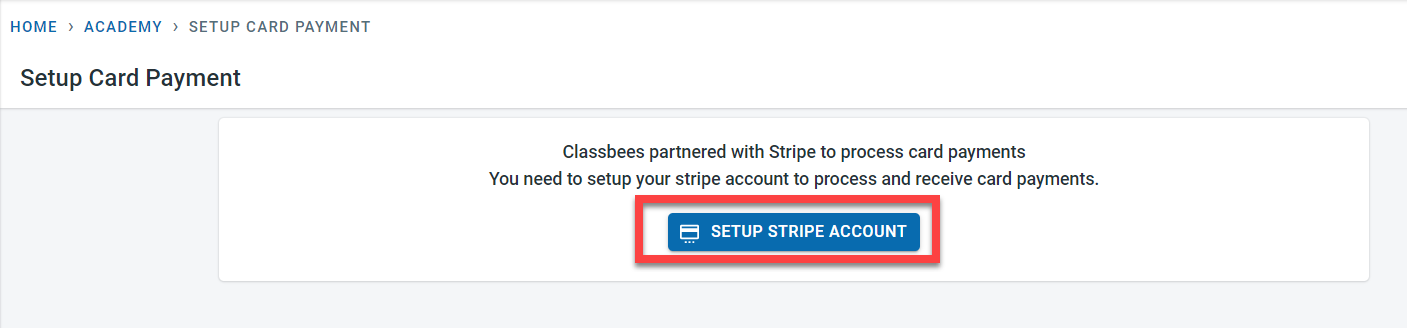
Follow the steps from Stripe to set up your account. To link an existing stripe account to the system, log in to the Stripe account and follow the steps. In order to comply with the legal KYC regulations, Stripe collects a number of information about the business and individuals.
After all the required information has been successfully collected by Stripe, the following message would be displayed.
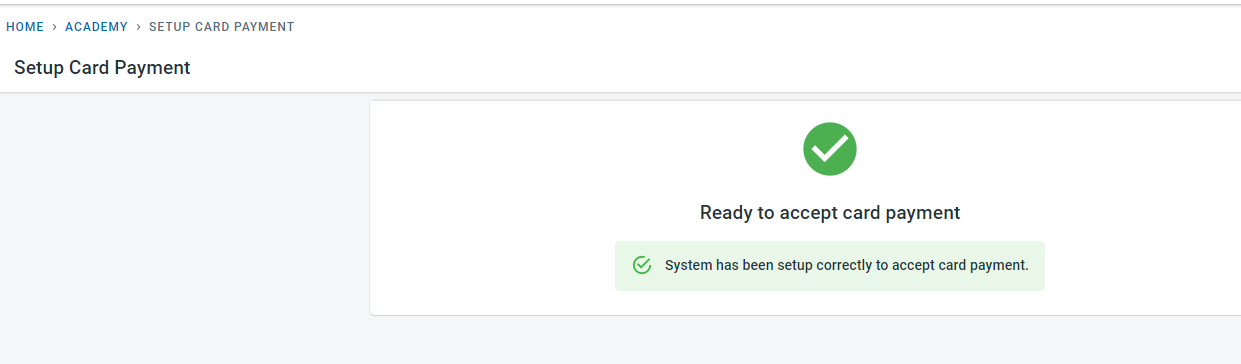
Card payments can now be taken in the Manage system for the academy/club.
The Stripe account is set up through Classbees but that is an independent account set up for you which could be accessed directly through the Stripe Connect Dashboard
Stripe Support has a lot of information about Stripe in general and also about payments and refunds.
Collecting card payments through the system
With the new release, payments can be taken directly in the system.
Payment can be recorded from the student

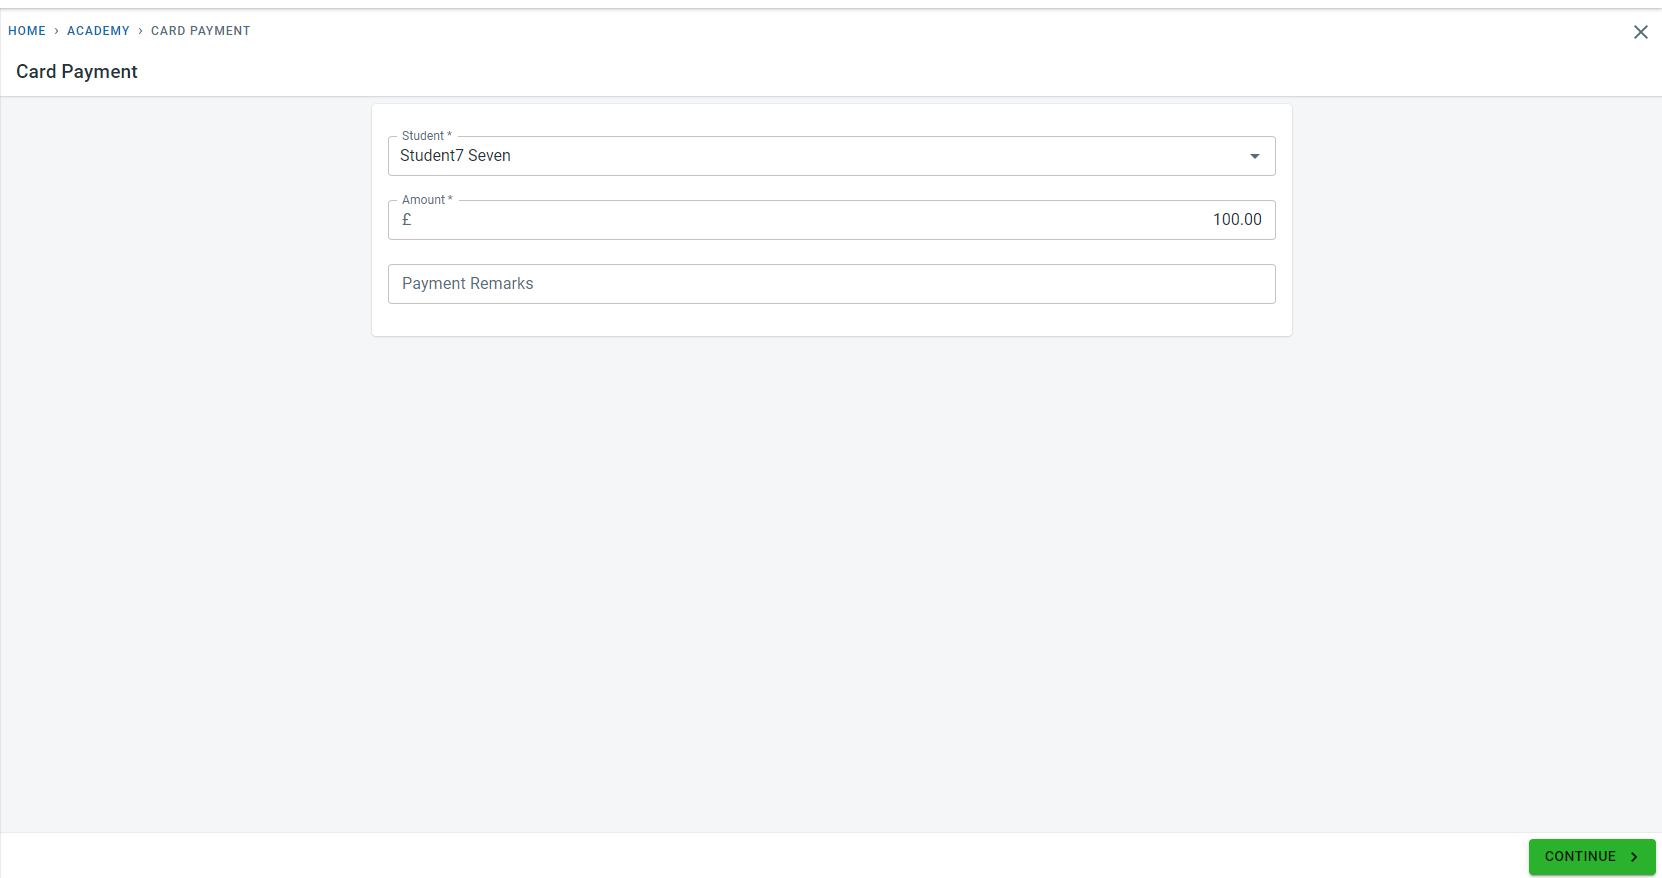
or from the payment page
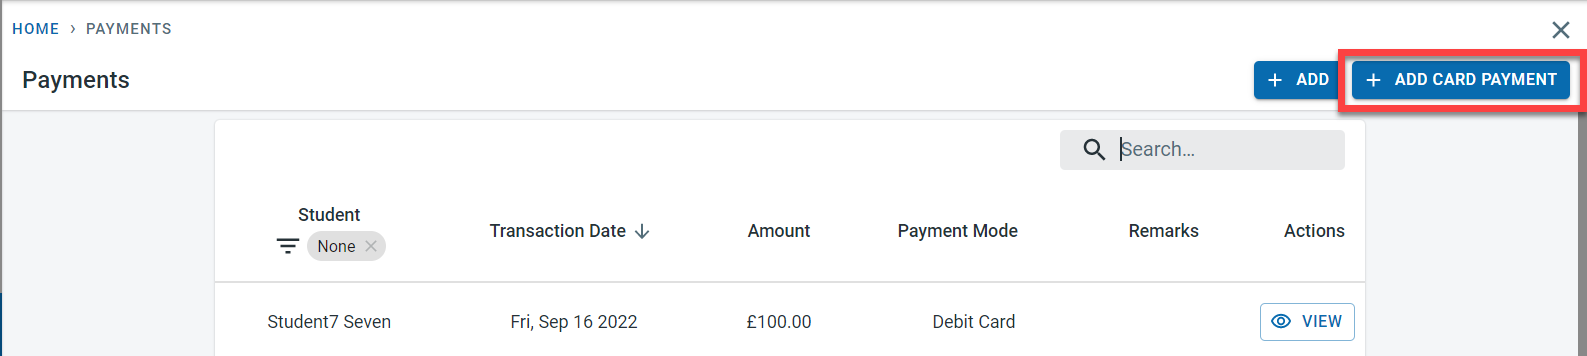
Enter the payment amount and click on “Continue”
Enter the card details and Click on “Continue Securely”

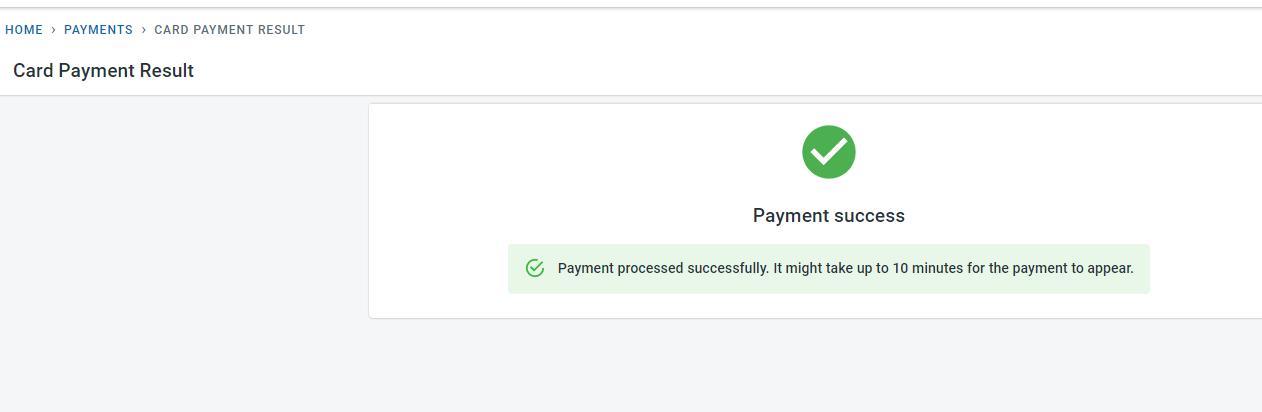
If the payment is successful, a success message would be displayed
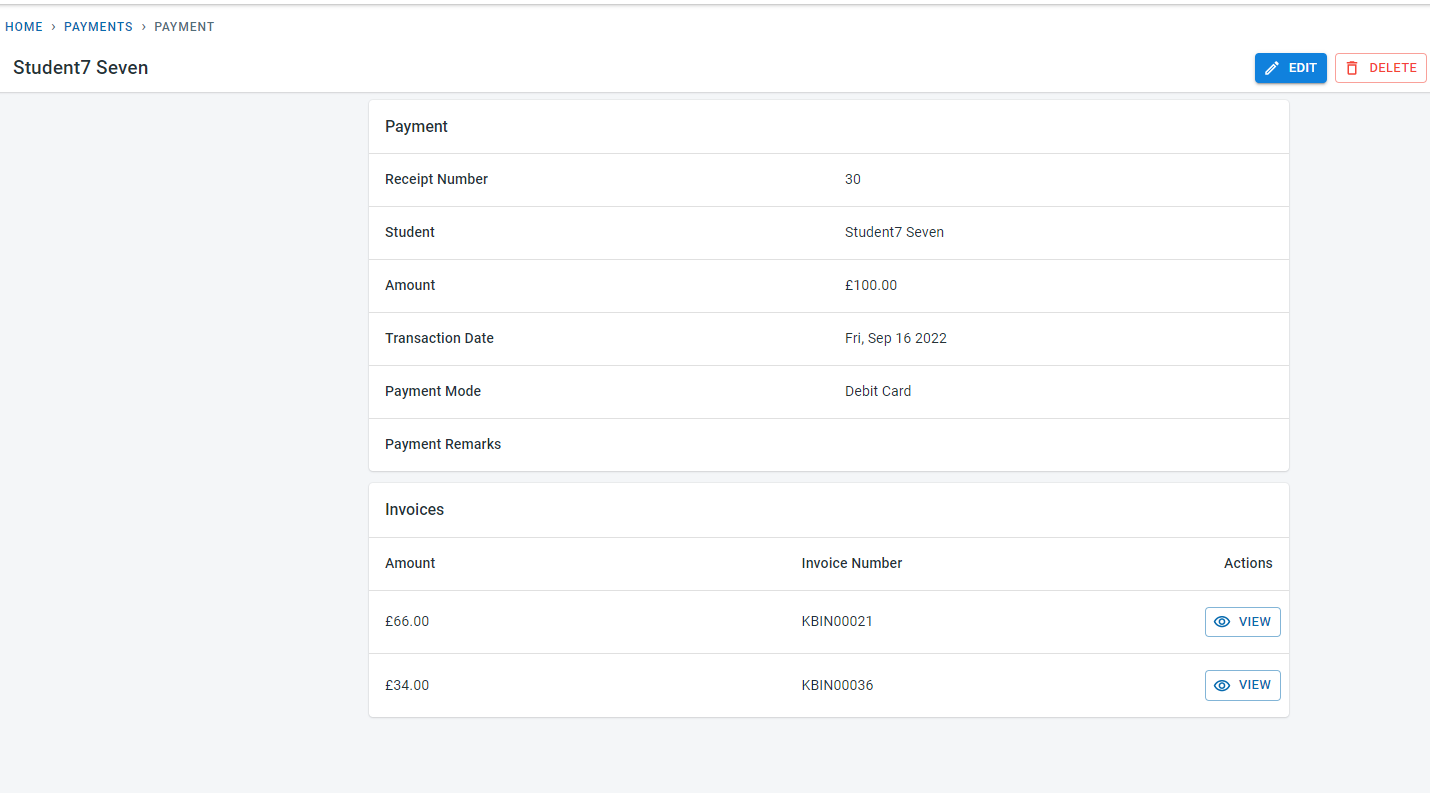
Payment would be recorded automatically in the system for the student
Able to send text messages communication from Manage
Academies/clubs will be able to send text messages (SMS) from Classbees.
In order to send text messages, two basic settings have to be done
- Enable text messages at the academy level
Click on Settings in the menu
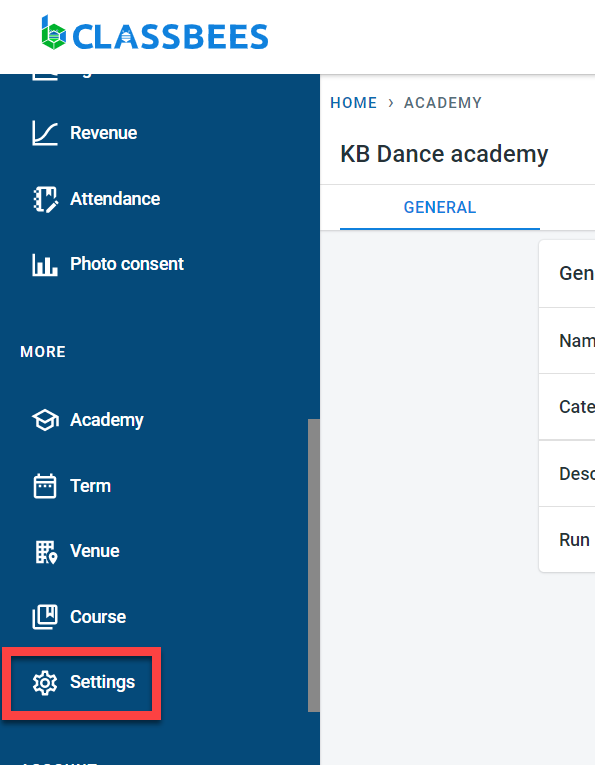
Select Communications
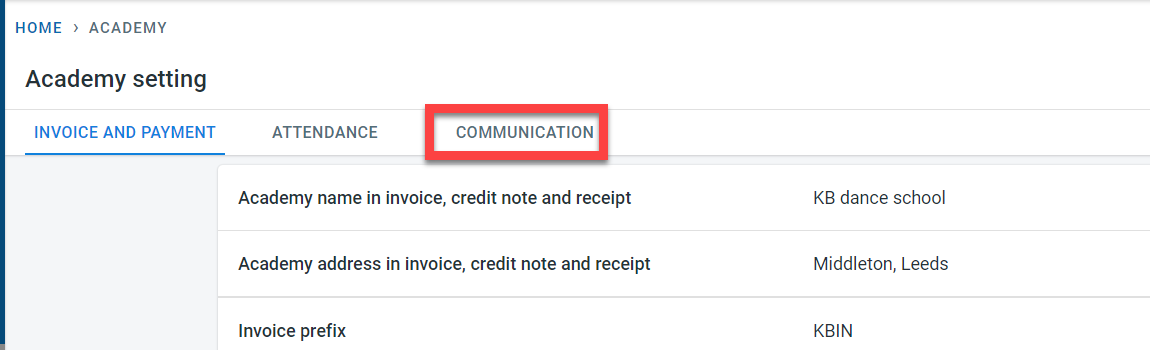
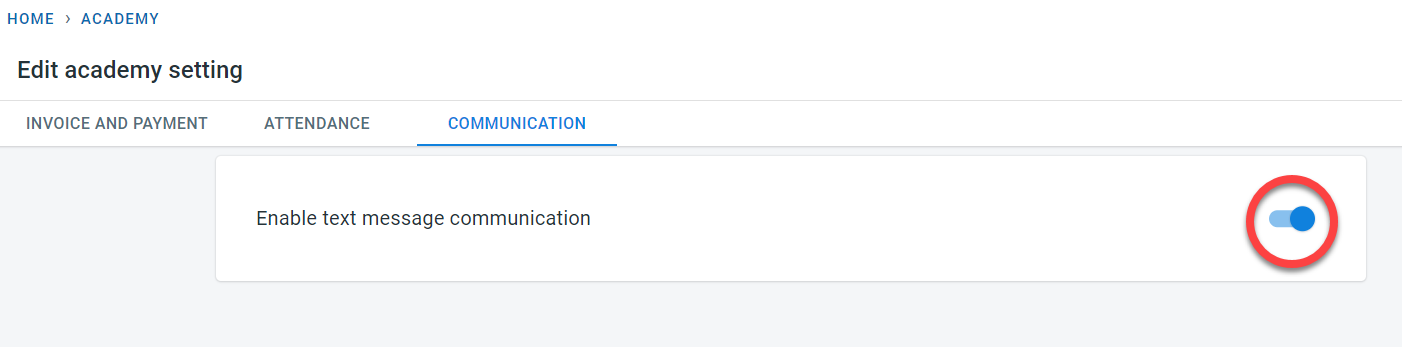
Enable text messages at the academy level
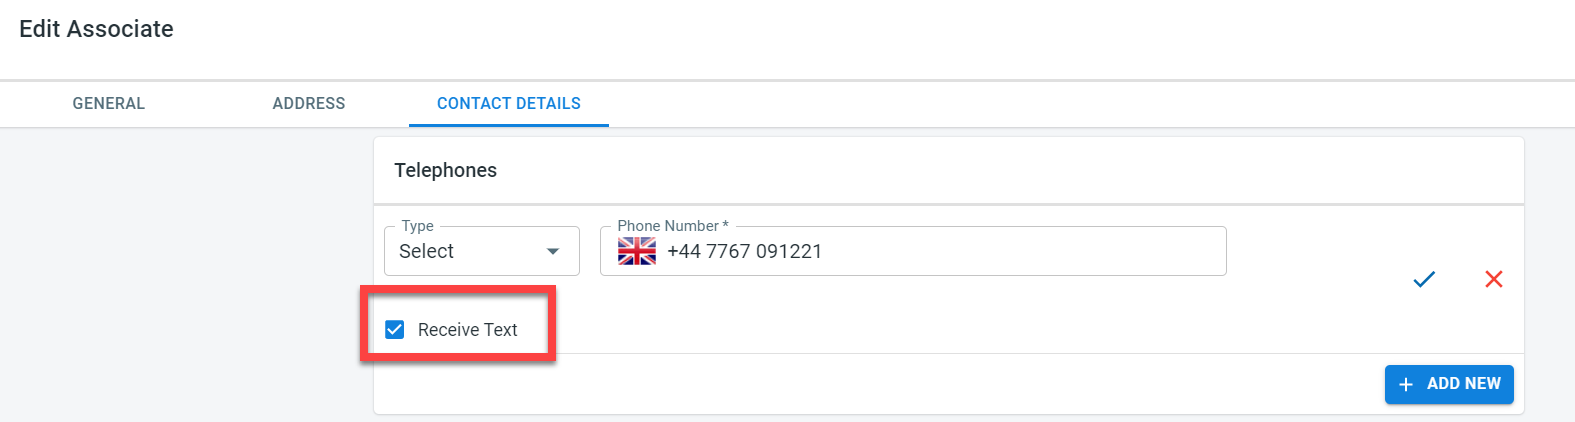
- Activate the numbers for which text messages could be sent to
Only numbers which are authorised to receive text messages in Classbees will be able to receive text messages.
In order to do that, enable the “Receive Text” check box next to the telephone number (This could be for the student or the associate)
Text messages could be initiated from three places
-
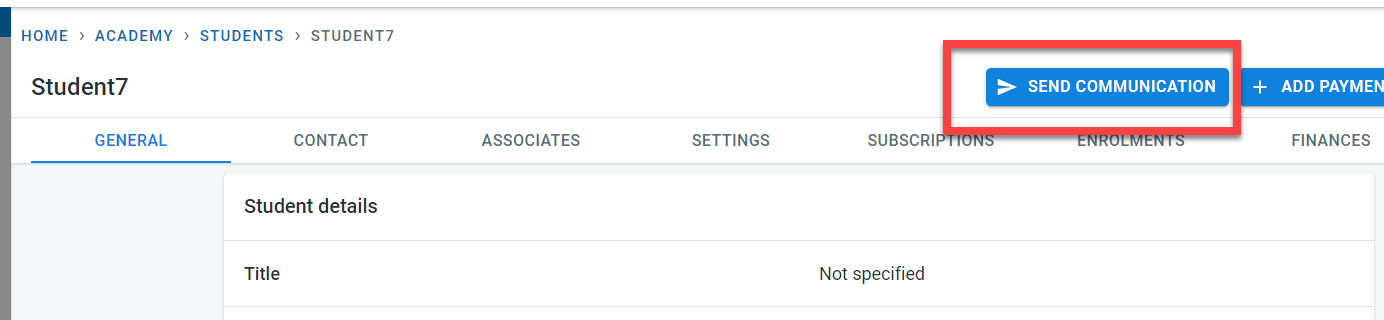
Student
This is to send text messages to an individual student
-
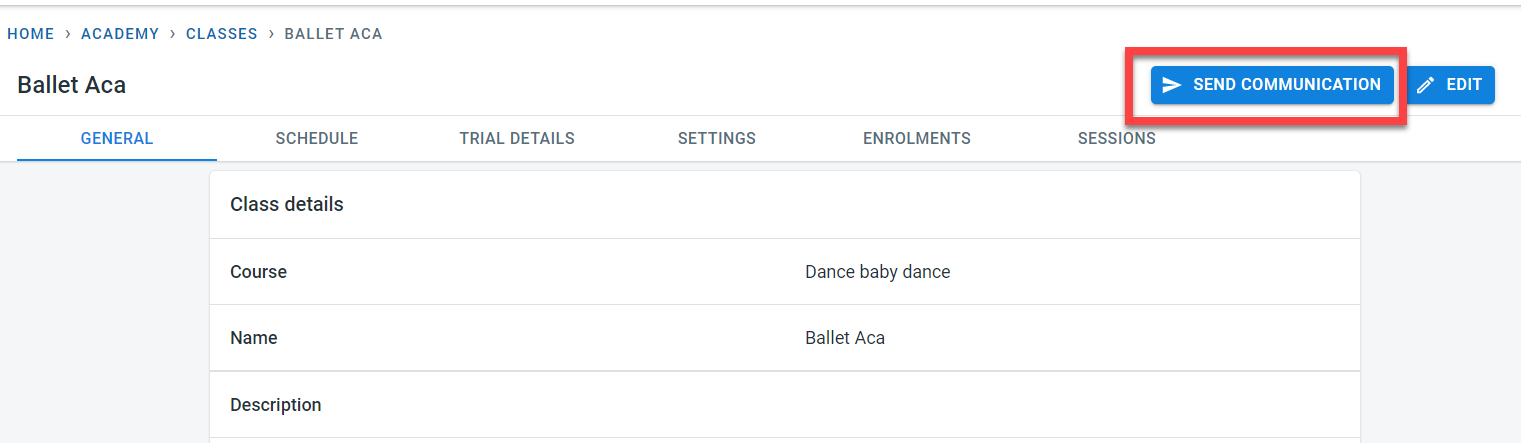
Class
Text messages could be sent to all relevant students/associates in the class
- Communications
Communications tab could be a general place to start communication and then single/ multiple students or classes could be added to the communication
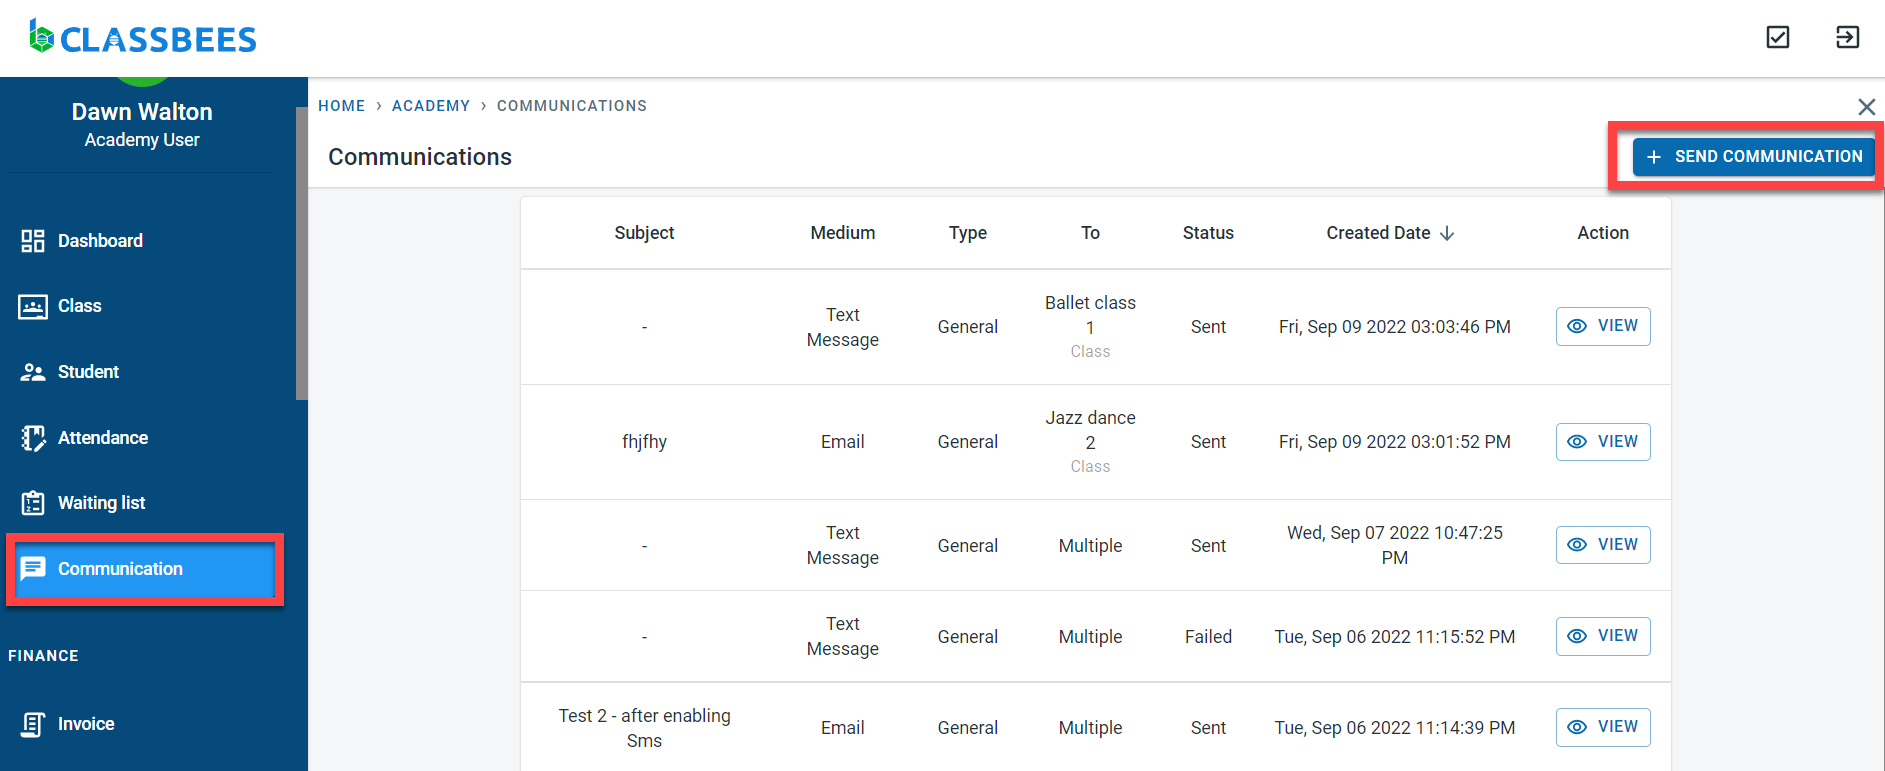
In the communications tab, select “Text message”
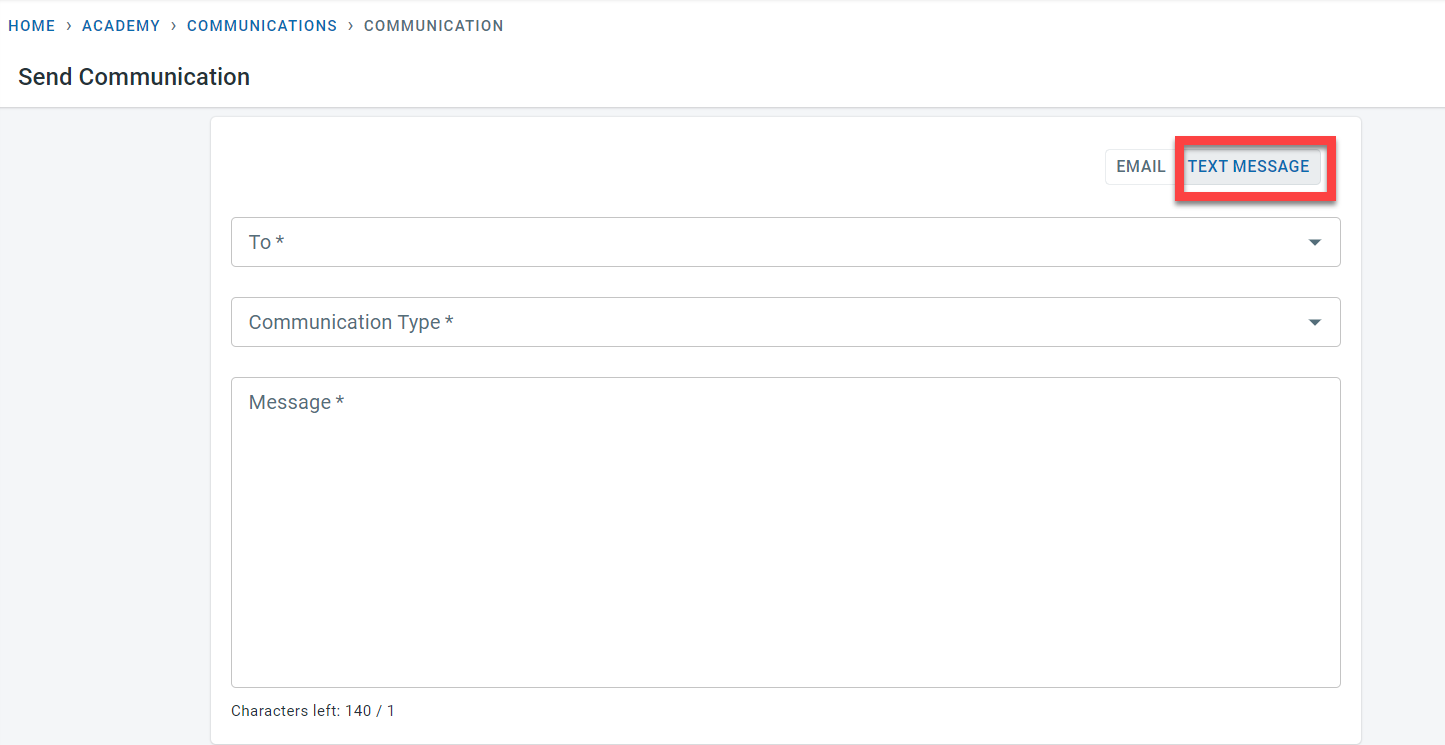
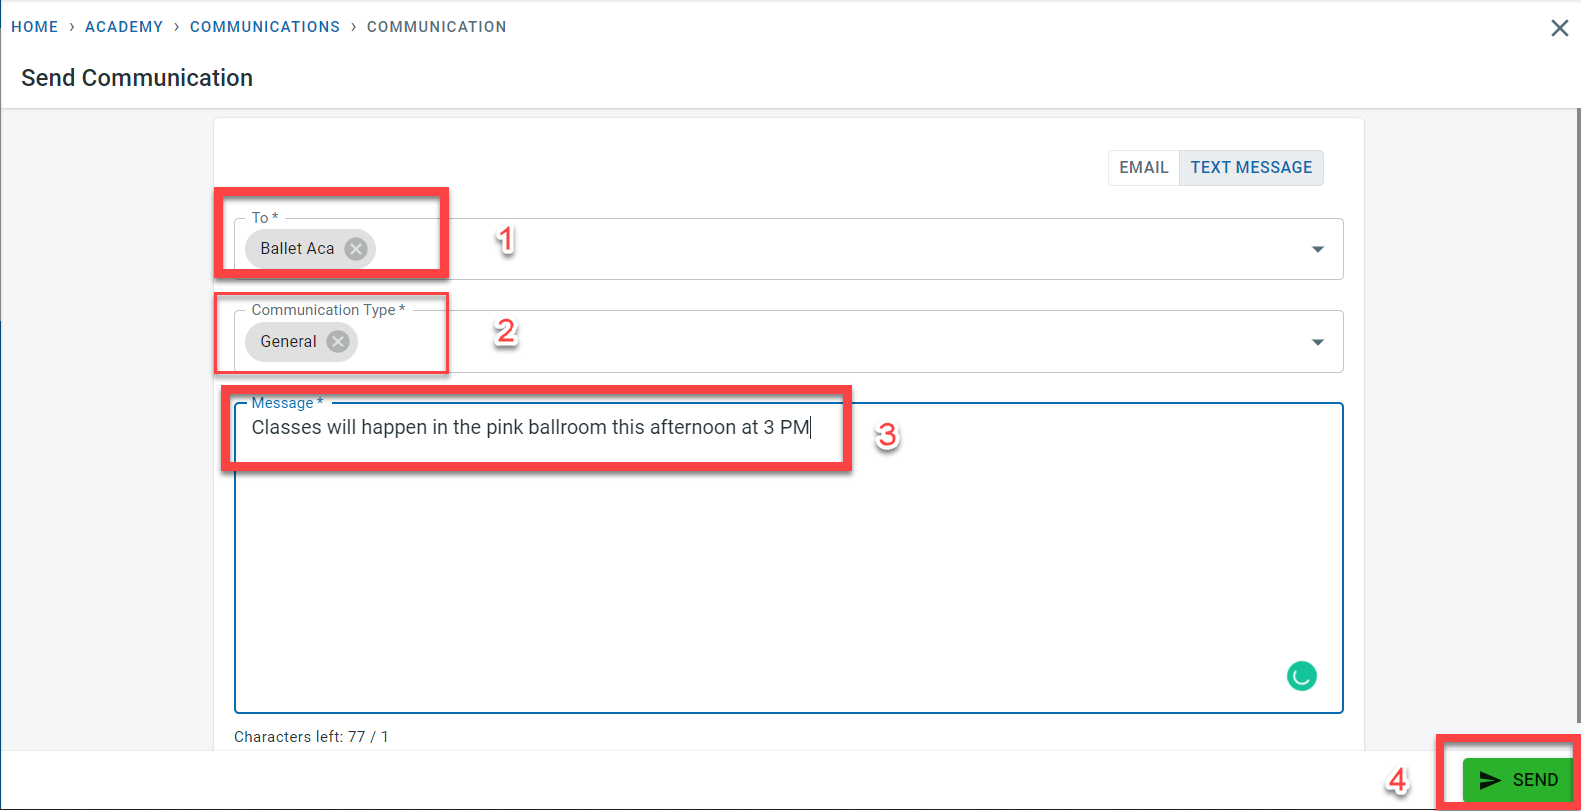
In the “To” column enter the class(es) or student(s) to whom the text messages have to be sent.
In the “Communication type”, select either General, parent or carer, emergency or finance relationship to select the right contacts to send the text message to.
Enter the message to be sent. A text message length is 140 characters
Click on Send
A confirmation message would be displayed to confirm the number of text messages that would be sent out for the contacts selected based on the To and Communication type fields entered.
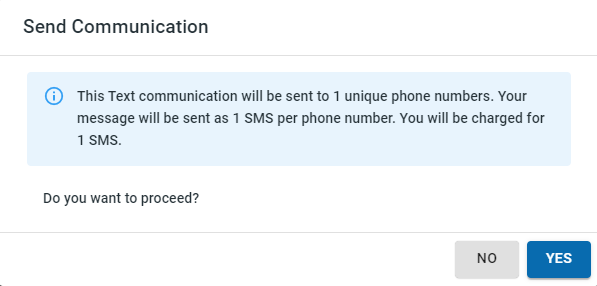
Click yes to send the text messages. A sample text message is shown below
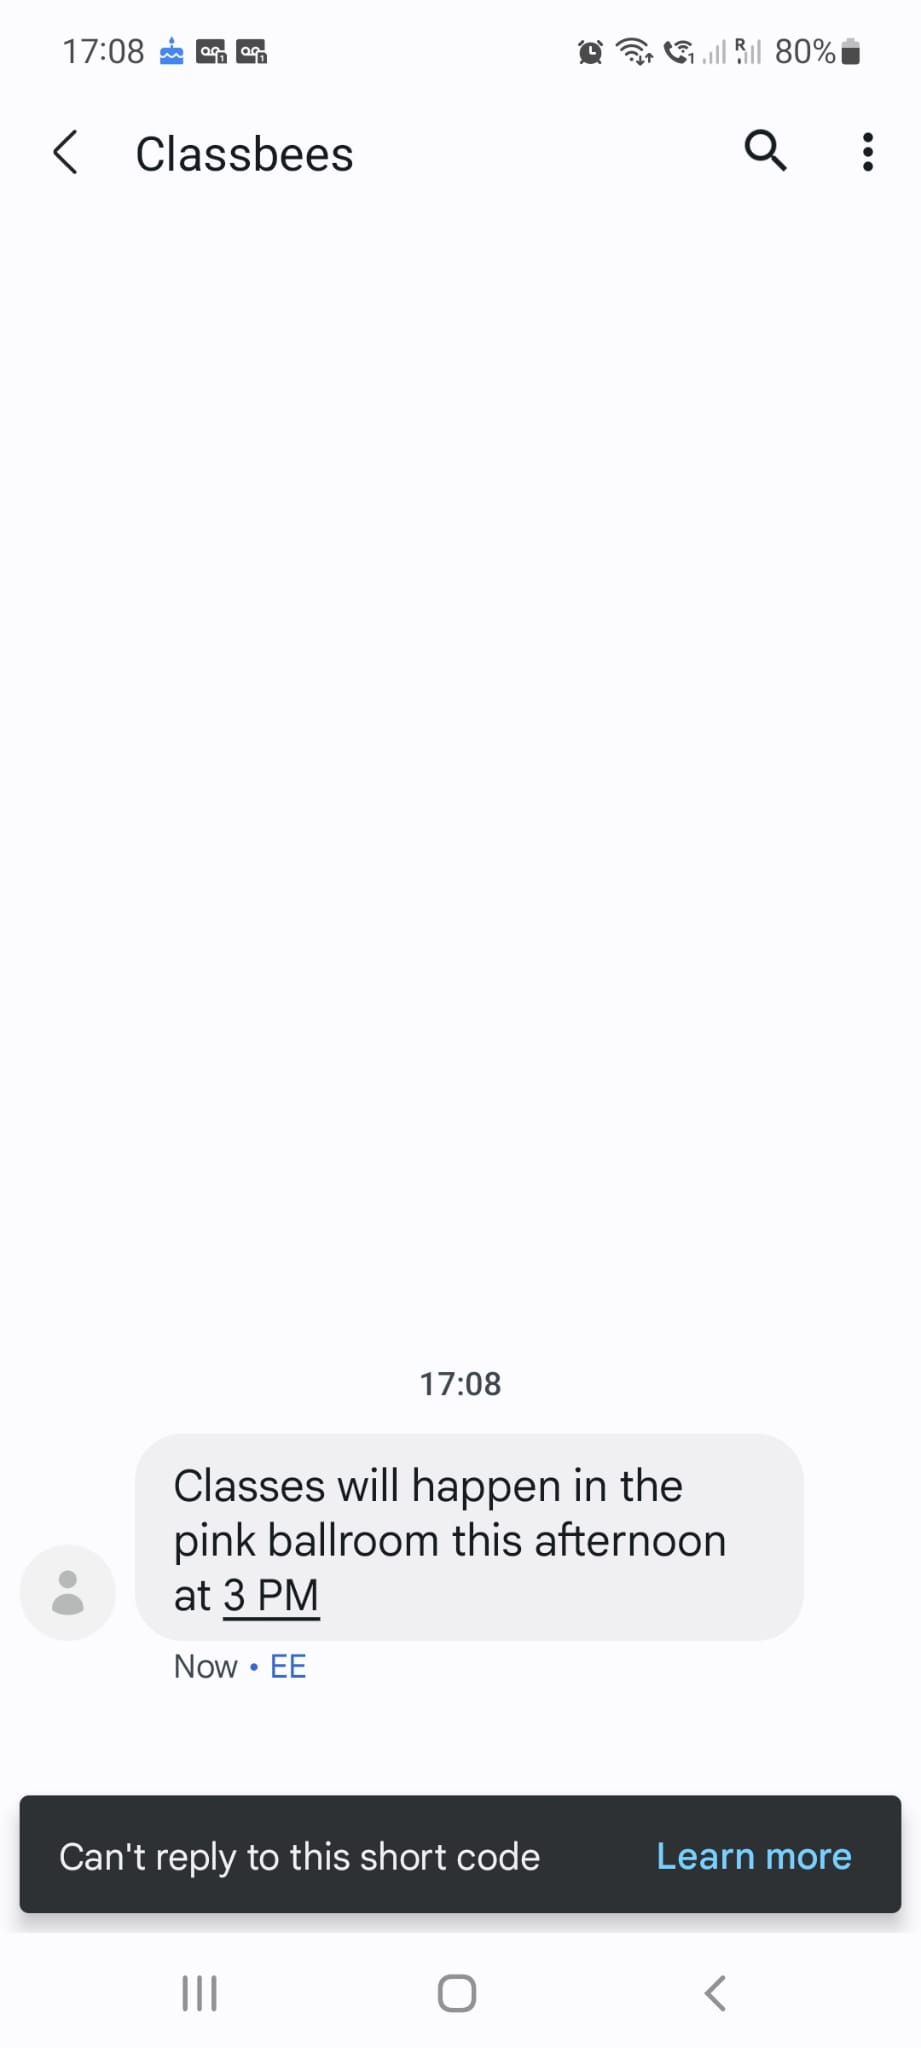
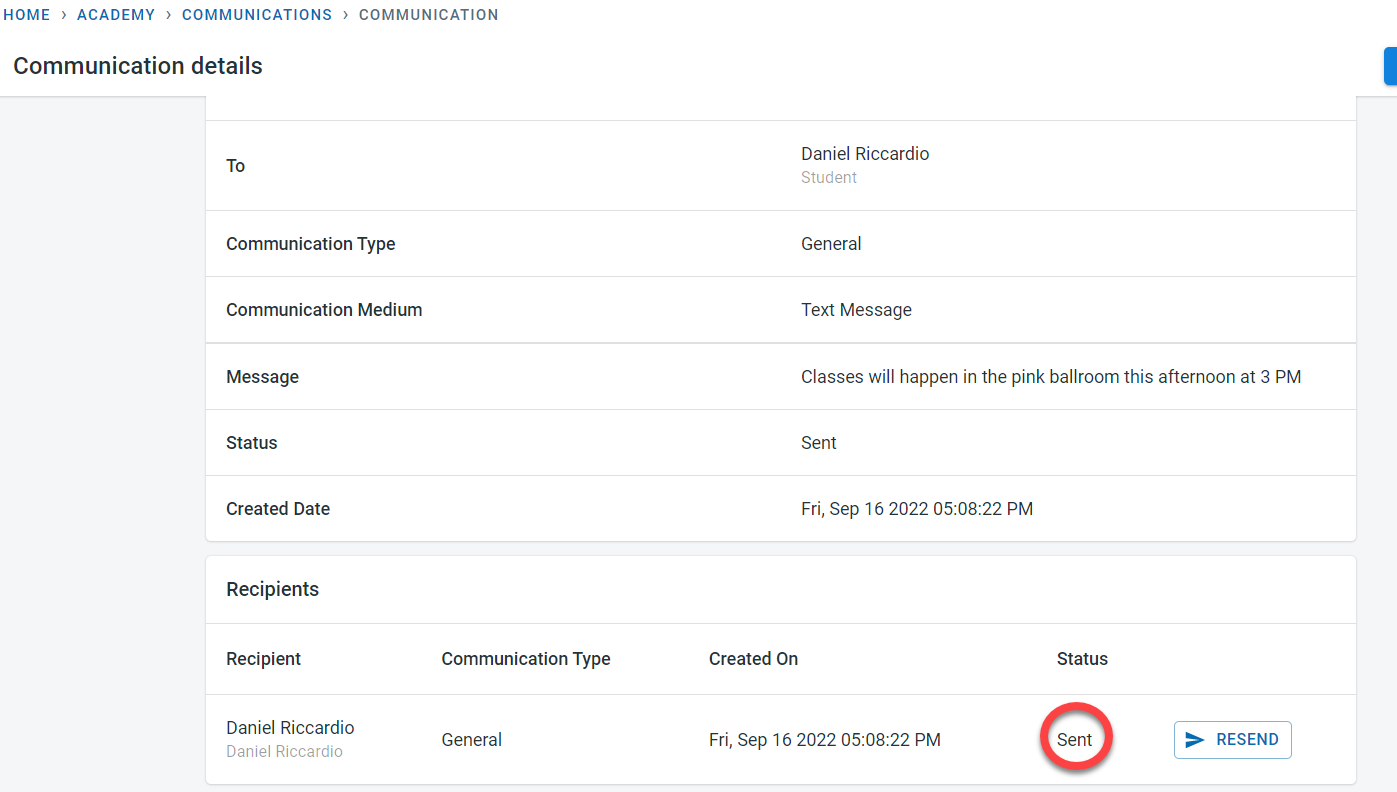
Please note: Text messages are sent immediately but the status of the messages in the communications tab will be updated periodically every 15 mins
Multi-user login for academy
Users with administrative rights can add other team members to the academy. Multiple users can be added to the system
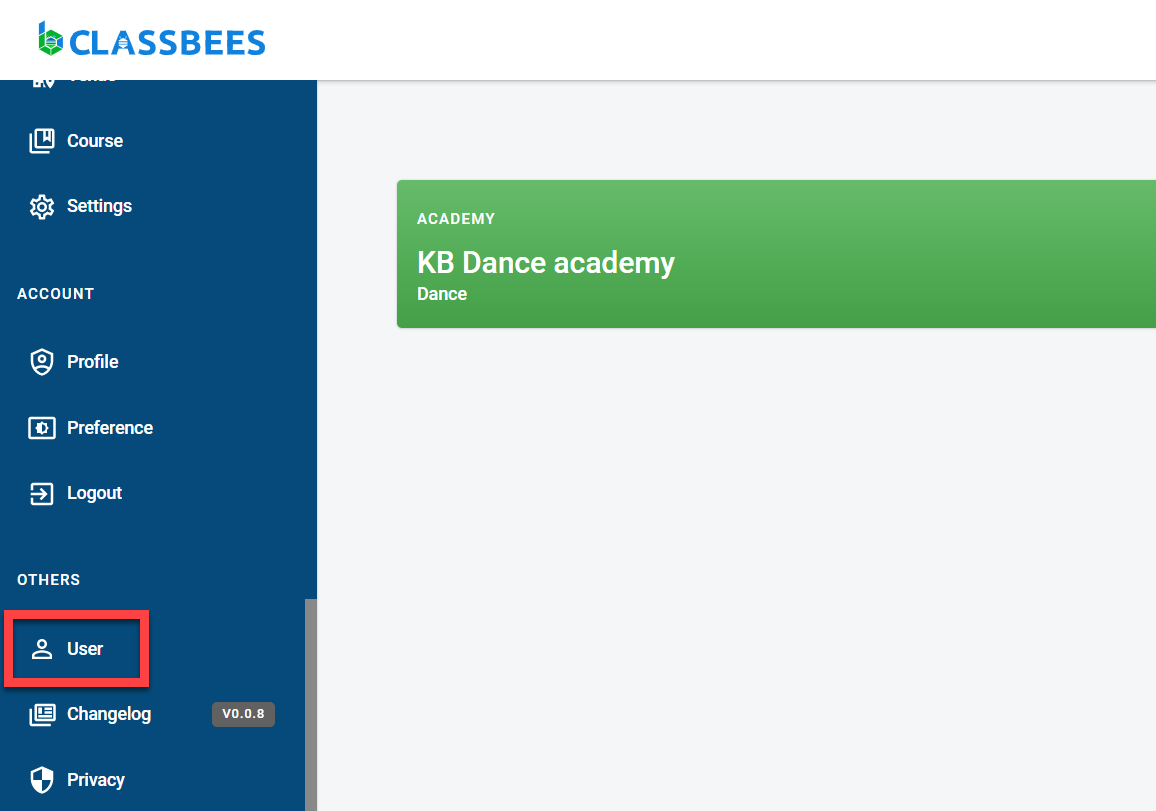
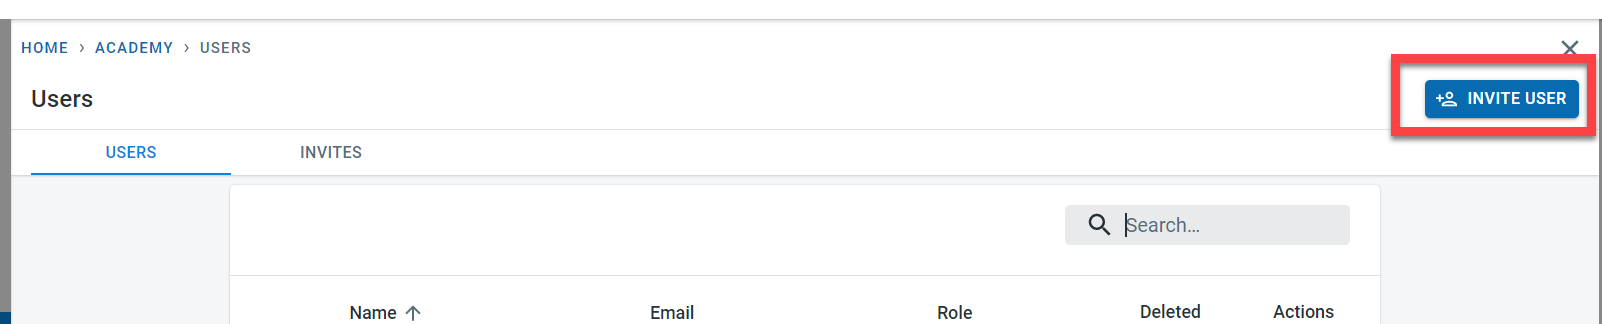
Navigate to the “User” section
Click on “Invite User”
Enter the email address and the role to be assigned to the new user.
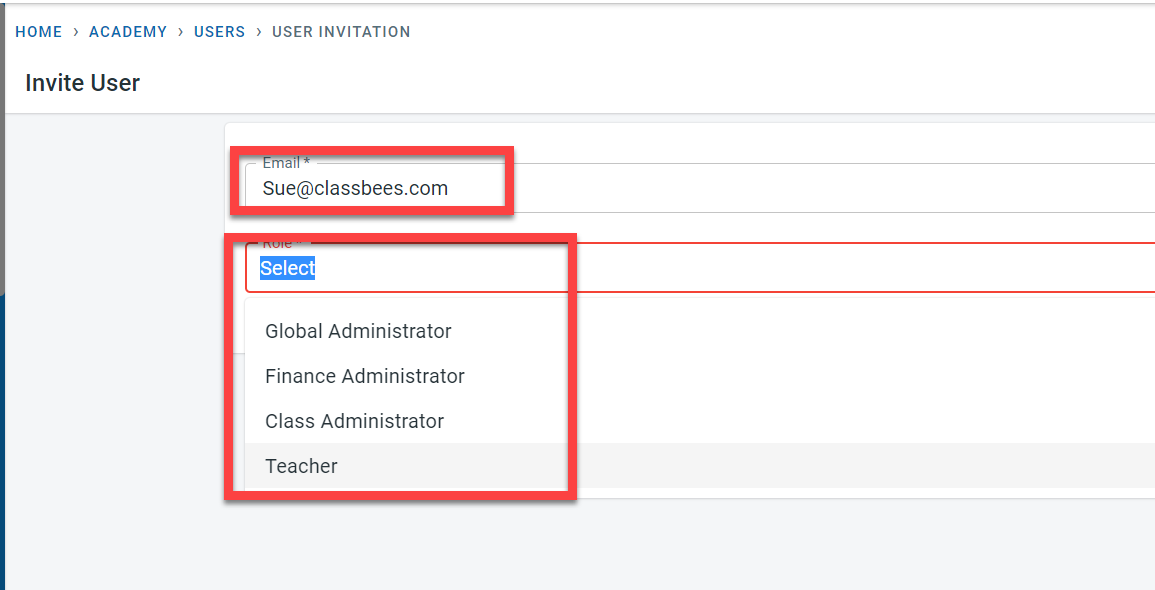
For Class Administrator or Teacher role, it is possible to define if the user should have access to all classes or to specific classes. Click on Invite.

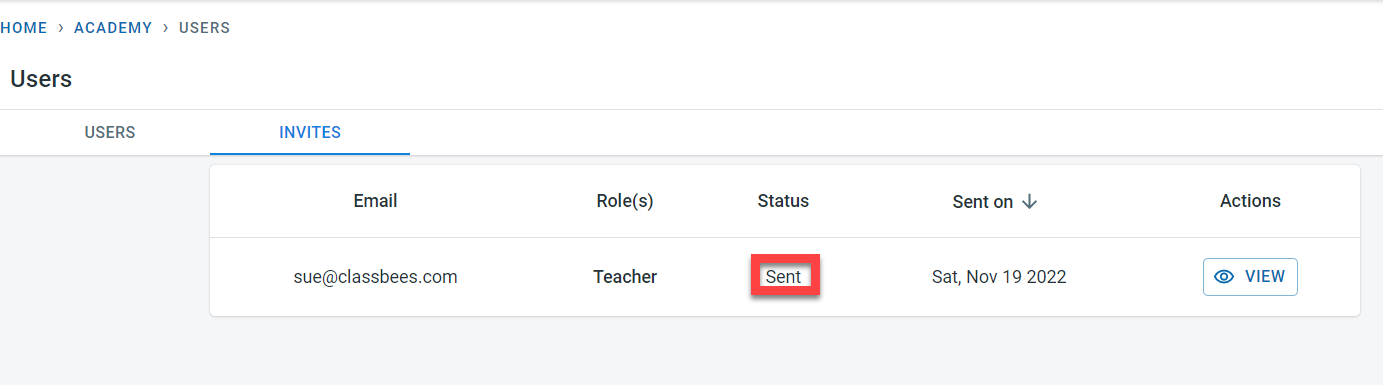
The status of the invites sent could be checked on the user screen
Click on “View” to see the details of the invite. The invite could be resent or revoked from this screen (before the user has signed up)
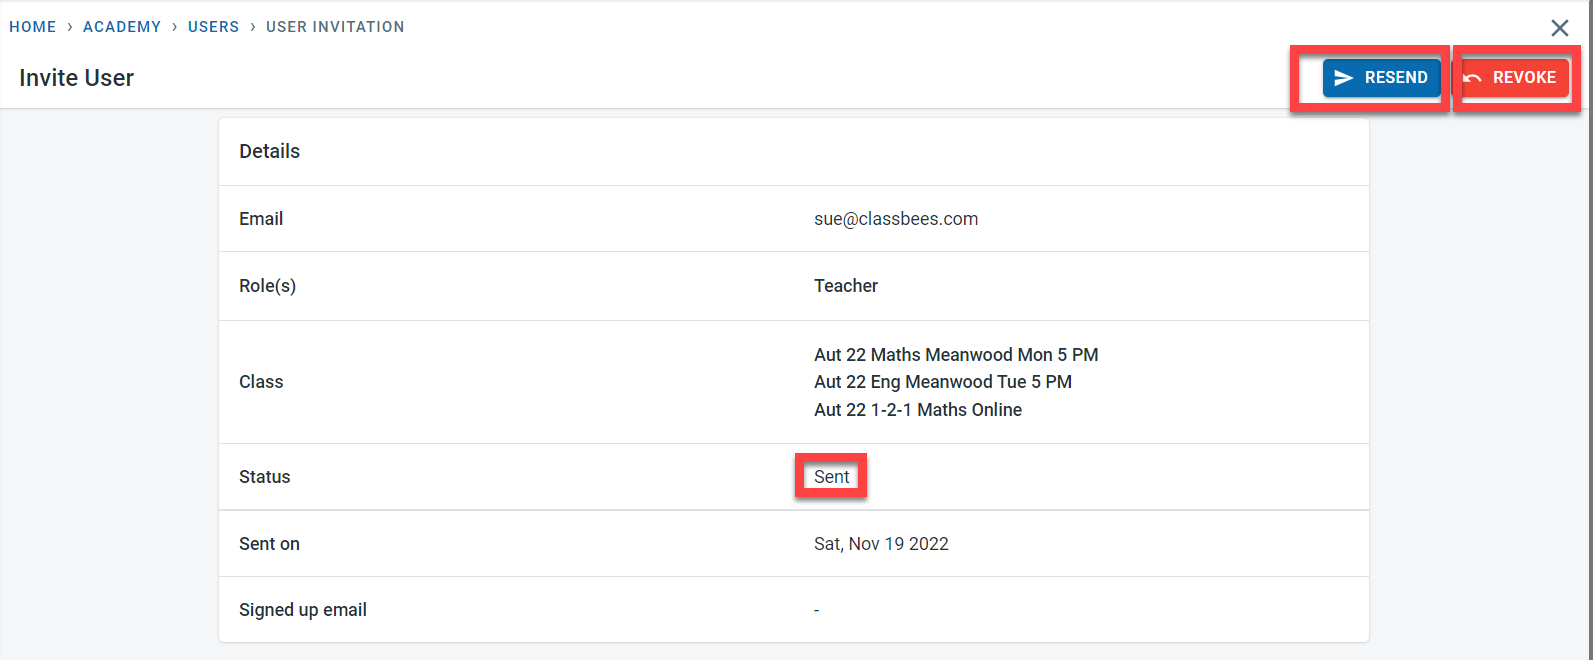
An invite is sent to the email specified
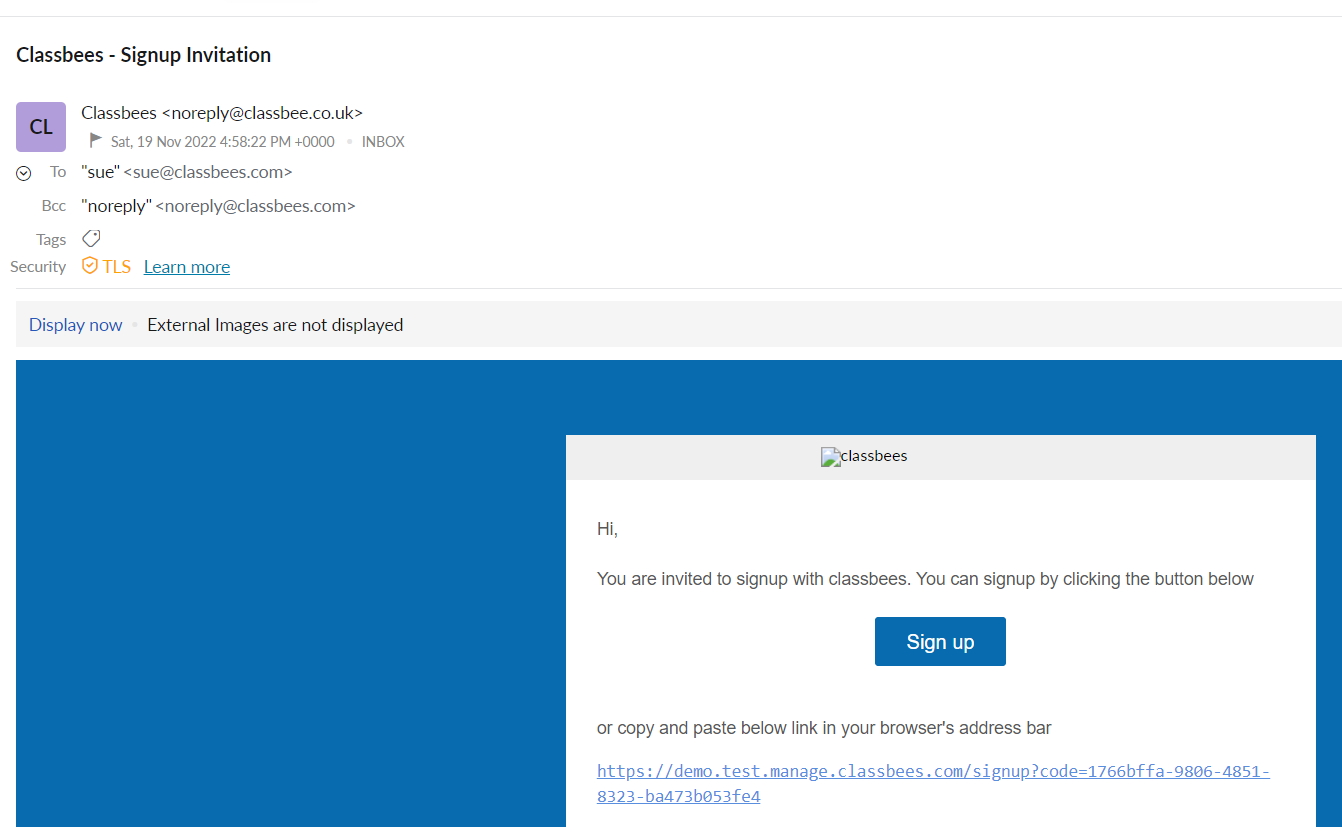
The newly invited user should click on “Signup” in the email to register
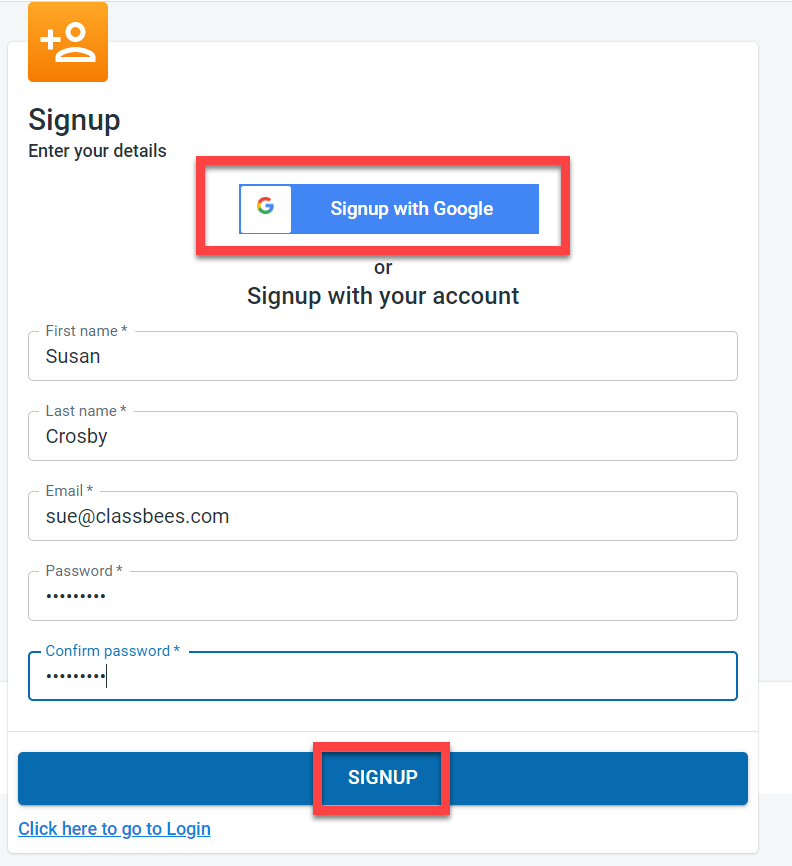
Signup could be done either using Google login details or the individual details could be entered to signup.
Once the user signs up, a confirmation email would be sent to the email address
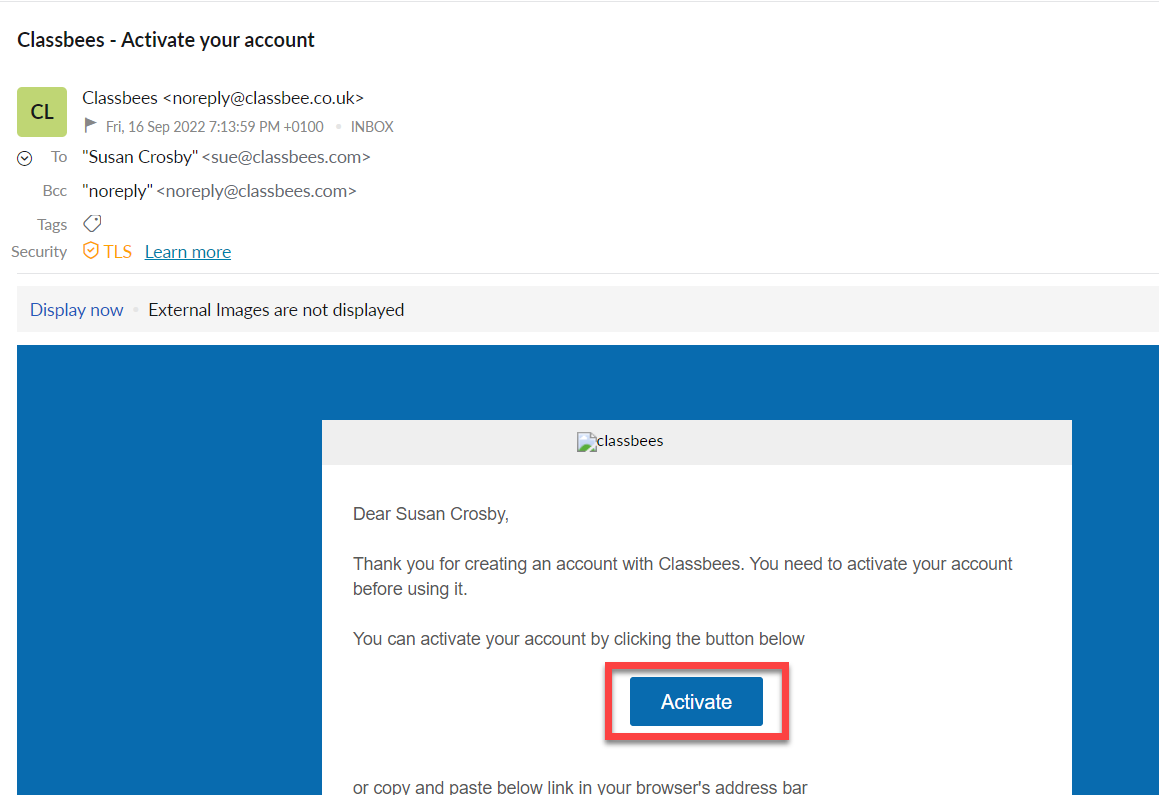
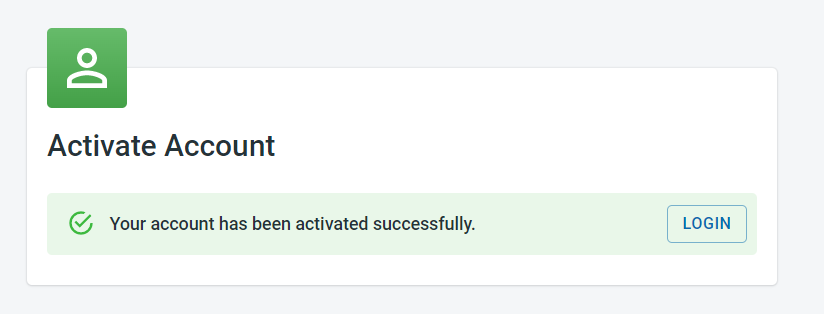
Once the user clicks on “Activate”, the user can login to access the system
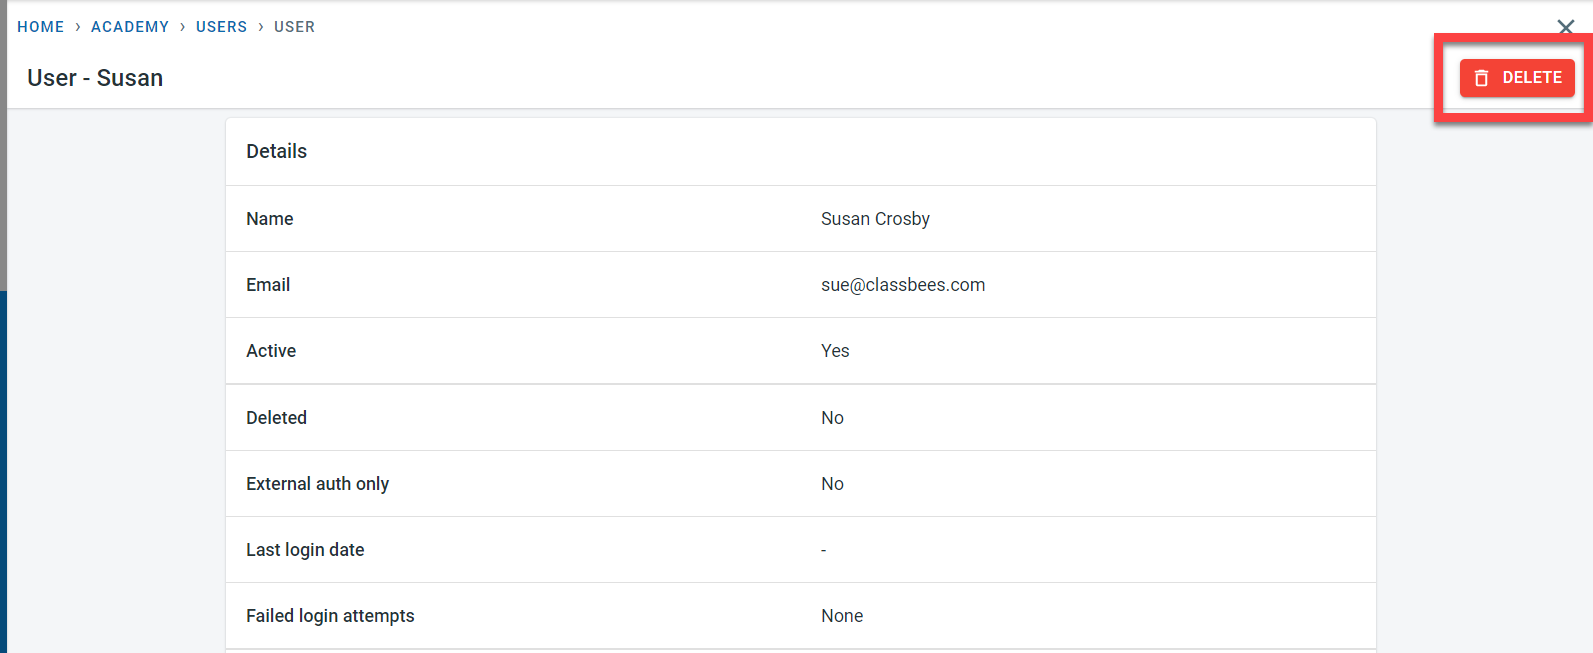
A user could be deleted anytime from the system by going on to the detail screen and then clicking on the “Delete” button.
Student transactions
Student transactions have been introduced to provide a single view of student finance. This is achieved by combining invoices, credit notes, and payments into one single view instead of separate sections.
In the student screen, select “View” next to the student
![]()
Click on “Finance” on the student screen
![]()
The student transactions are displayed by default in descending order by the date of the transaction
![]()
In the student transaction,
- All invoices raised for the student will be displayed under the debit column
- All credit notes and payments for the student will be displayed under the Credit column
- For each transaction, the balance column displays the statement balance after taking into the transaction value. Any transaction recorded under the debit column would increase the statement balance as it is negative and the transactions recorded in the credit column will decrease the statement balance as it is a positive value.
Please note: Clicking on “view” next to the transaction would display the transaction details.
![]()
Shown below is the Student transaction.
![]()
In order to view the invoice, credit note, or payment in detail, click on the number (invoice number, credit note number, or payment number)
![]()
Clicking on the number would open the relevant financial document
![]()
Attendance UI improvements
A much-improved attendance summary screen has been deployed. Sessions are displayed against individual classes
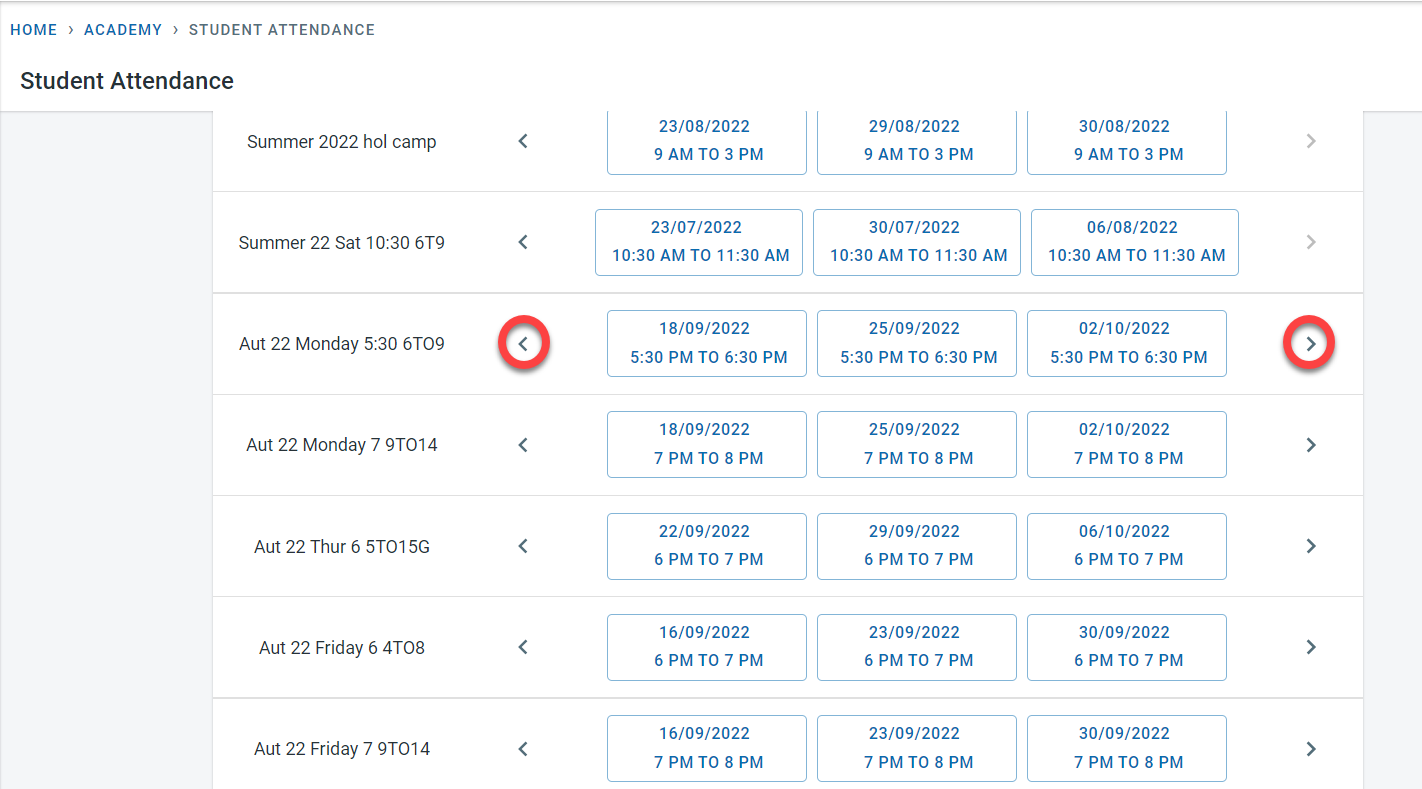
The scroller next to the sessions could be used to scroll to past or future sessions