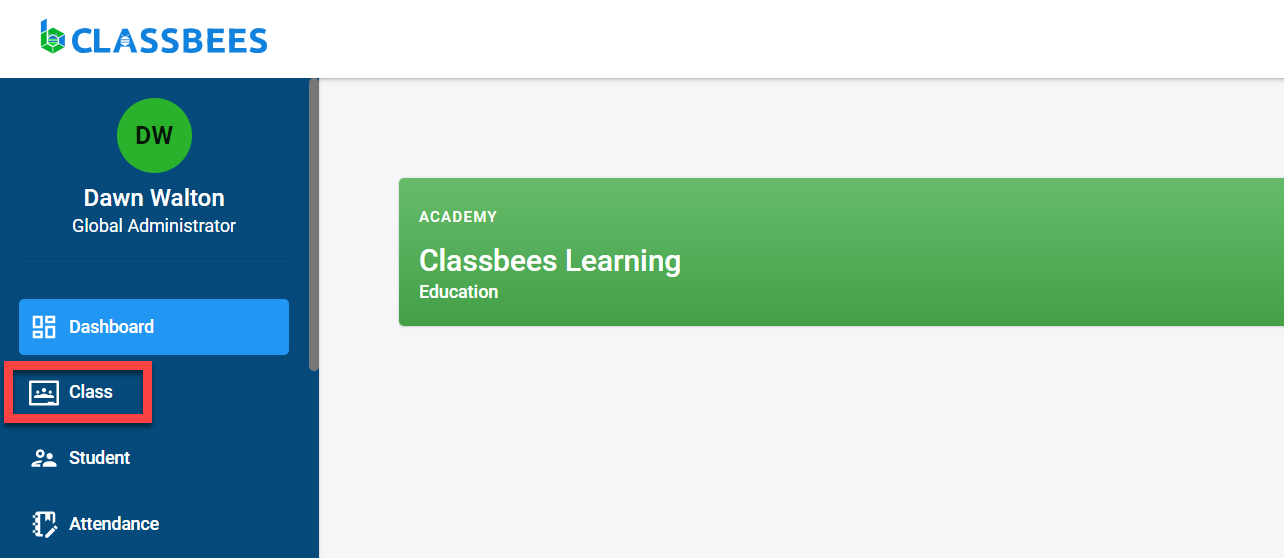
To access the class module, select “Class” from the main menu
Click on “Add Class” to create a new class from scratch. In order to create a new class by copying an existing class, follow the steps in clone class
There are four sections to create a class
General
If there are multiple courses defined in the academy, there will be a popup to select the course for which the class is been created. Click on “OK”.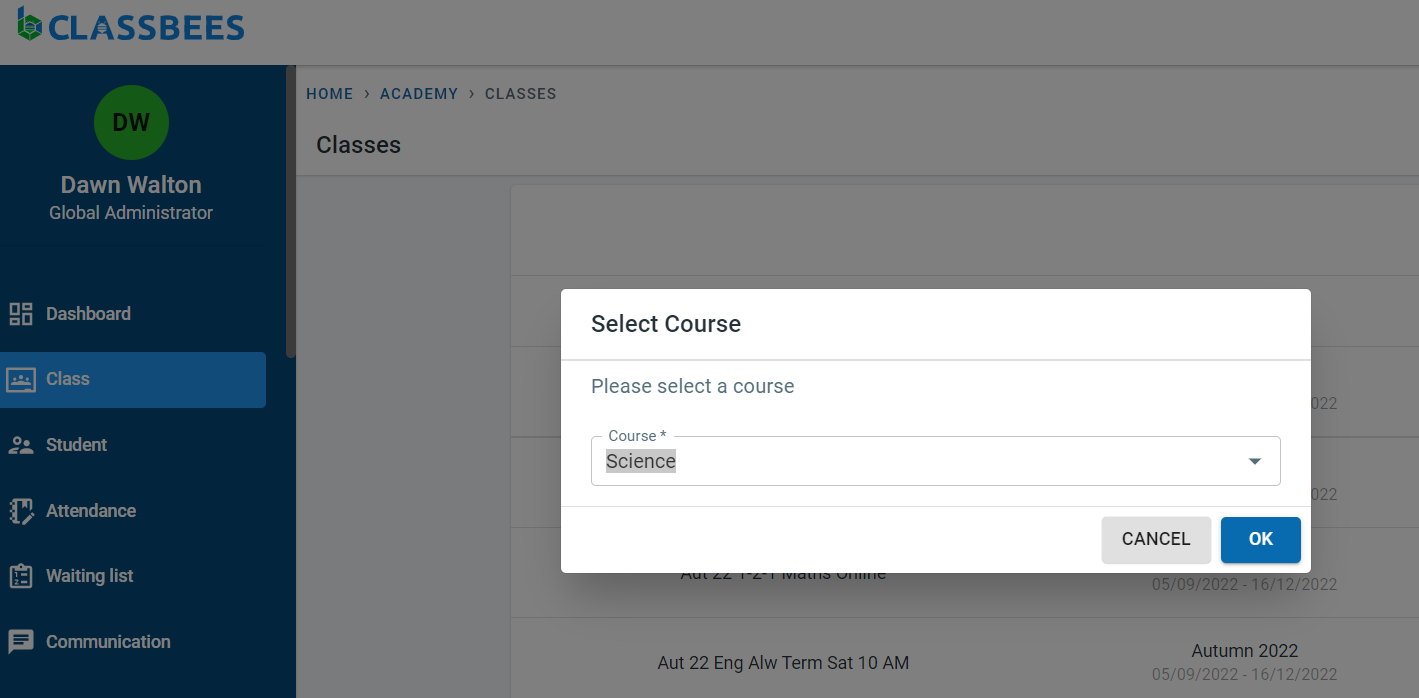
If there is only one course defined for the academy then the course field is auto-populated
Enter the name and description of the class
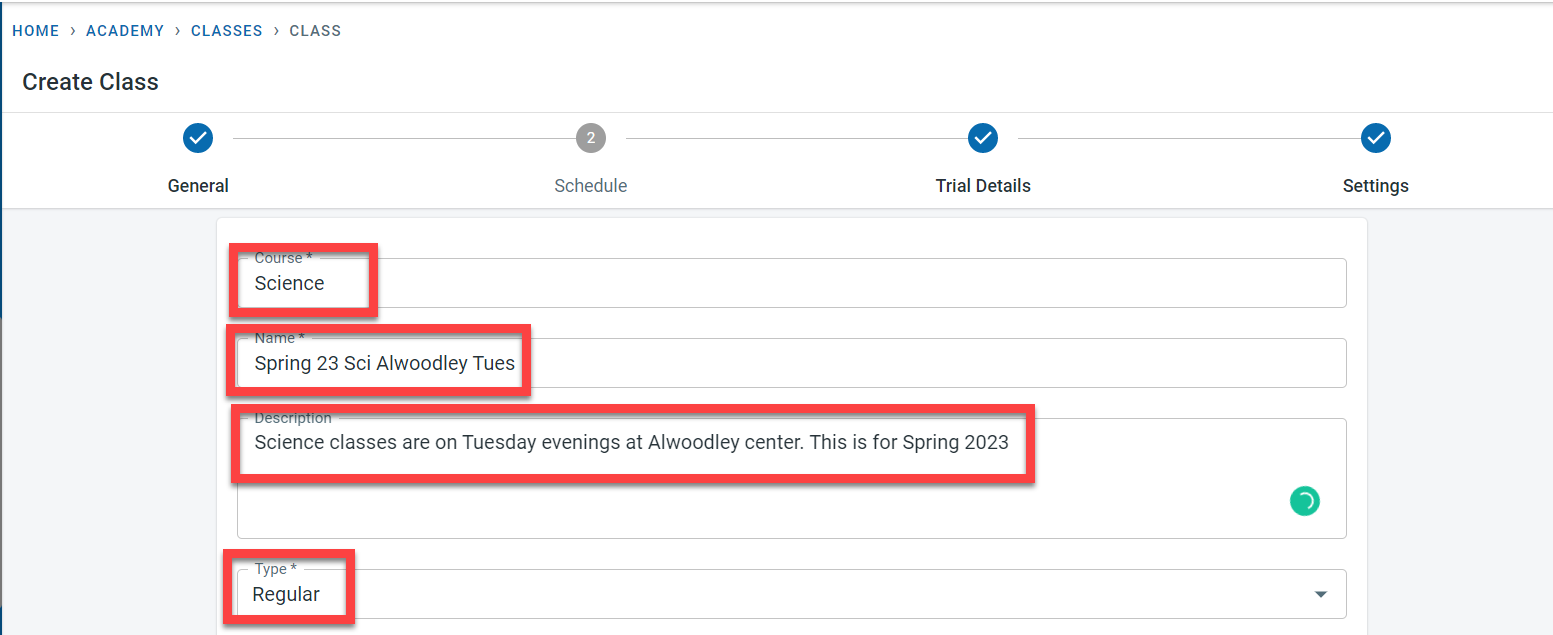
The type is used to define the frequency type of class. The available values are
- Regular - classes are scheduled at regular intervals over a fixed time. An example here would be classes that run every week on a Thursday over the school Spring term
- Seasonal - Classes are scheduled to run at specific periods of the year. An example here would be holiday camps that run over the easter holidays every year
- Adhoc - Classes scheduled here do not follow a specific pattern and is scheduled on random dates
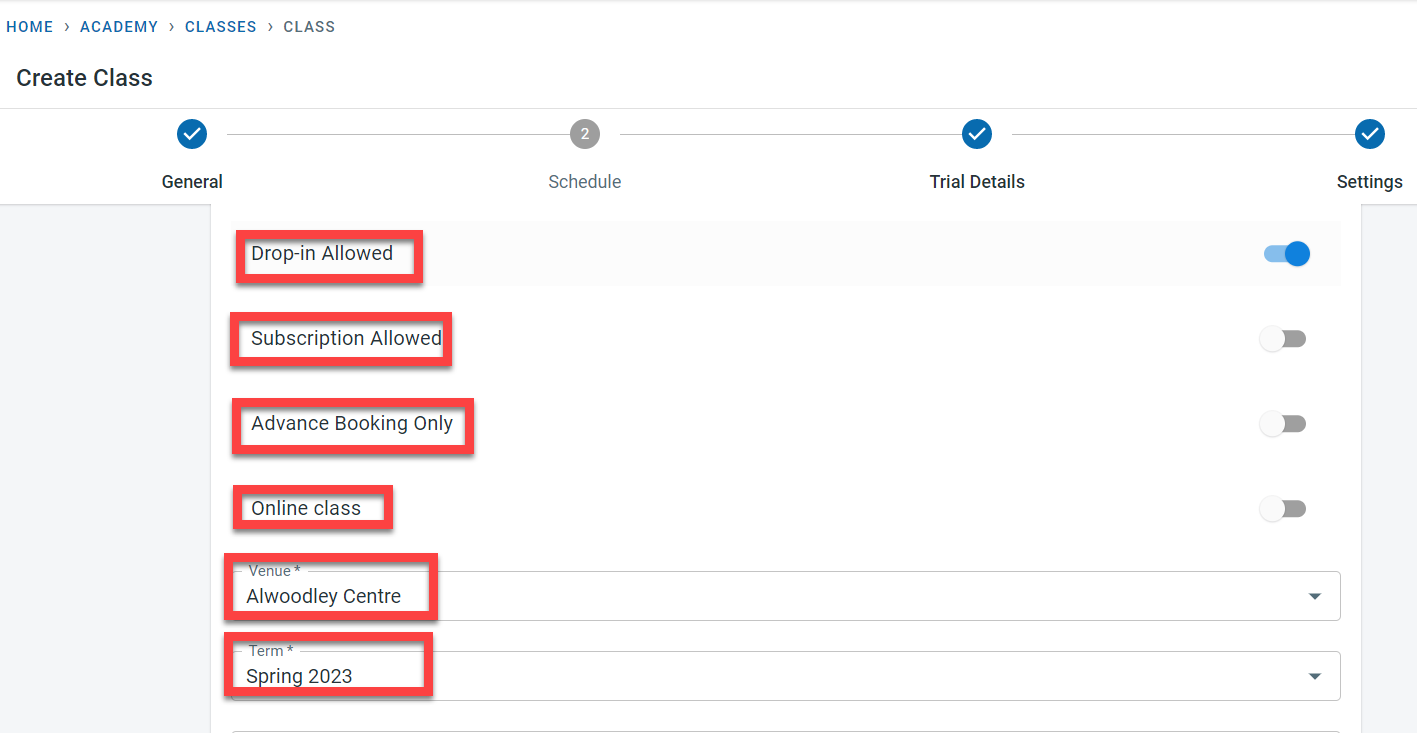
If the class allows students to attend certain sessions without subscribing for the whole term, the “Drop in Allowed” should be switched on. If the Drop in classes have to be booked in advance of the session, activate the “Advance Booking Only” switch.
In order to allow subscription fees at the class level, switch on the “Subscription allowed”. Please note this is not relevant to the subscription defined at the academy level.
If the class is to be delivered as an online class only, activate the “Online Class”. Once this is activated the Venue field would disappear. If the class is not an online class, select one of the venues from the venue list defined.
The next step in the class definition is the selection of the term from the term list defined.
Any changes made in the course, term, and venue will automatically be passed onto the classes linked to the course,term and venue
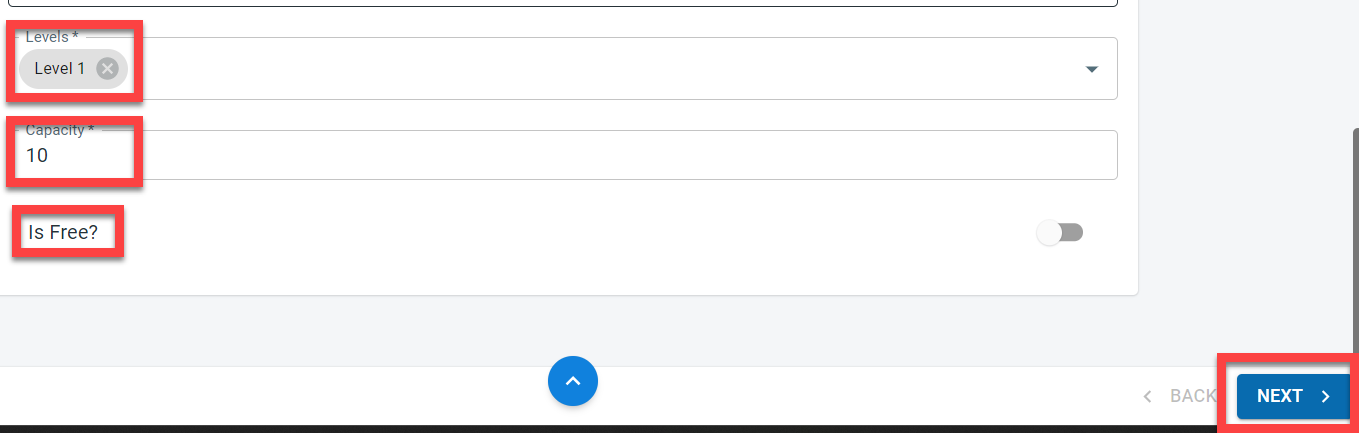
It is possible to restrict the class to specific levels defined within the course. In the level field, select the levels defined in the course.
The capacity is used to define the maximum number of students who can attend each session within the class.
If the class is free, activate the “Is Free?” switch.
When the “Is Free?” switch is set, it is not possible to set the term, pay as you go and block fees for the class but it is possible to add extra fees to the class
Click on “Next” to move to the Schedule tab.
Schedule
The schedule tab is used to define the start and end times of the classes/ activities along with the periodic frequency at which the class runs through the term. The schedule tab by default would display the first day defined in the term attached to the class in the general tab.
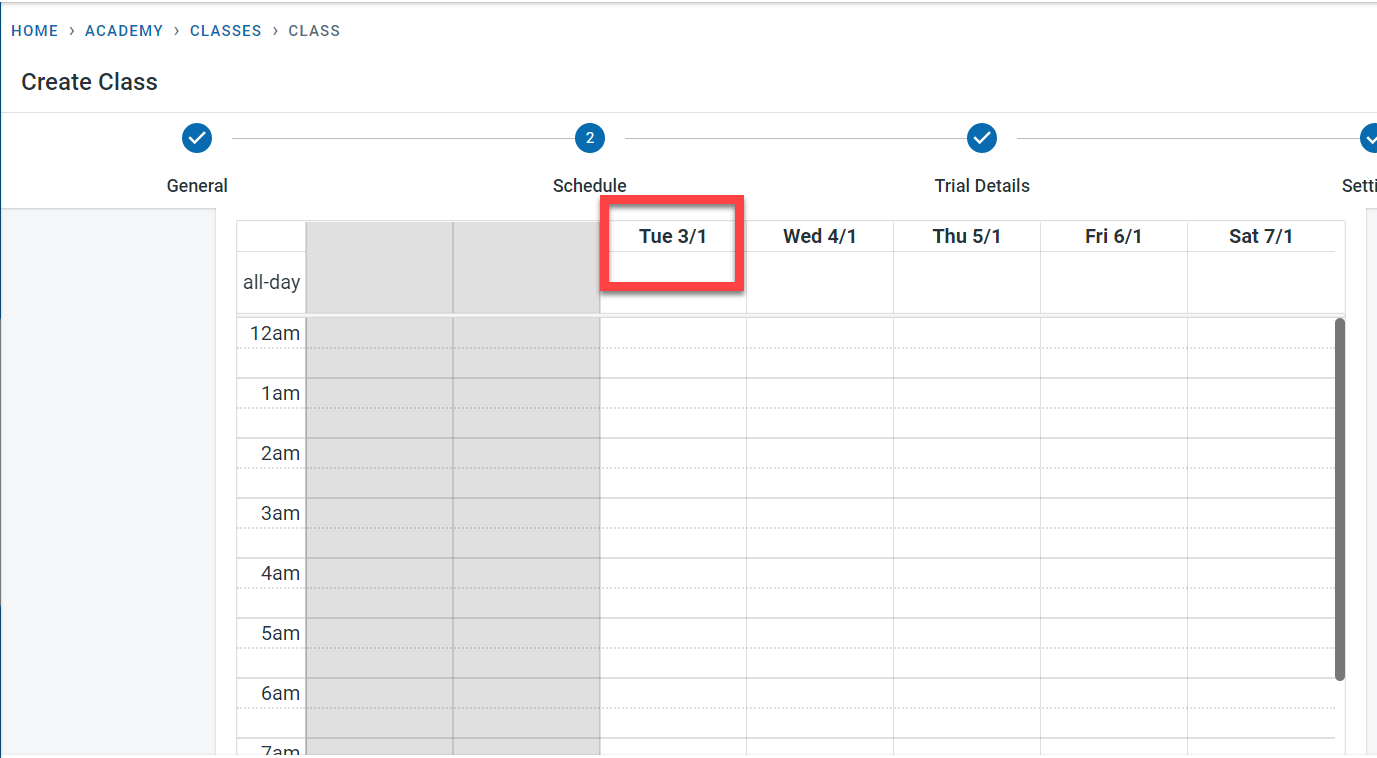
For the first session, select the time interval for the first session that would be run within that term. Enter the Session start date and time and the session end date and time. If the session is to run the whole day, activate the “All day” field
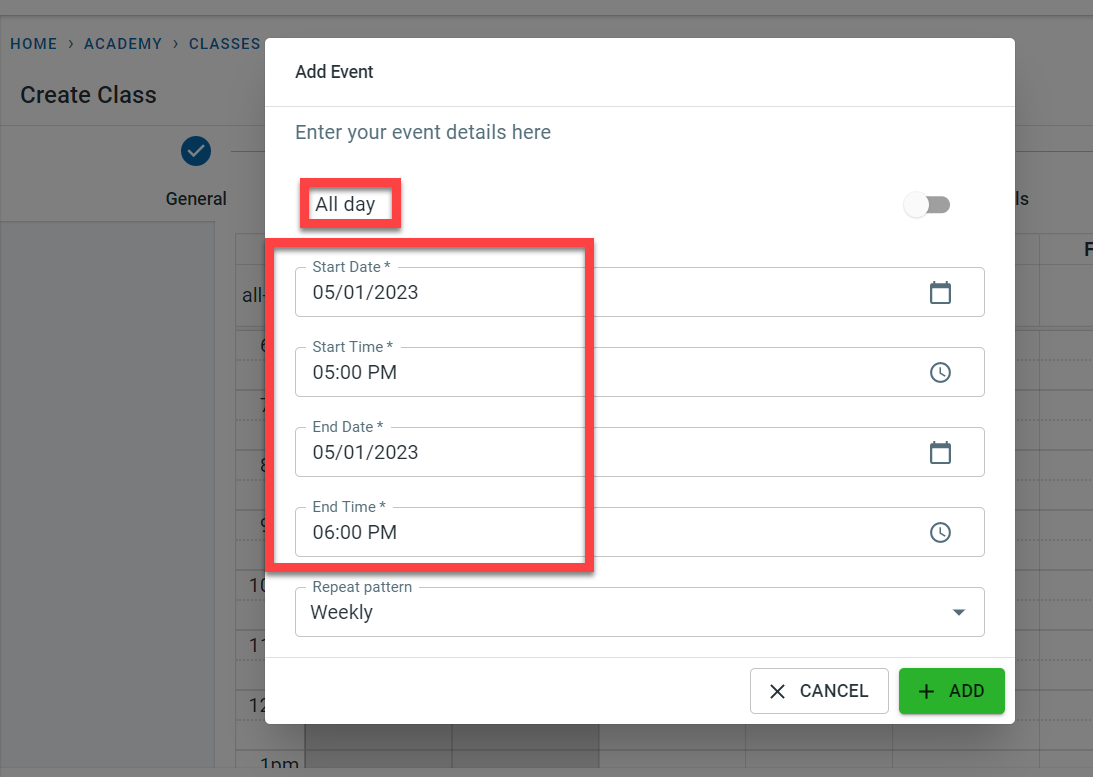
The next step is to define the periodic frequency at which the class or activity will be scheduled throughout the term. There are various frequencies for scheduling the sessions as shown below
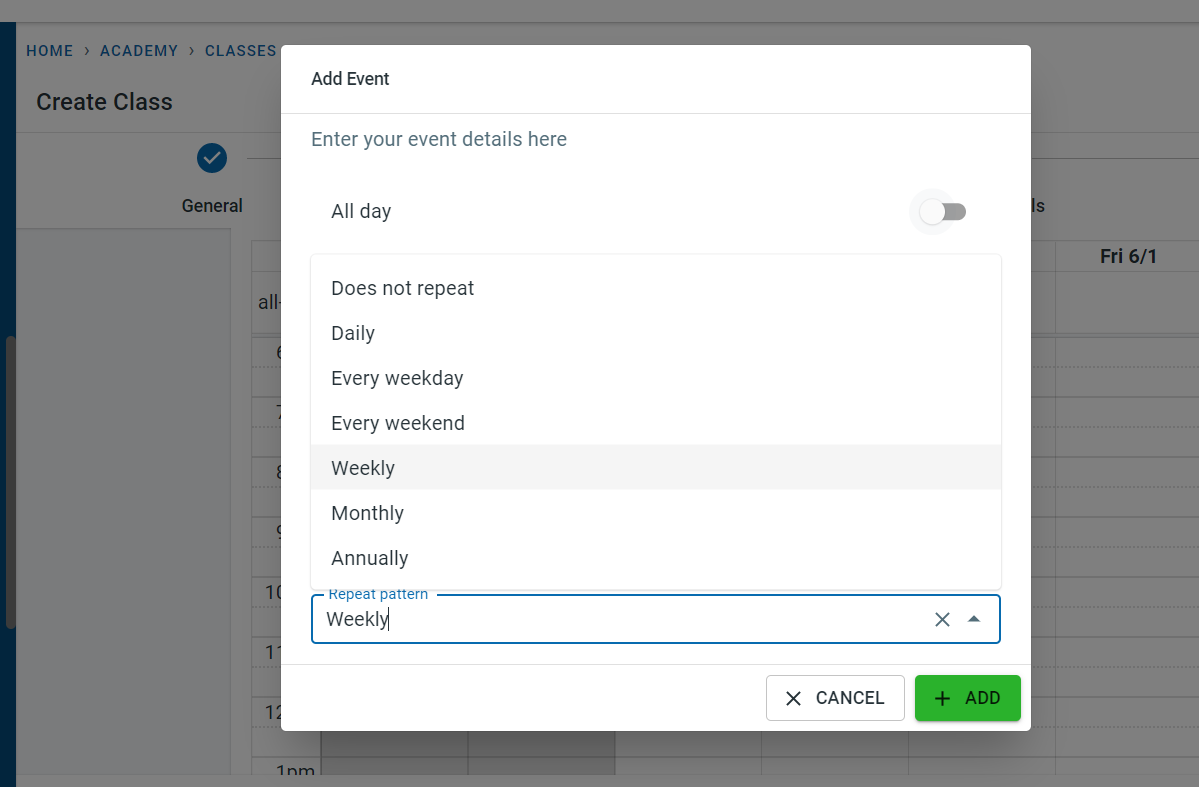
Based on the above schedule, sessions will be created using the term start and end dates. N sessions will be defined on the days which are marked as holidays in the term definition
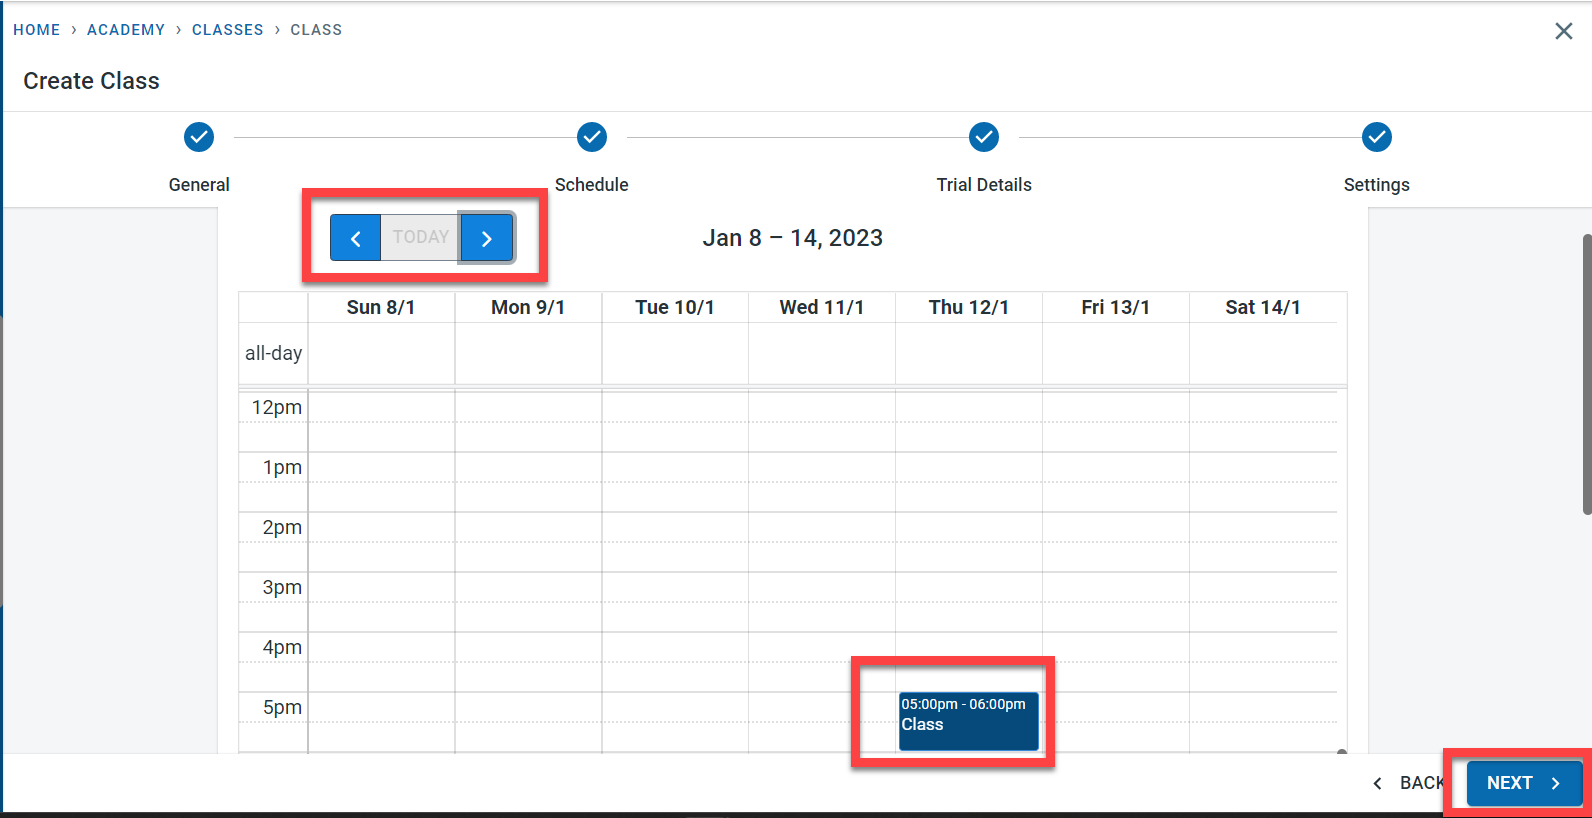
It is possible to navigate between the different weeks within the term using the navigation buttons next to the week definition displayed. Click on “Next” to move to the “Trial Details” Tab.
In order to edit a session, Click on the session within the schedule tab.
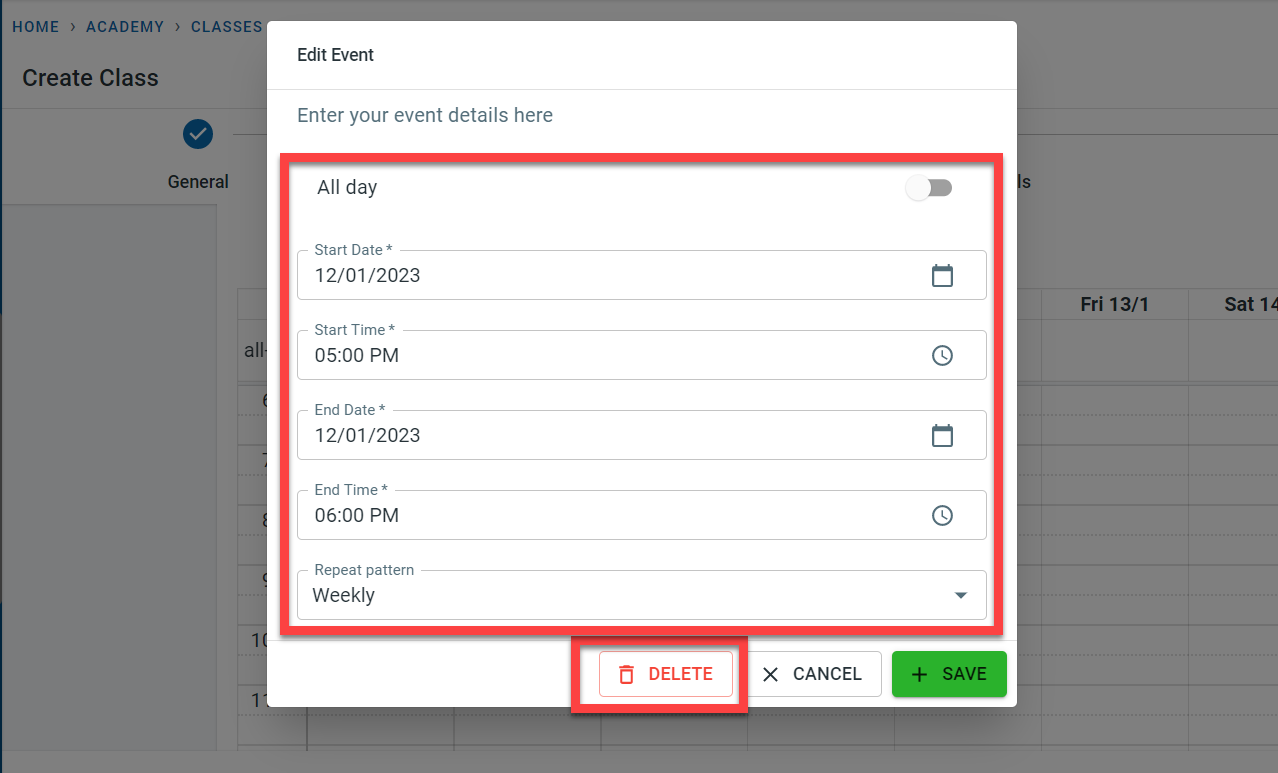
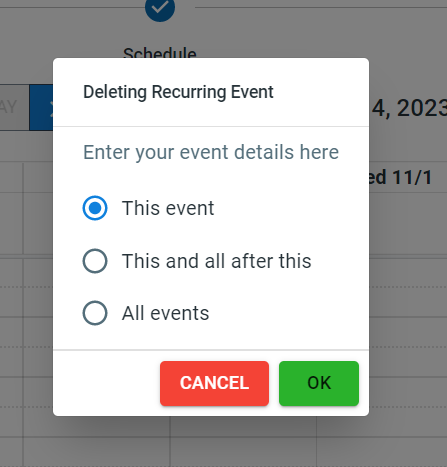
If a particular session is to be deleted or if all sessions after the selected session are to be deleted or to delete all sessions, click on the “Delete” Button.
Trial details
This section is used to define the trial sessions offered to new students.

If trial sessions are offered for the class, activate the “Trial available” field.
It is necessary to specify how many trial sessions are offered for every new student who wants a trial in the “Number of Trial Sessions” field.
If the trial is free, activate the “Is trial Free” field. If this field is activated, no trial fees can be added to the fee setting for the class.
To limit the number of trial students who can attend each session, activate the “Is Trial Capacity” field and enter the number of trial students who can attend a session in the “Capacity” field.
“Is Trial capacity subset of class capacity” is used to define whether the trial student attending the session is considered to be part of the main class capacity defined.
Example: the class capacity is 10. If the trial capacity is a subset of class capacity then when a trial student attends a session there will be space only for 9 other students to attend the session.
If the trial capacity is not a subset of the class capacity then even when a trial student attends the class, the main class capacity is still 10.
Settings
In order to record the actual in and out times for the students in attendance, activate the “Record time in/out” field. If this is not activated it is possible only to record if the student was present or absent for the session. This field value at the class level is copied from the academy setting but can be overwritten at the class level.
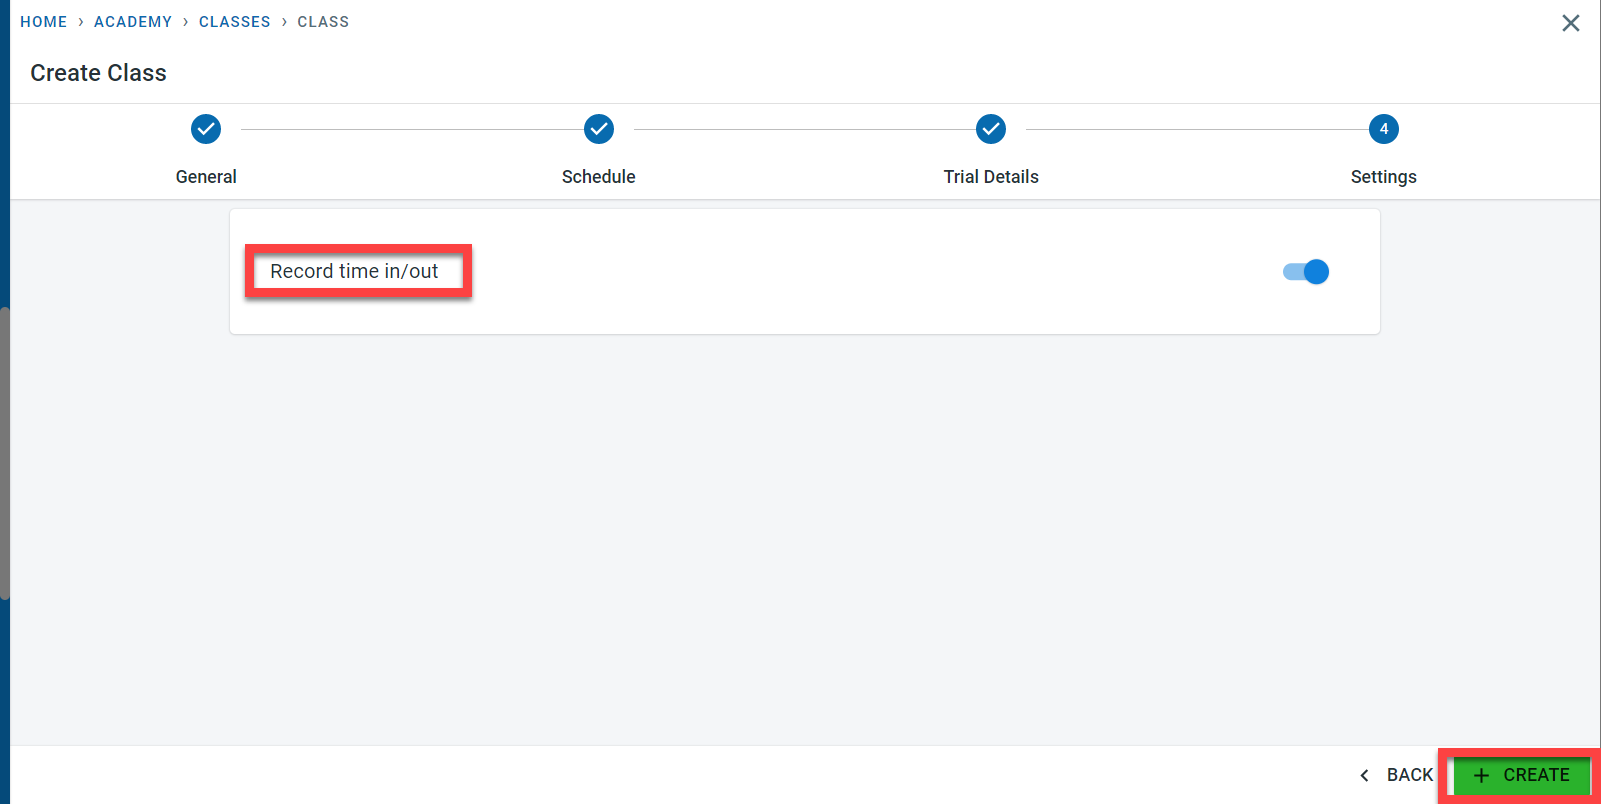
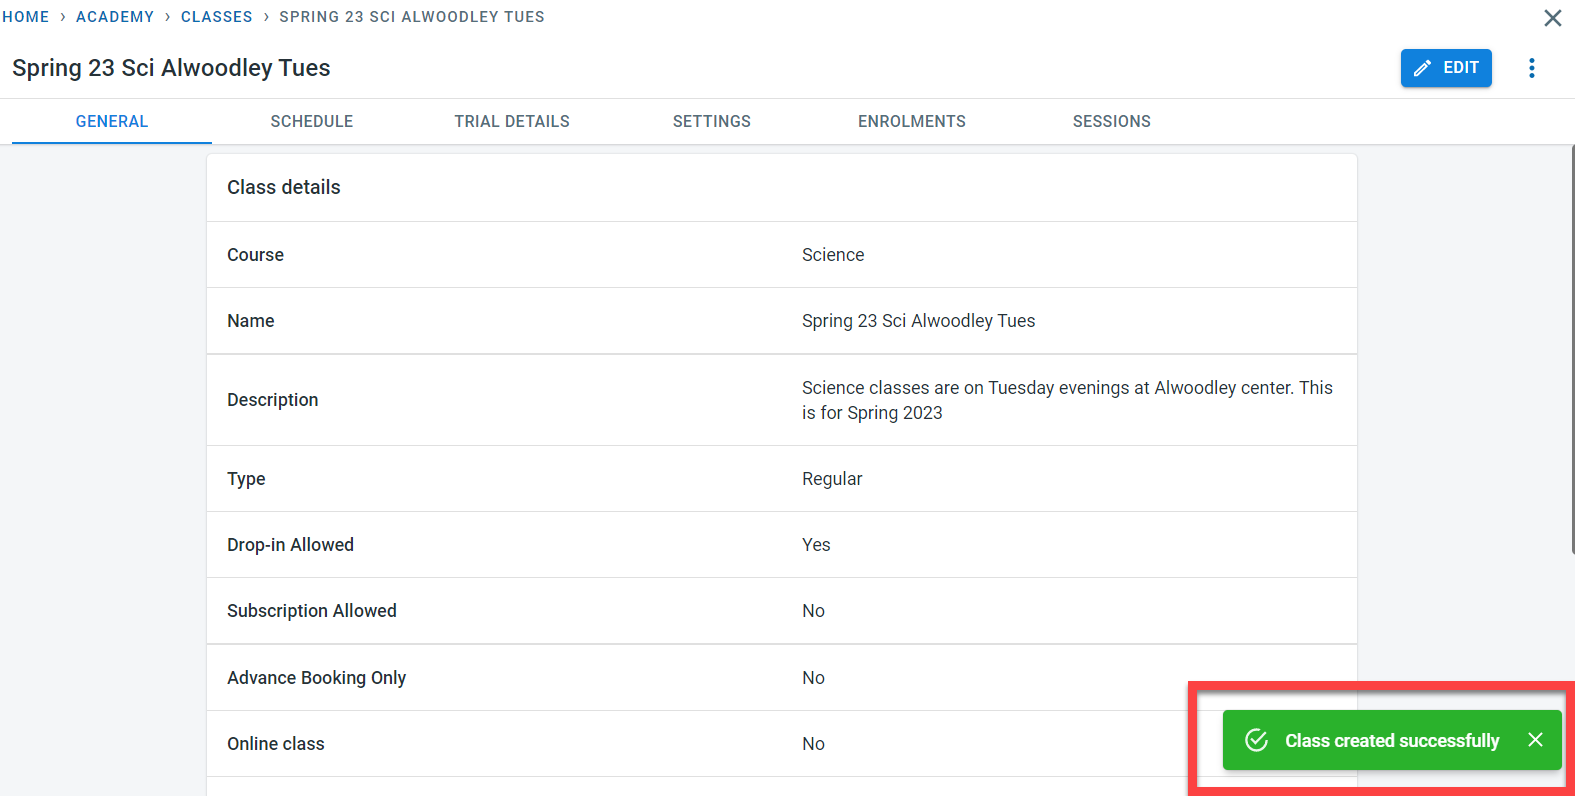
Click on “Create” to save the class. A success message will be displayed only the class is created.
Sessions
Once the class is created, click on the “Sessions” tab. Over here it is possible to see all the individual sessions created for the class. For each session, it is possible to see the total spaces and the space available for each of the sessions along with the trial reservation space and trial space available.
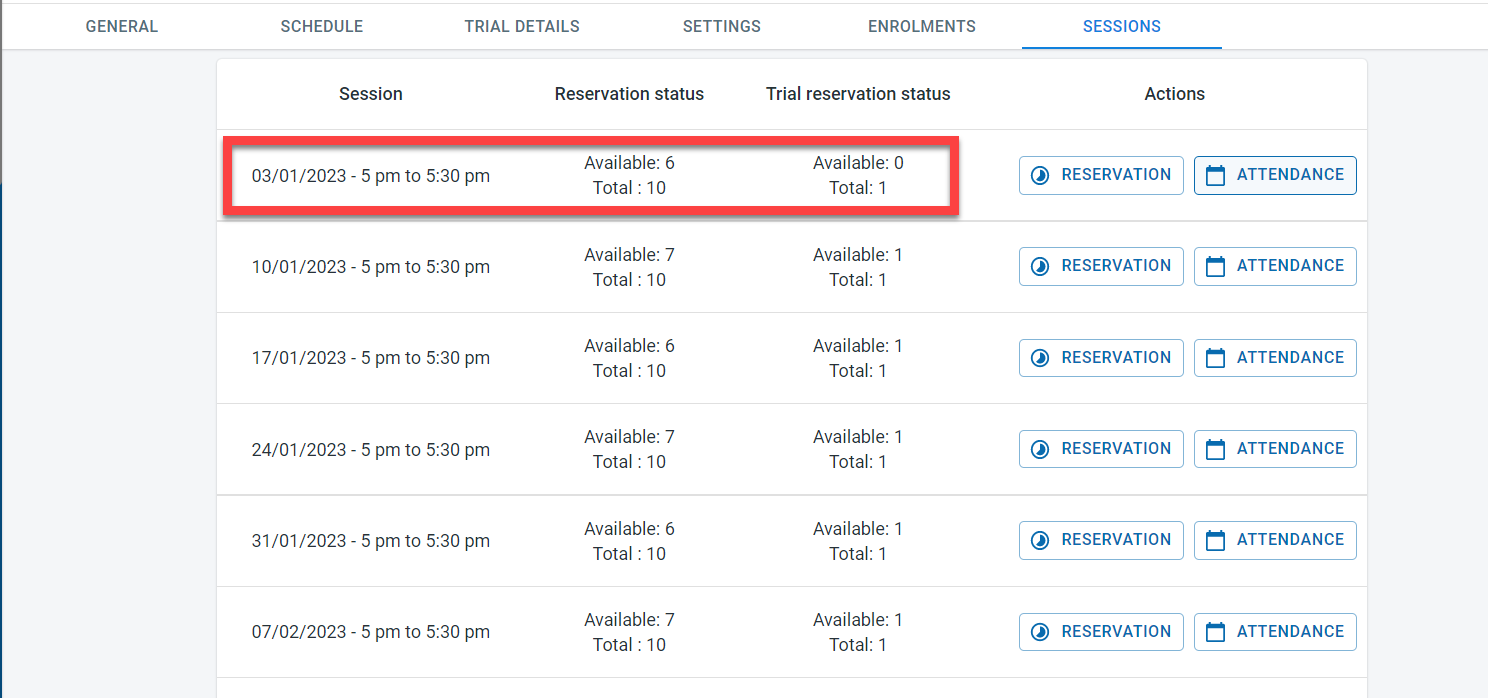
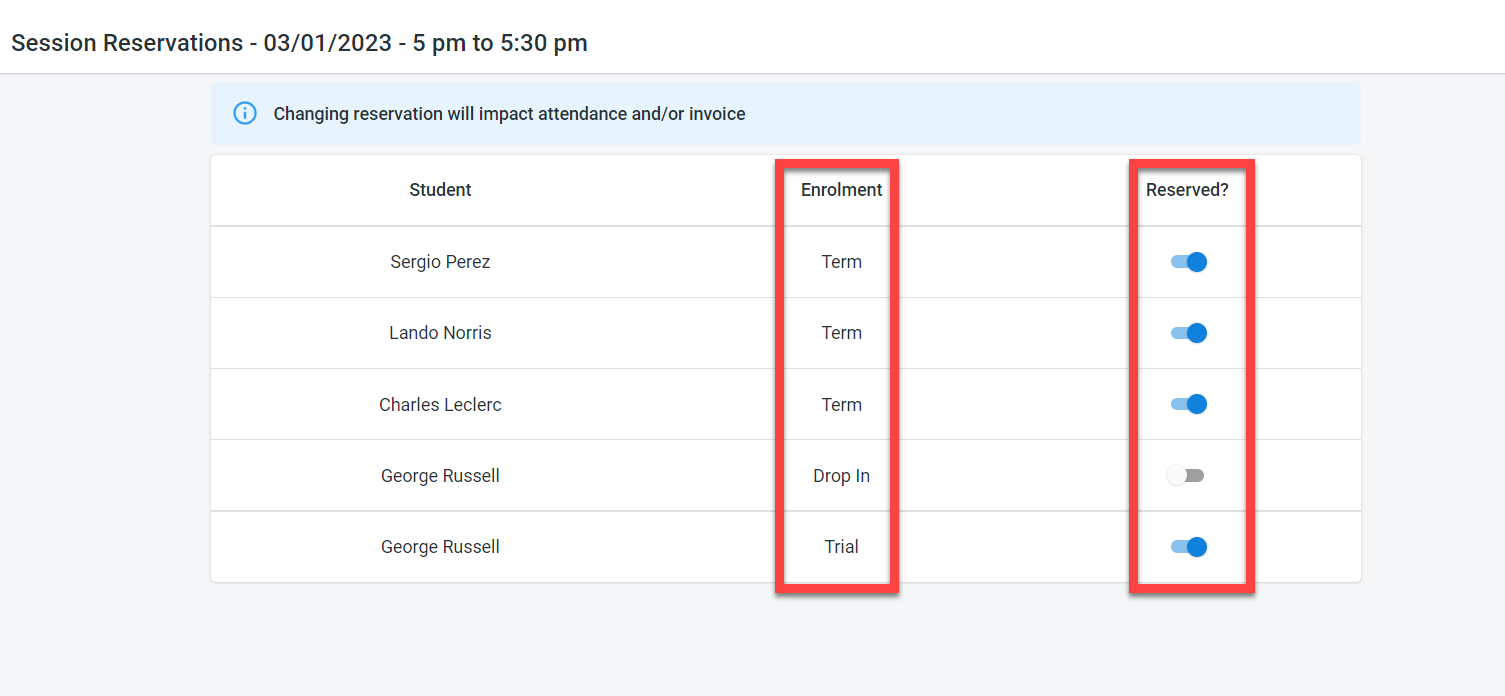
By clicking on the reservation button next to the session, it is possible to view the students who have enrolled in the session along with the enrolment type per student. It is possible to amend the reservation for the student for the session from this screen.
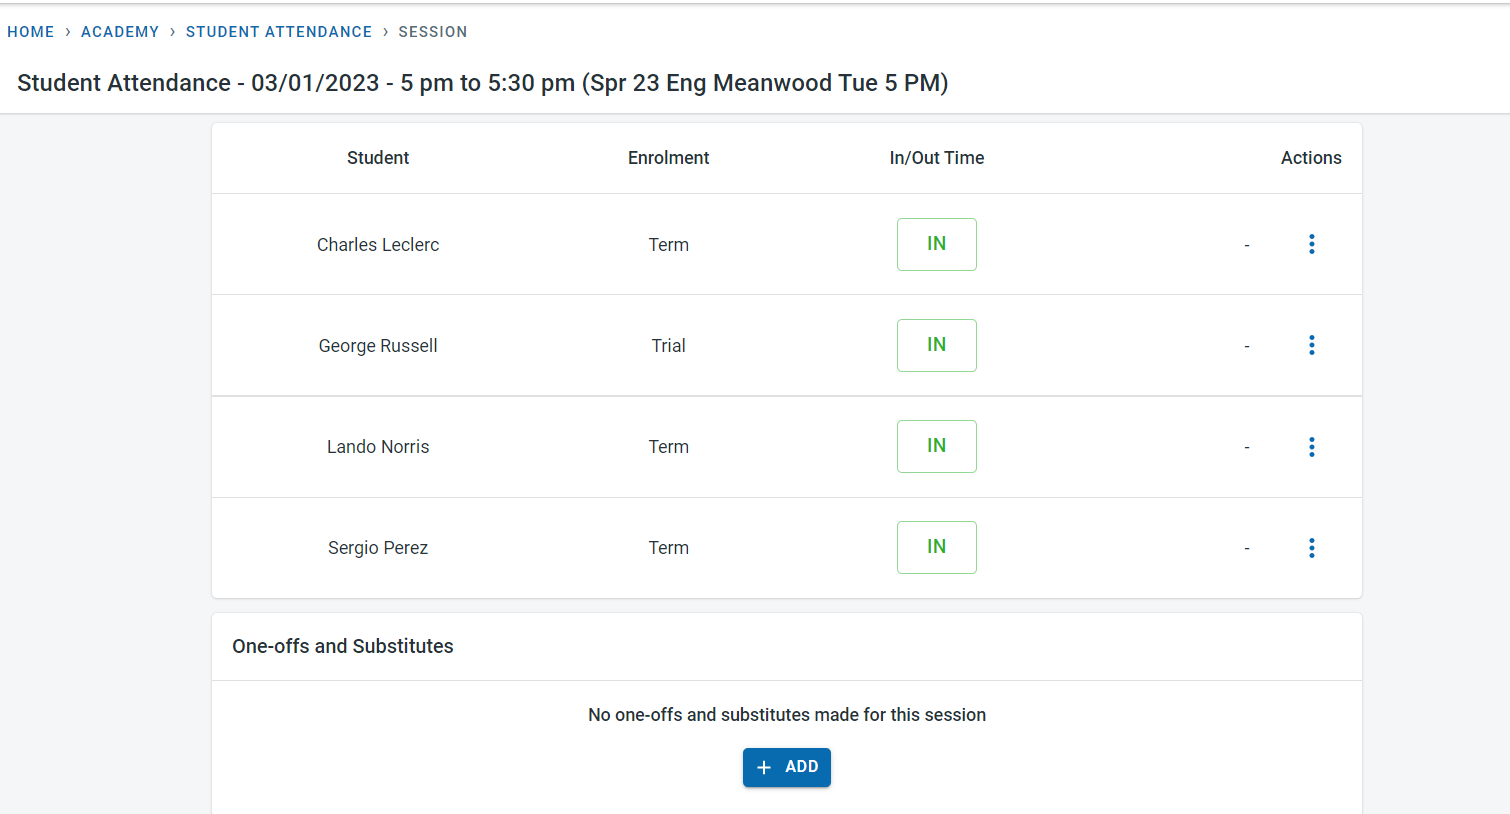
By clicking on the attendance button next to the session, it is possible to navigate to the attendance screen for the session.
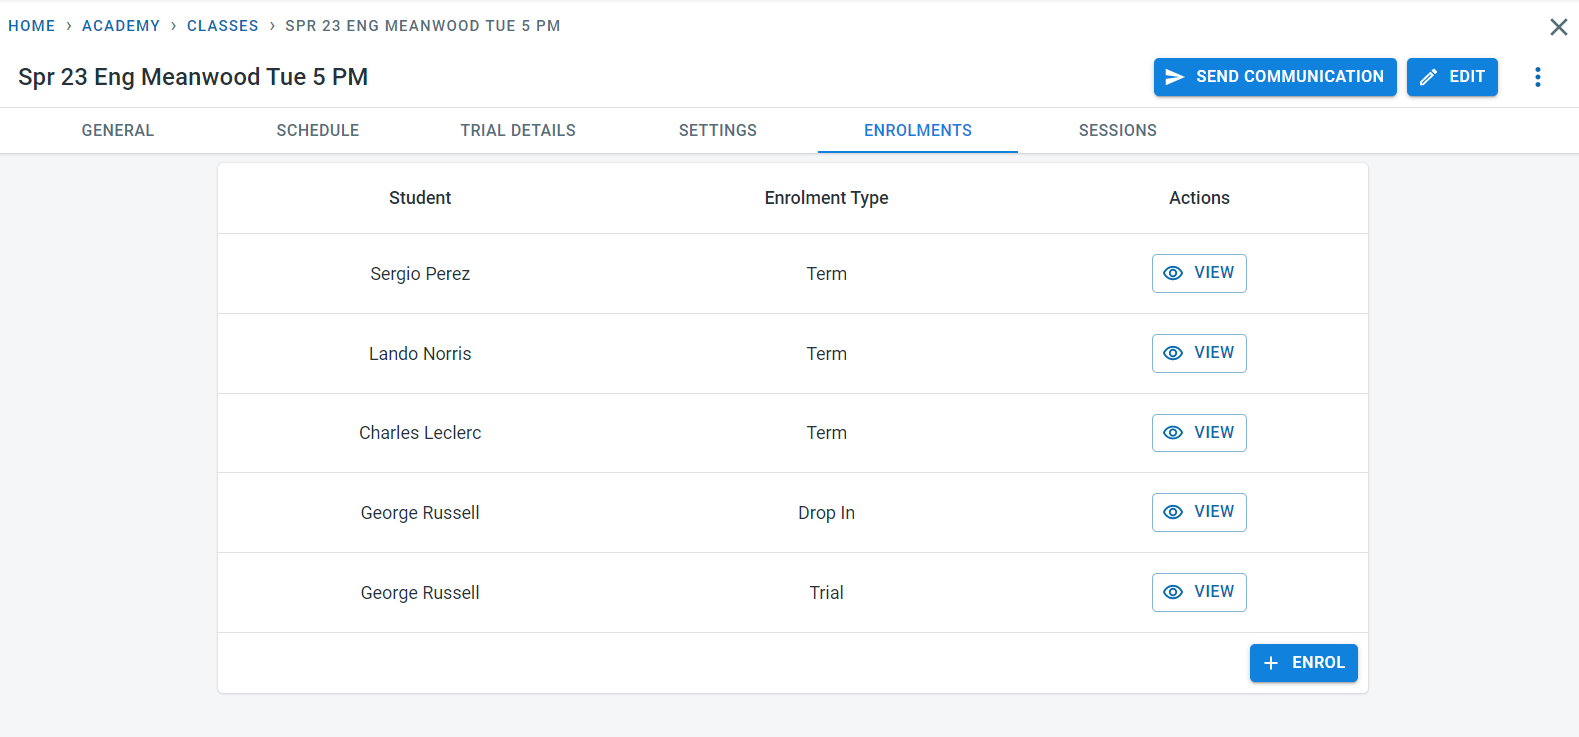
Enrolments
From the enrolments screen, it is possible to view the students who have enrolled in the class.
More details on enrolments are available in the Student Management - enrolment section