It is possible to send email communication to students and associates with a valid email address.
Sending an email communication
In the communication screen, Select “Email” to start an email message.
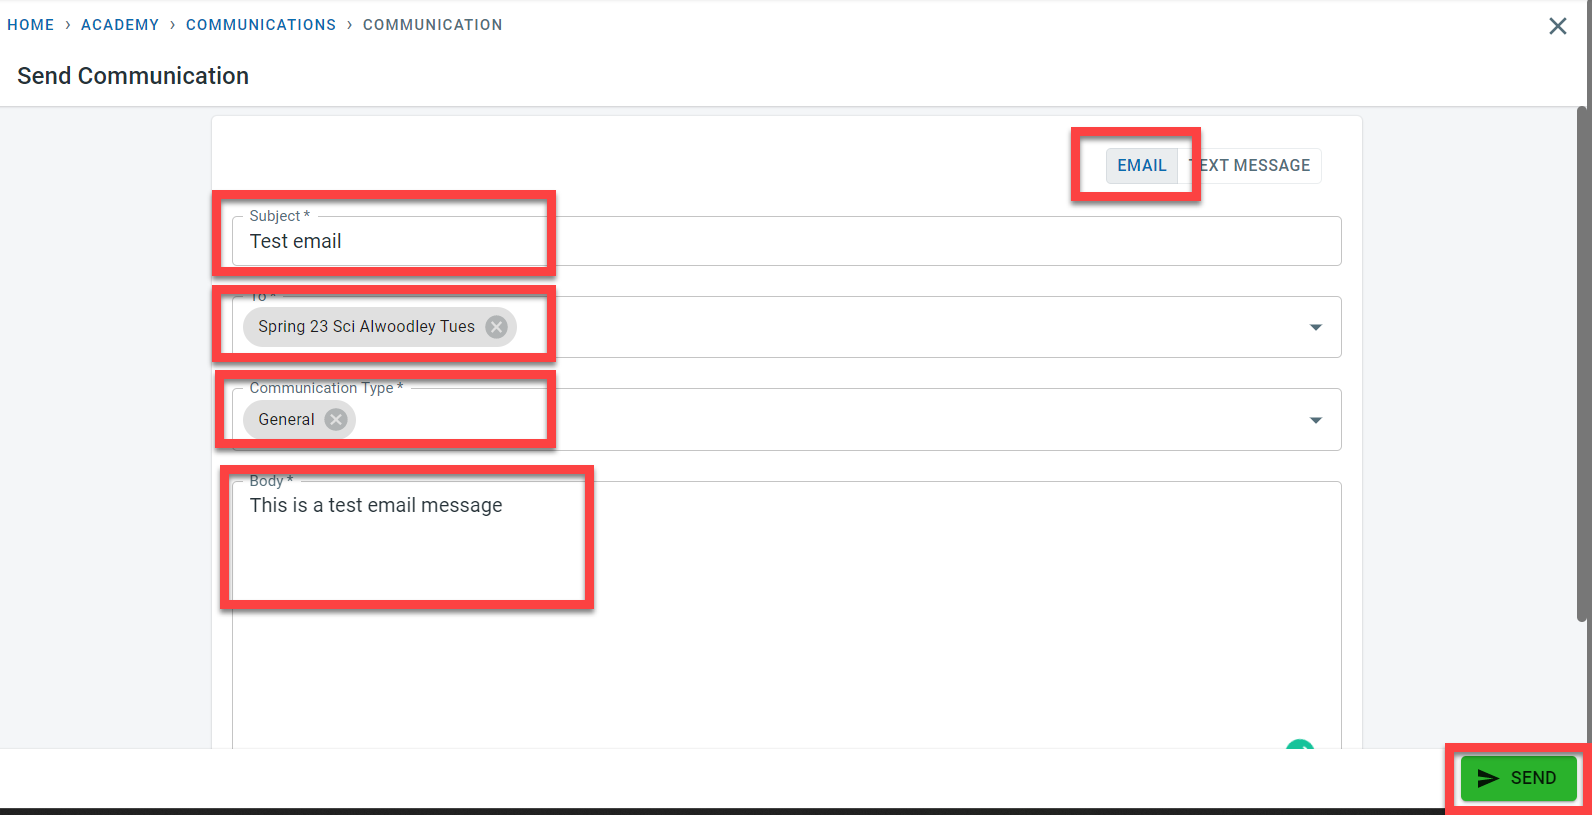
Enter a subject for the email.
In the “To” column enter the class(es) or student(s) to whom the email message has to be sent to
In the “Communication type”, select either General, parent or carer, emergency or finance relationship to select the right contacts to send the email communication to.
Enter the message to be sent.
Click on Send.
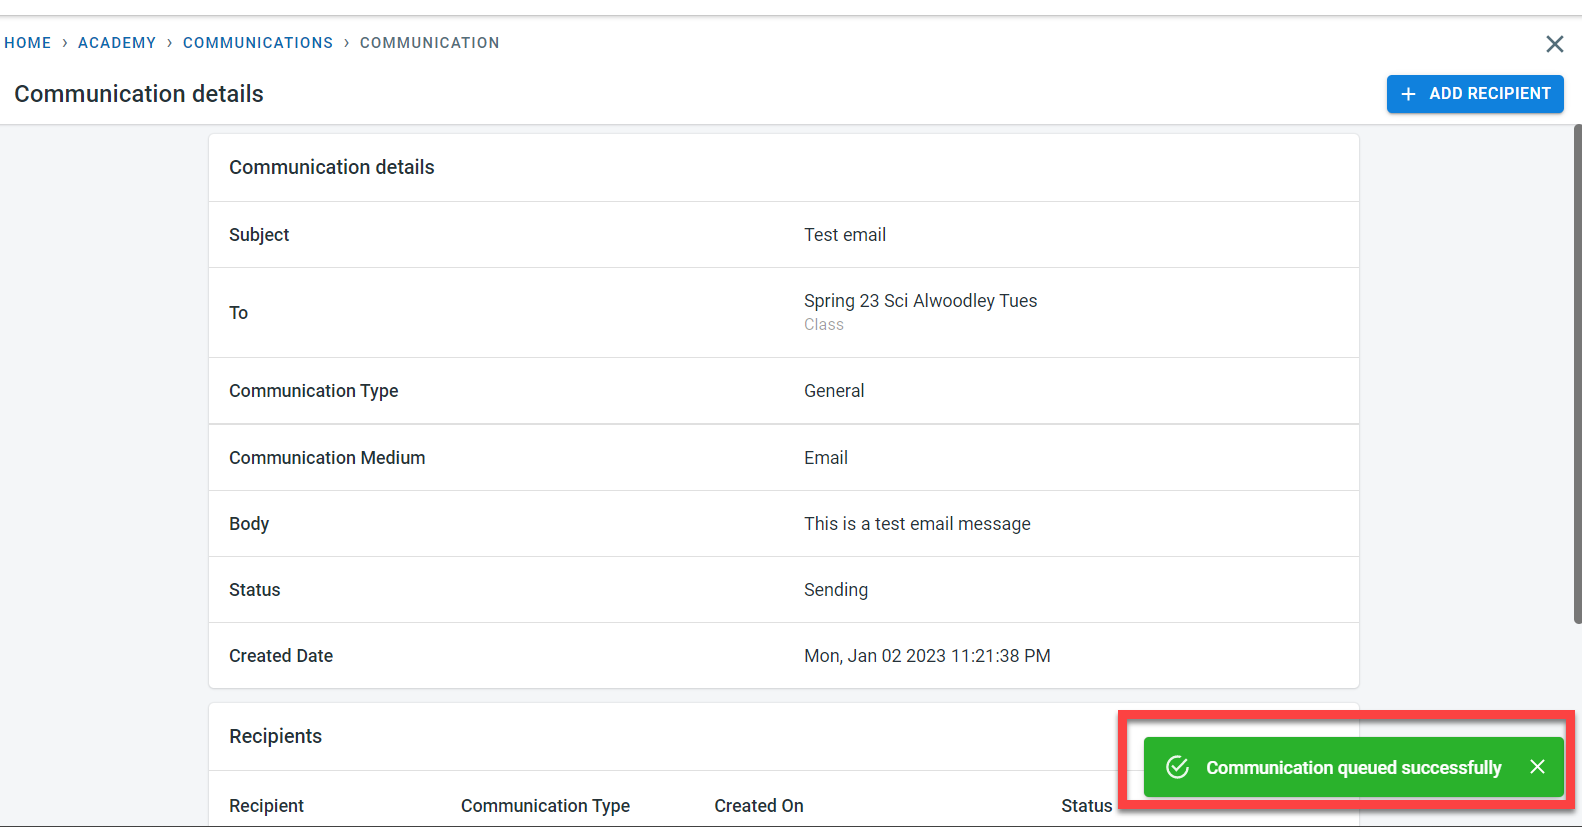
A confirmation message will be displayed to confirm that the email has been queued to be sent to the intended recipients
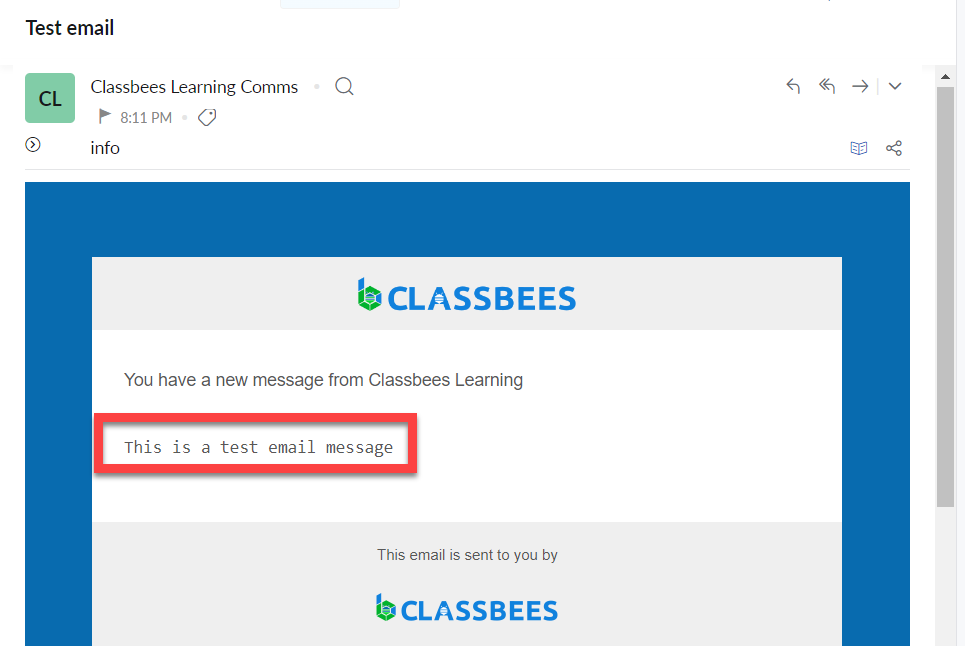
A sample of the email sent to the recipients is shown below
Status of email and further processing
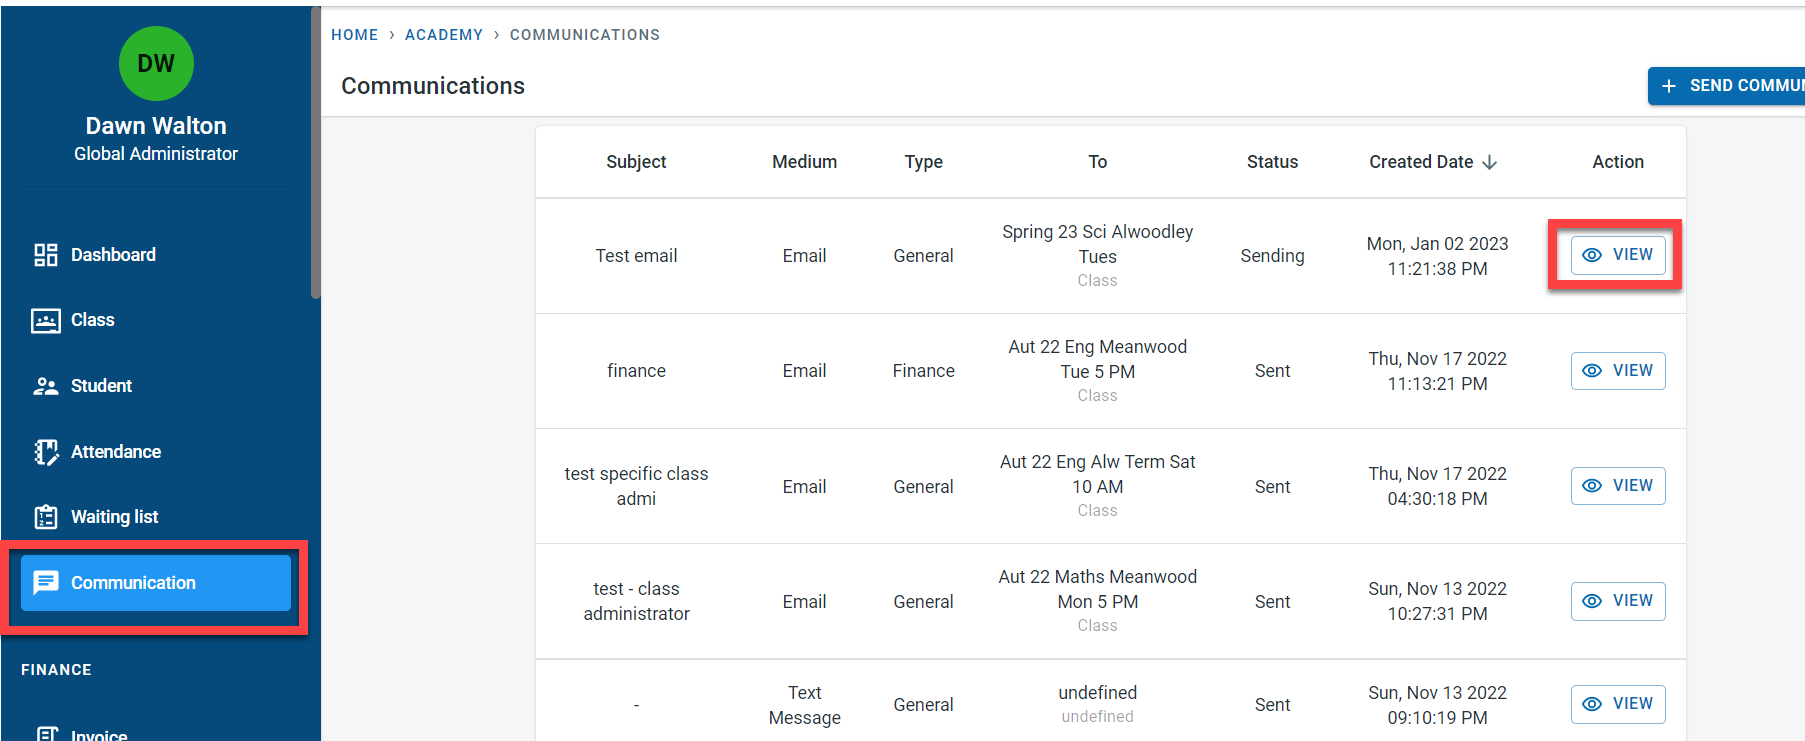
To check the status of the email sent to the recipients select the “View” button next to the email communication
At the bottom of the communication, the recipient’s name is displayed - below the recipient’s name is the student name linked with the recipient. The status per recipient is displayed.
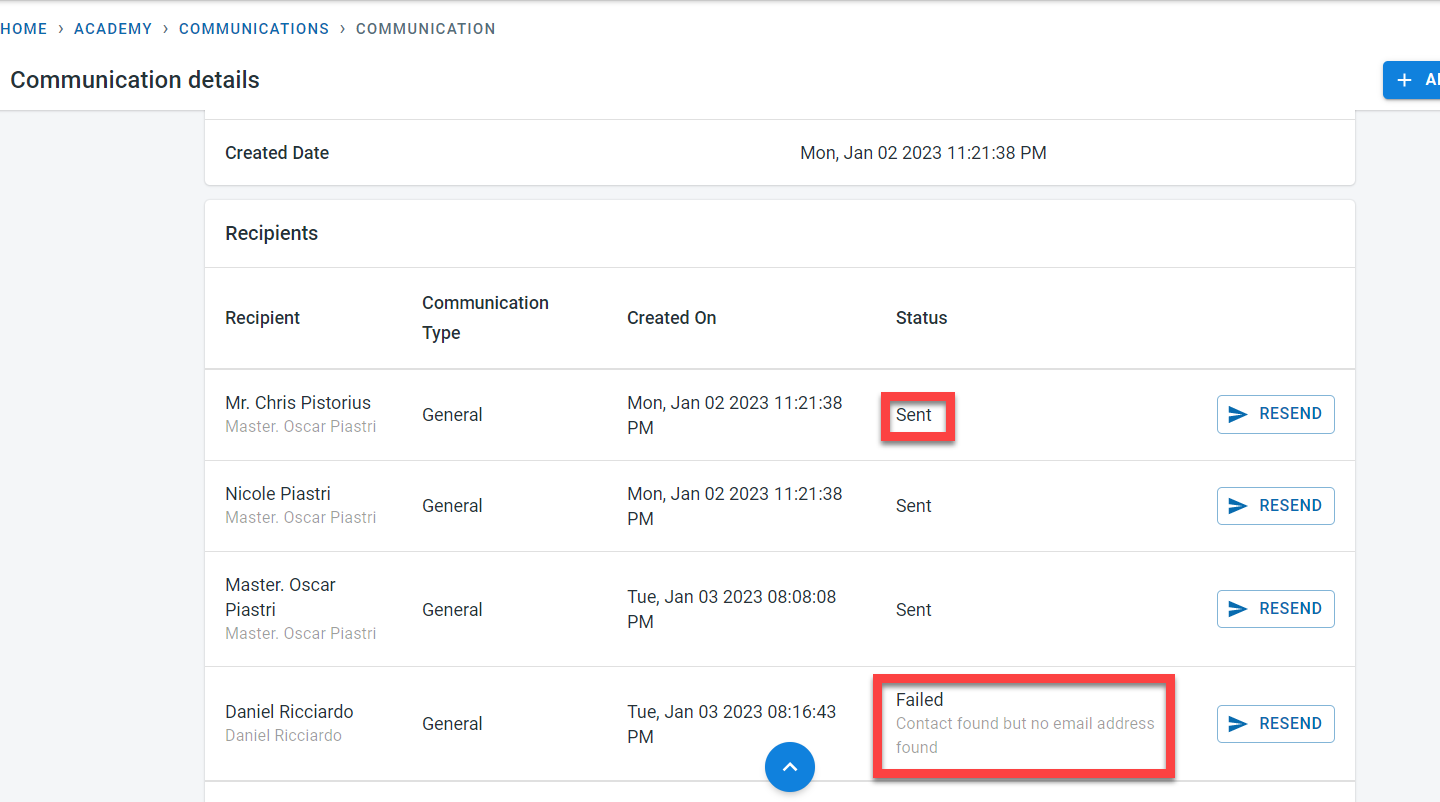
The possible statuses for each recipient are
- Sending - the manage system is in the process of sending the message to the recipient
- Sent - the email communication has been sent to the recipient
- Failed - Email cannot be sent to the recipient
For the failed status, the reason for failure is displayed below the status. Two of the most common reasons are
- There are no contacts that could be found for the communication type selected. For example, an email is sent to all the emergency contacts within a class but a particular student has no associates with the emergency relationship.
- There is no valid email address for a contact found. In this case, for the same email example from above, there is a contact for the student who has been set as an emergency contact but there is no email address linked to the contact.
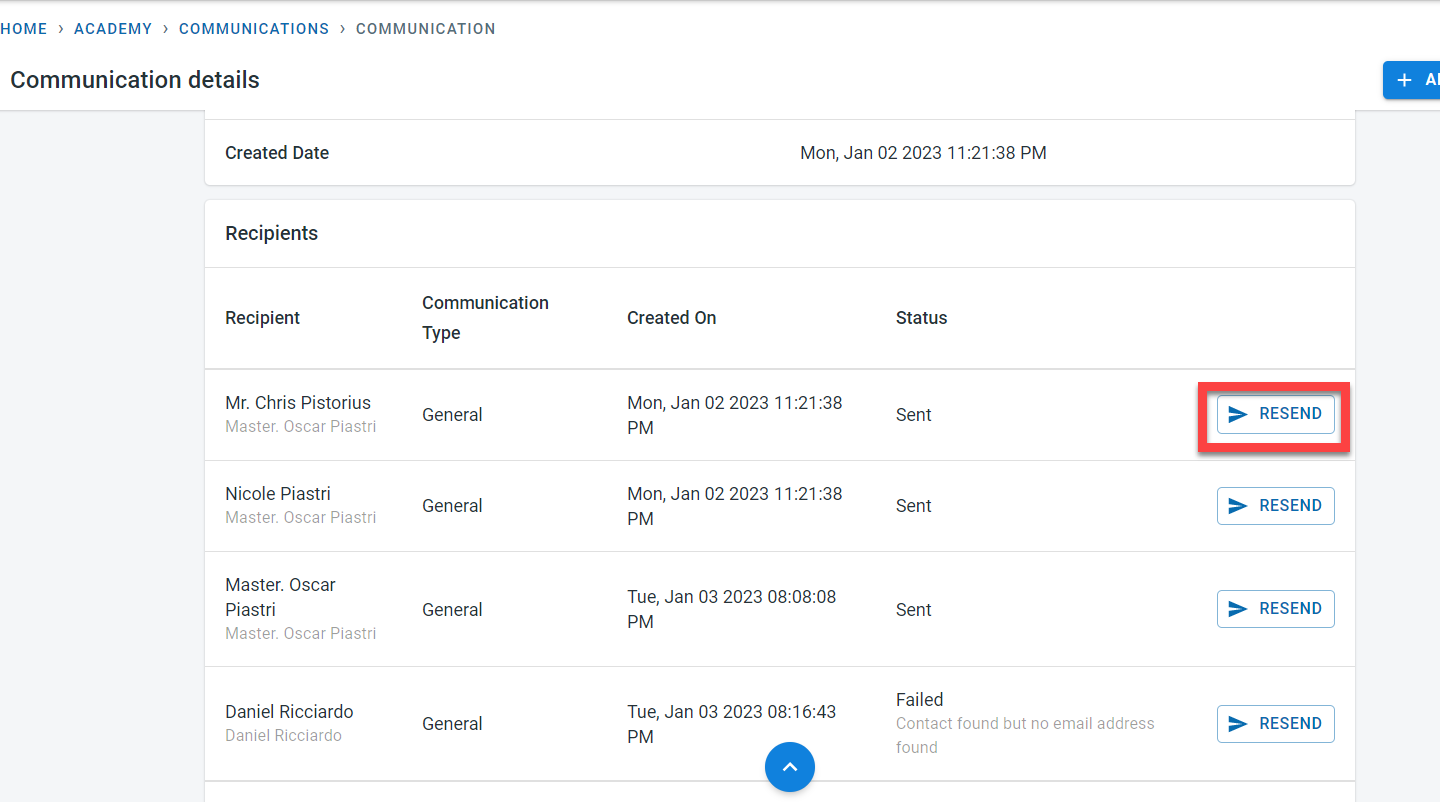
It is possible to resend an email to a particular recipient by clicking on the “Resend” button next to the recipient
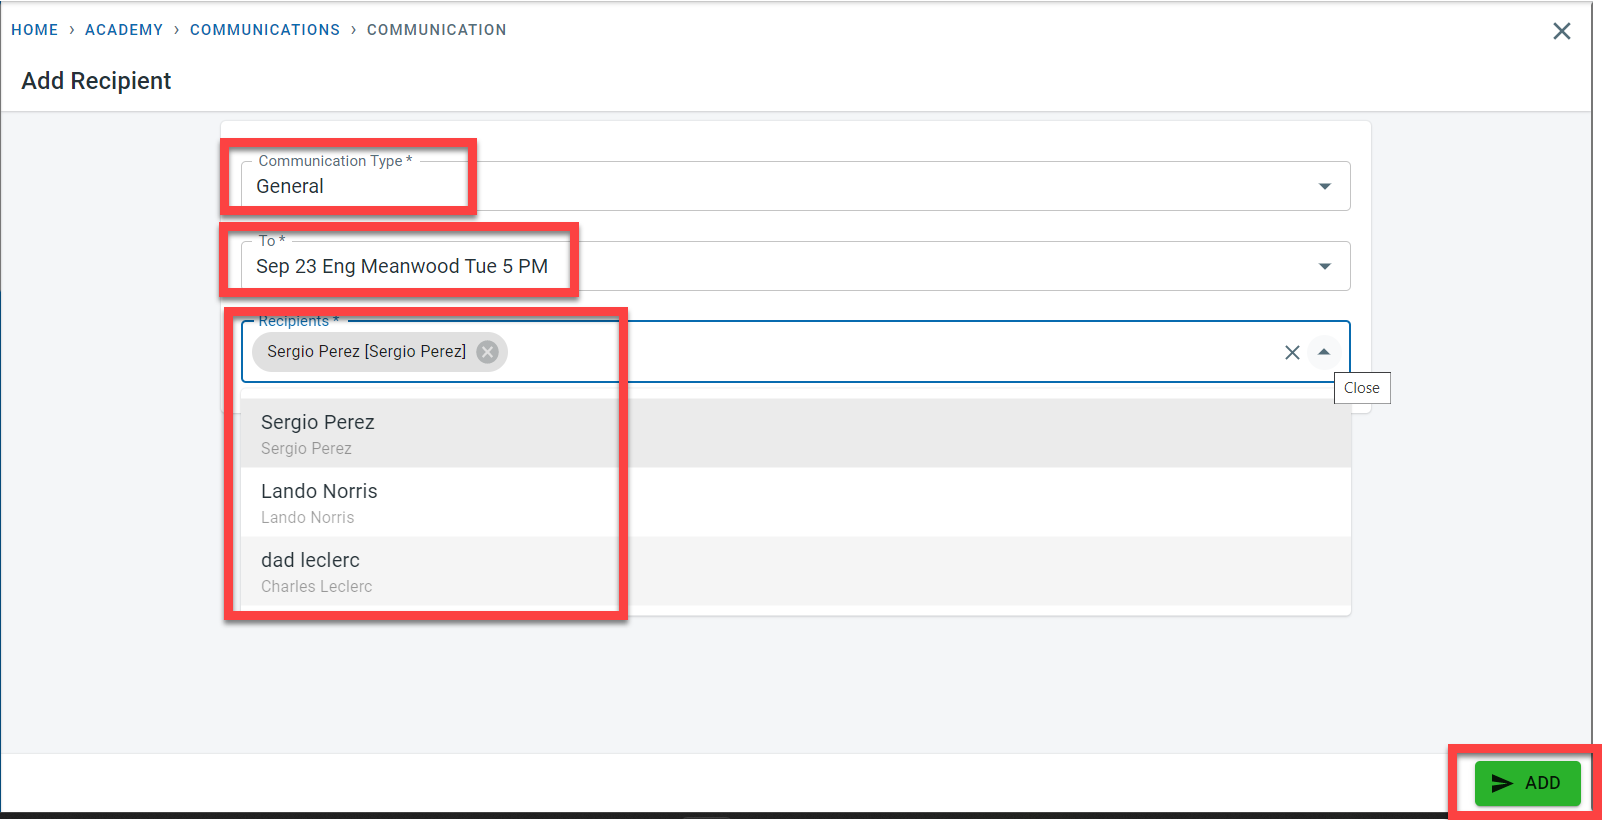
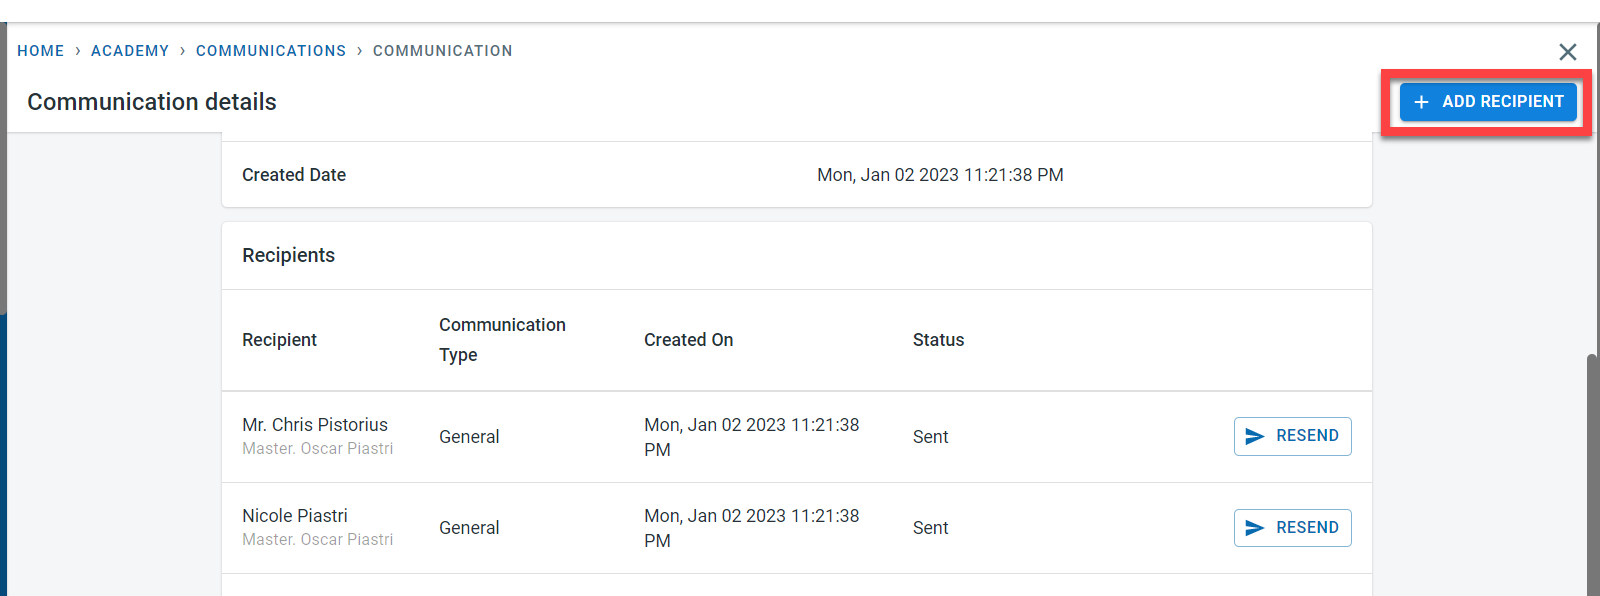
For existing communication, it is possible to add new recipients. Click on “Add recipient” at the top of the communication screen
In the add recipient screen, select the communication type. In the “To field”, select a class or individual student. In the Recipient field, it is possible to select individual or multiple recipients which are displayed based on the selection in the “To field”
Click on “Add” to send the email communication to the newly added recipients