You can add as many users to your Classbees manage account as you need to, and adjust their access and editing permissions accordingly.
Delete a user from Classbees Manage
Add a new user
Users with administrative rights can add other team members to the academy. Multiple users can be added to the system. Also multiple roles can be assigned to one user.
There are four roles available in the system
-
Global Administrator - users with this role will have access to all functionalities in the system. The Global administrator can create and update the academy, term, venue, course, classes, students, record attendance, send communication, and can access all financial functionalities in the system.
-
Class Administrator - this role will be able to manage classes, students, and attendance. The class administrator can view the academy, term, venue, and course but cannot create or edit them. The class administrator cannot create classes but can clone classes. They can manage students, send communication from the system, and record attendance. These users will not have access to any finance-related functionality in the system.
-
Teacher - This role will be able to view the academy, term, venue, course, class, and student but cannot create or edit them. The teacher can only manage the reservation and attendance of students. Users assigned to teacher roles will not have access to any finance-related functionality in the system
Class administrator and teacher can be assigned to specific classes or all classes in the system
- Finance Administrator - this role has full access to finance features at the academy, course, class, and student level and read-only access to features that are needed to get to the finance features.
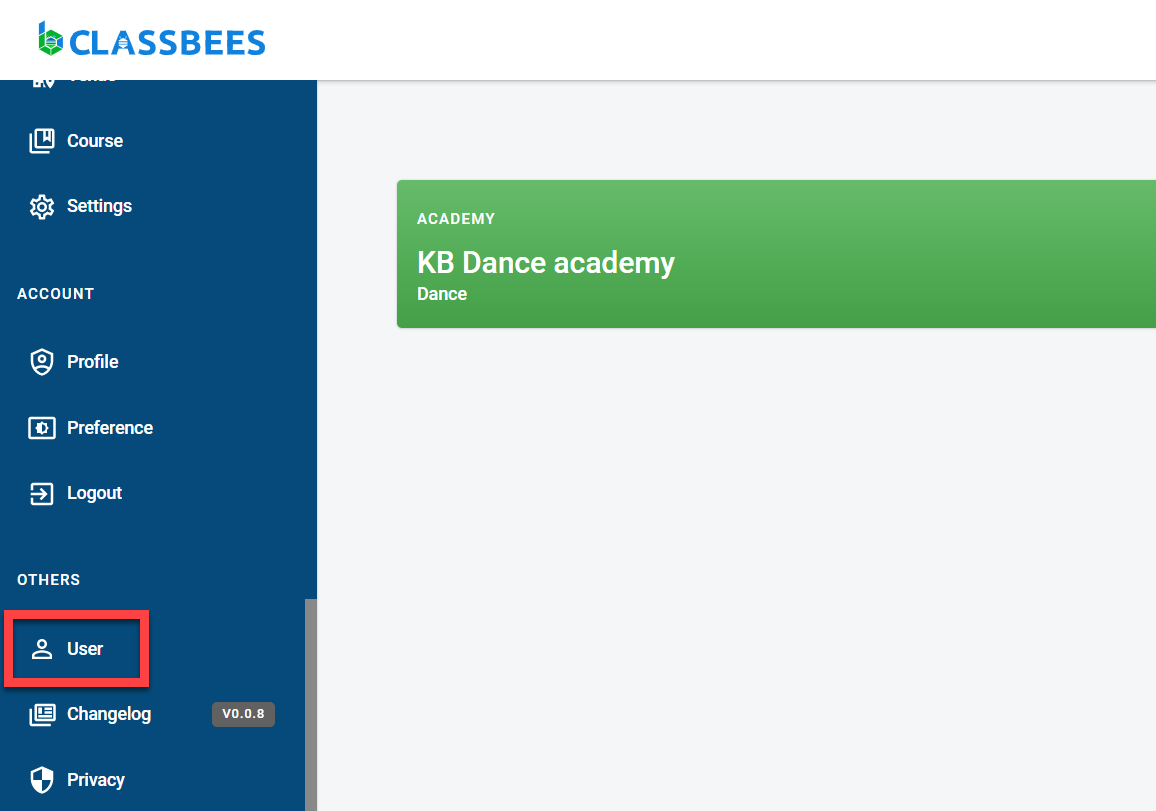
Navigate to the “User” section
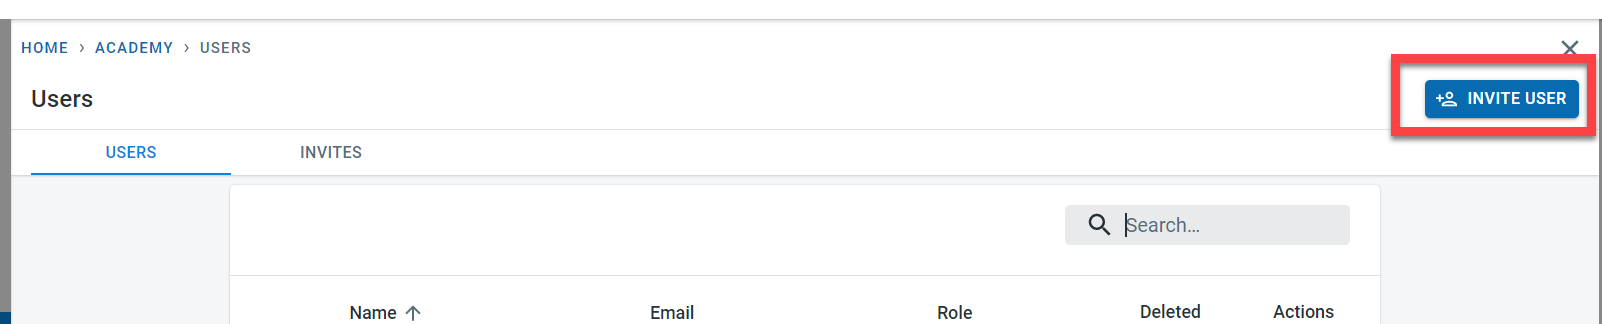
Click on “Invite User”
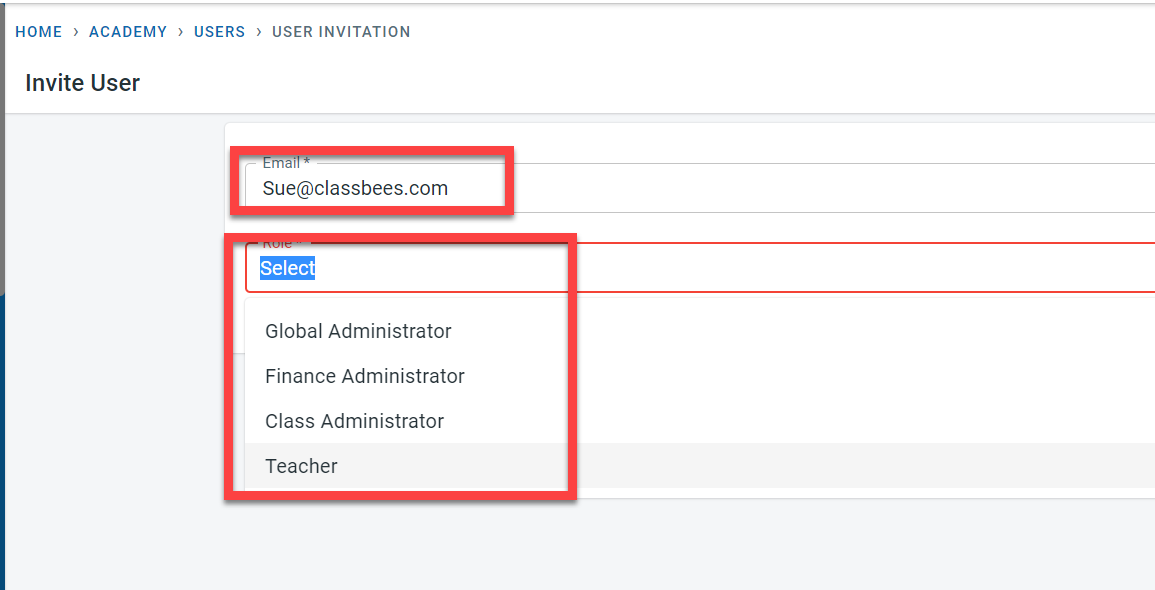
Enter the email address and the role to be assigned to the new user.

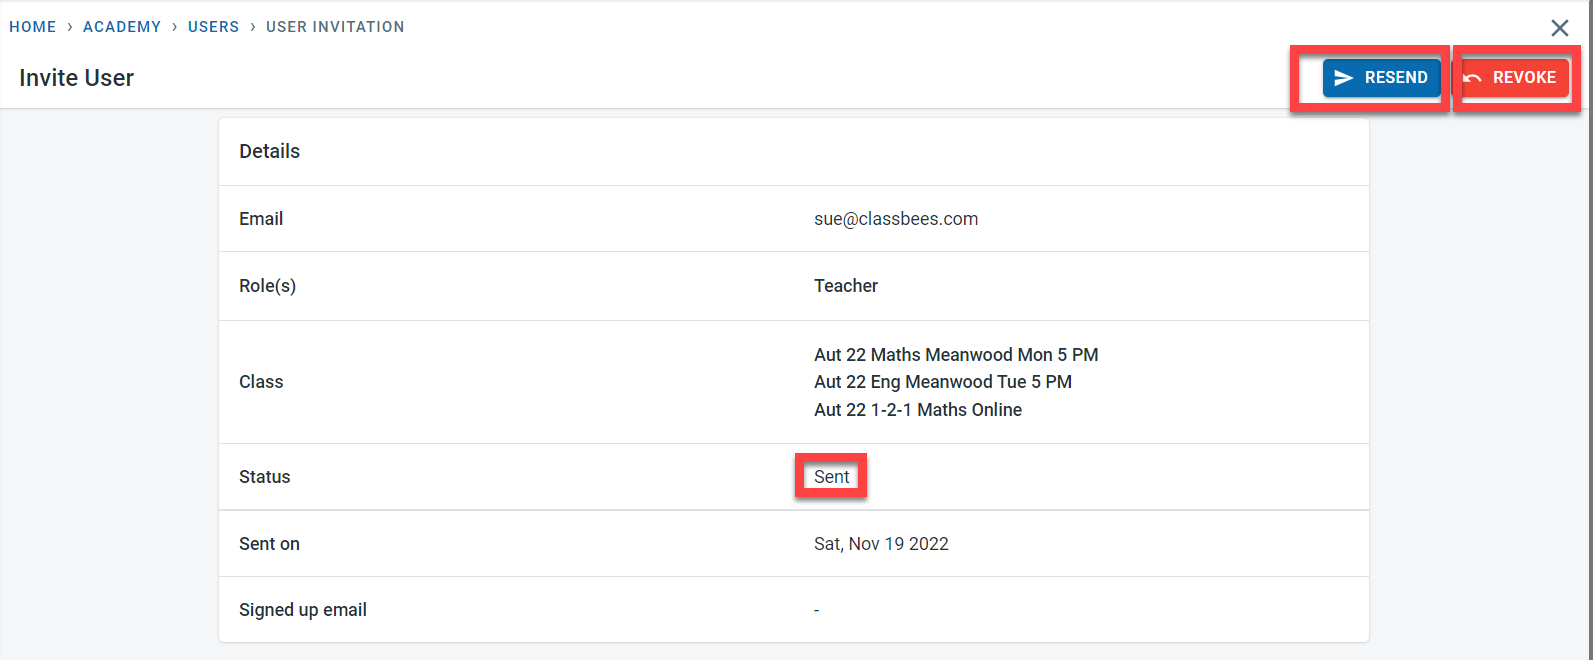
The status of the invites sent could be checked on the user screen
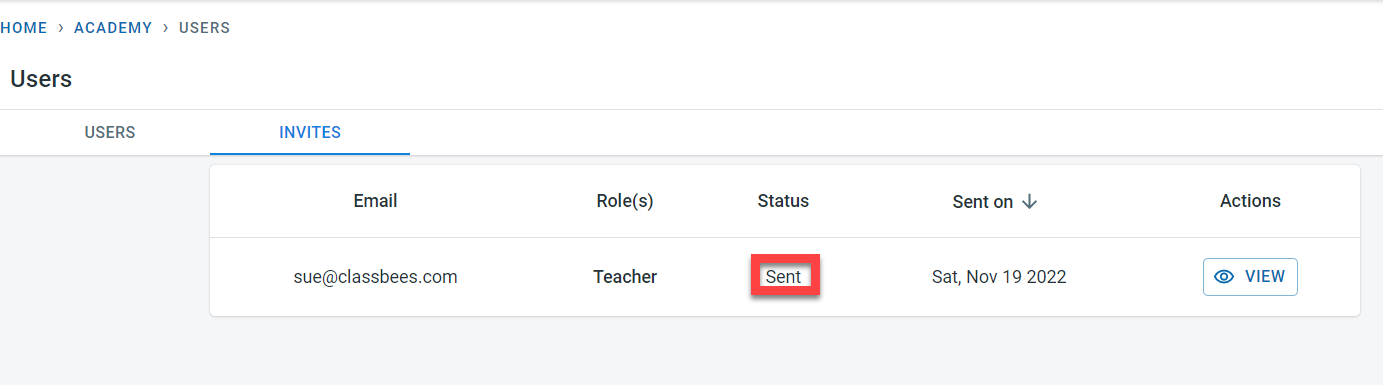
Click on “View” to see the details of the invite. The invite could be resent or revoked from this screen (before the user has signed up)
An invite is sent to the email specified
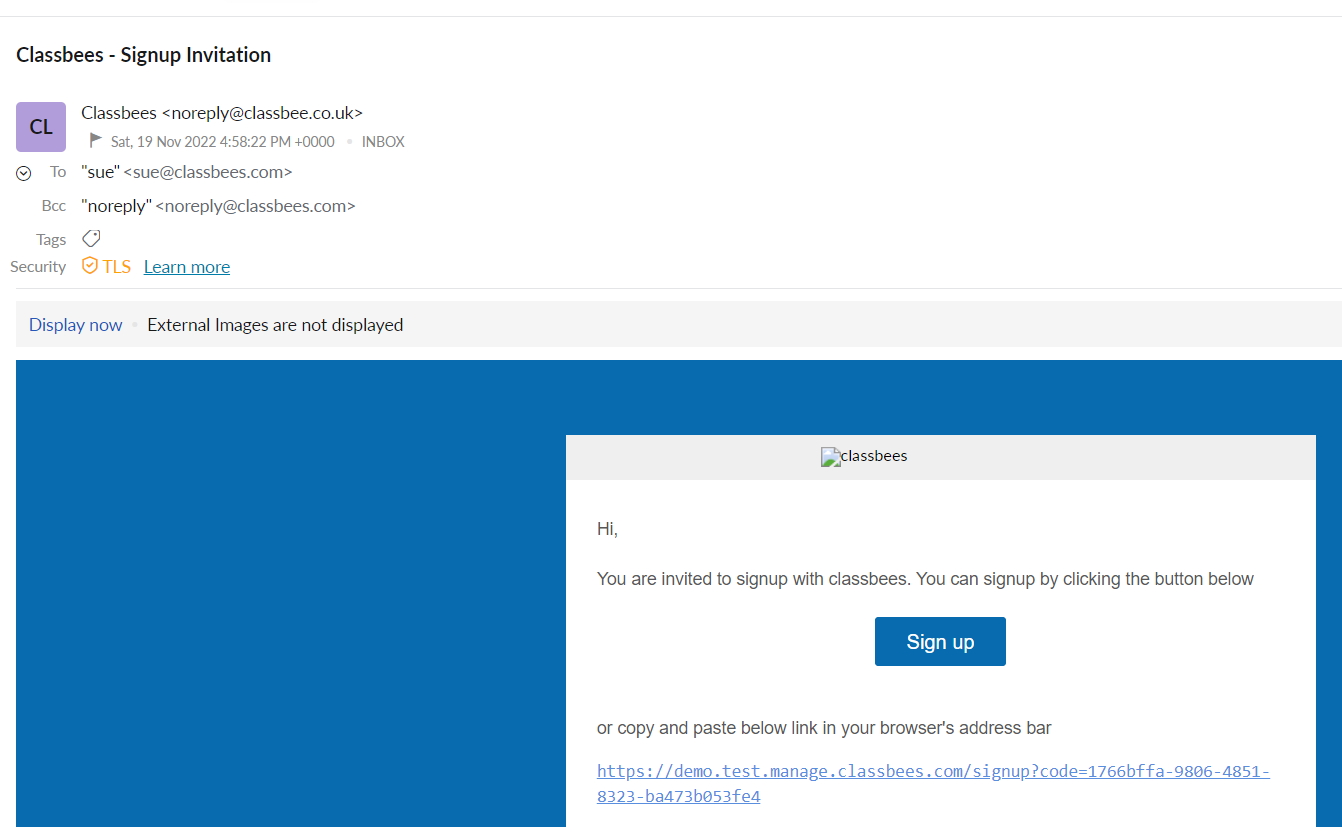
The newly invited user should click on “Signup” in the email to register
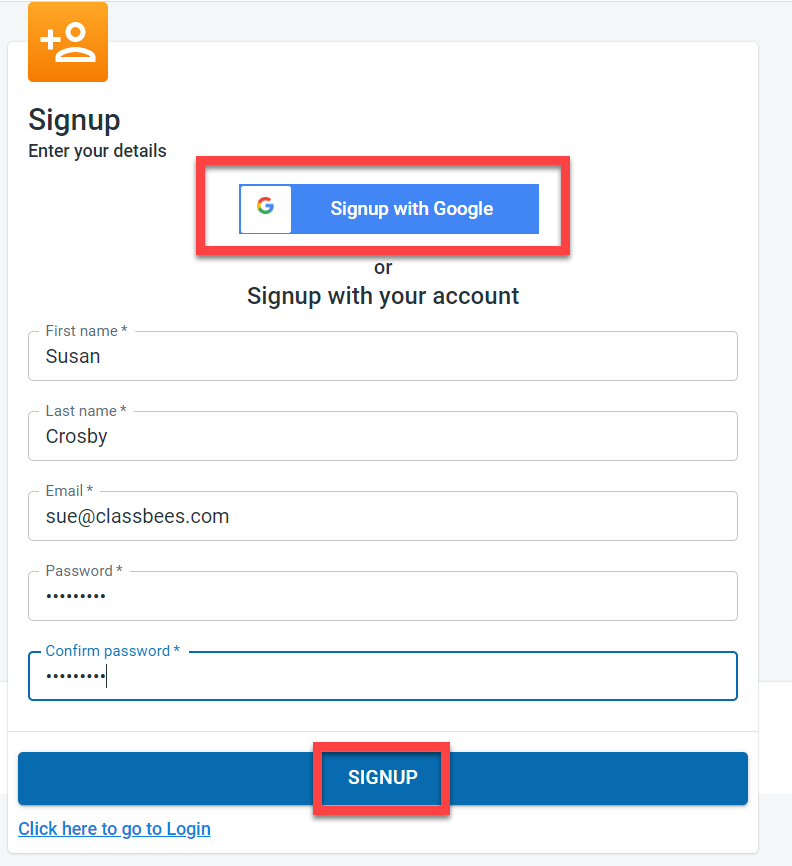
Signup could be done either using Google login details or the individual details could be entered to signup.
Once the user signs up, a confirmation email would be sent to the email address
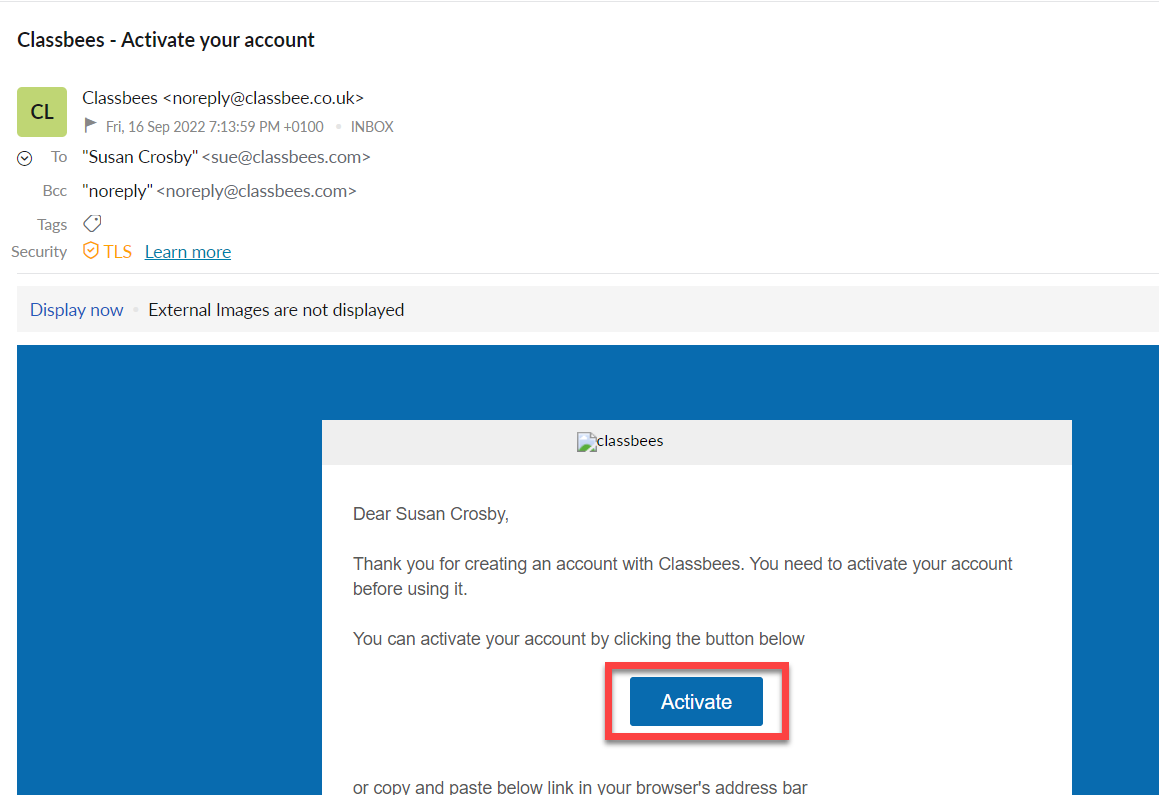
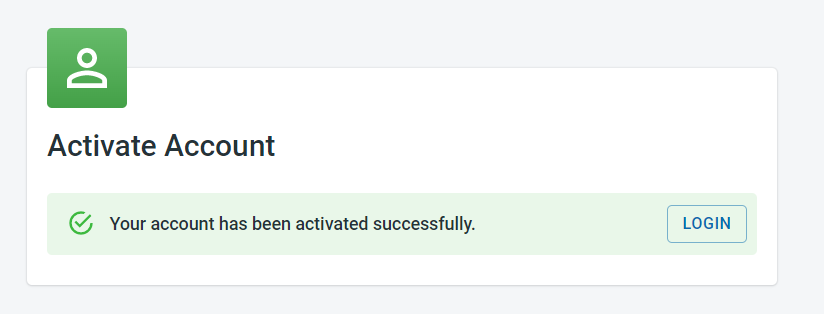
Once the user clicks on “Activate”, the user can login to access the system
Delete a user
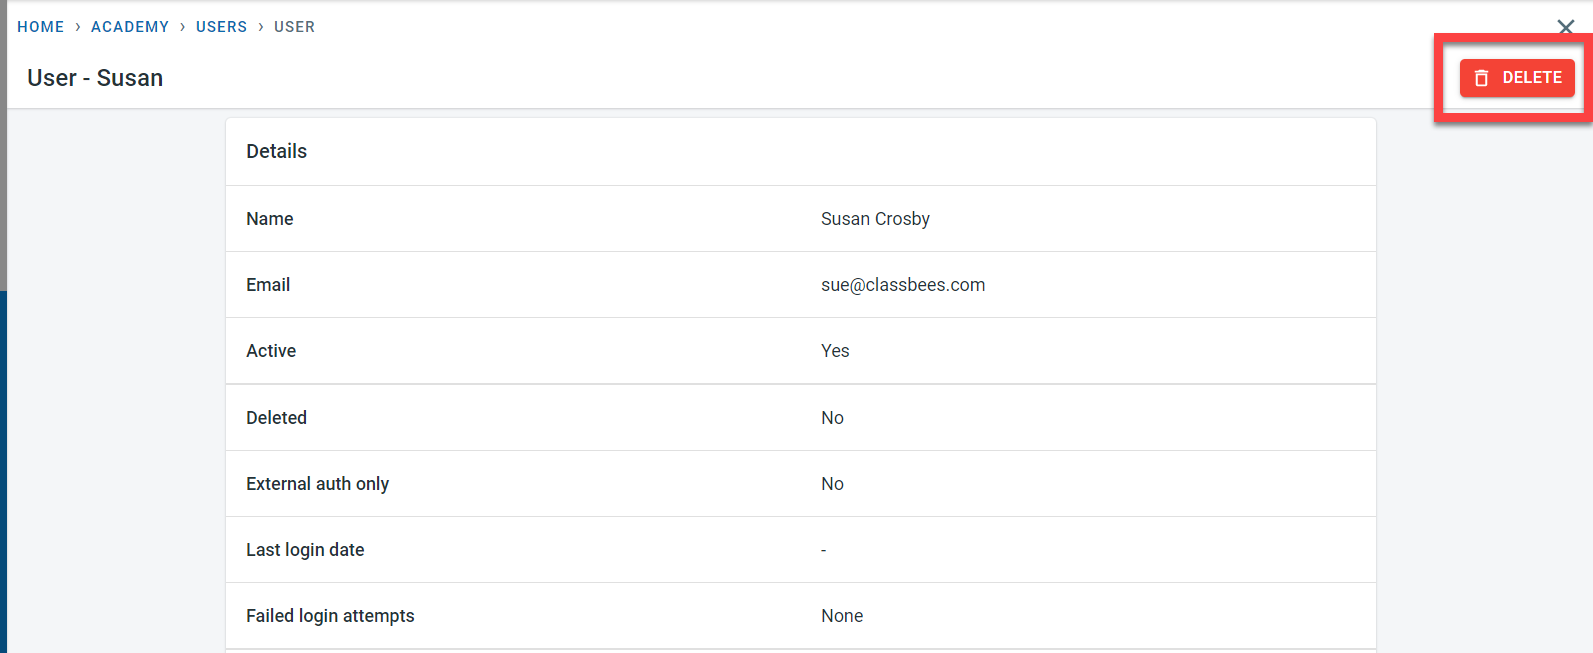
A user could be deleted anytime from the system. Navigate to the user tab. Click on View next to the user to go to the detail screen.Click on the “Delete” button.
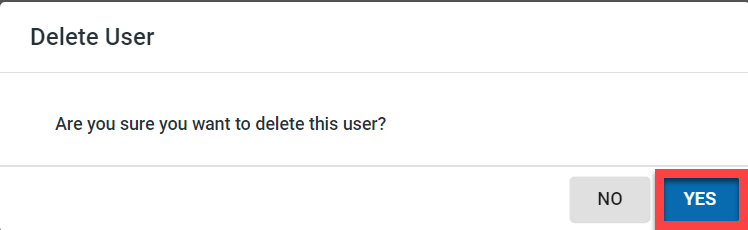
Select “Yes” in the pop-up to confirm the deletion of the user
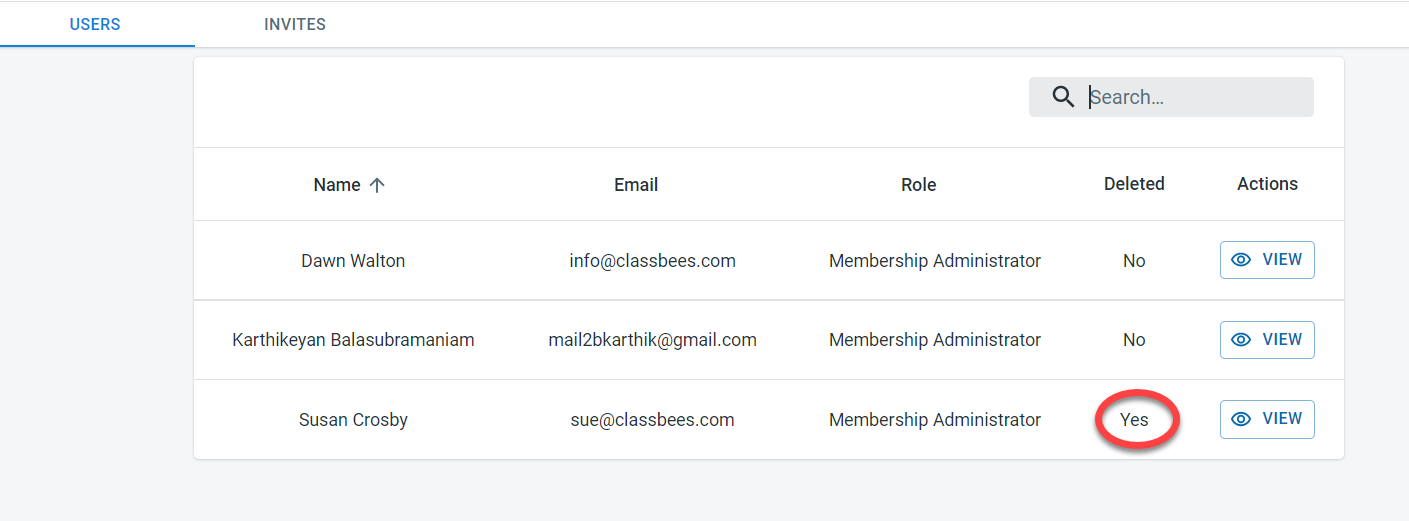
The user would be set to deleted status in the system
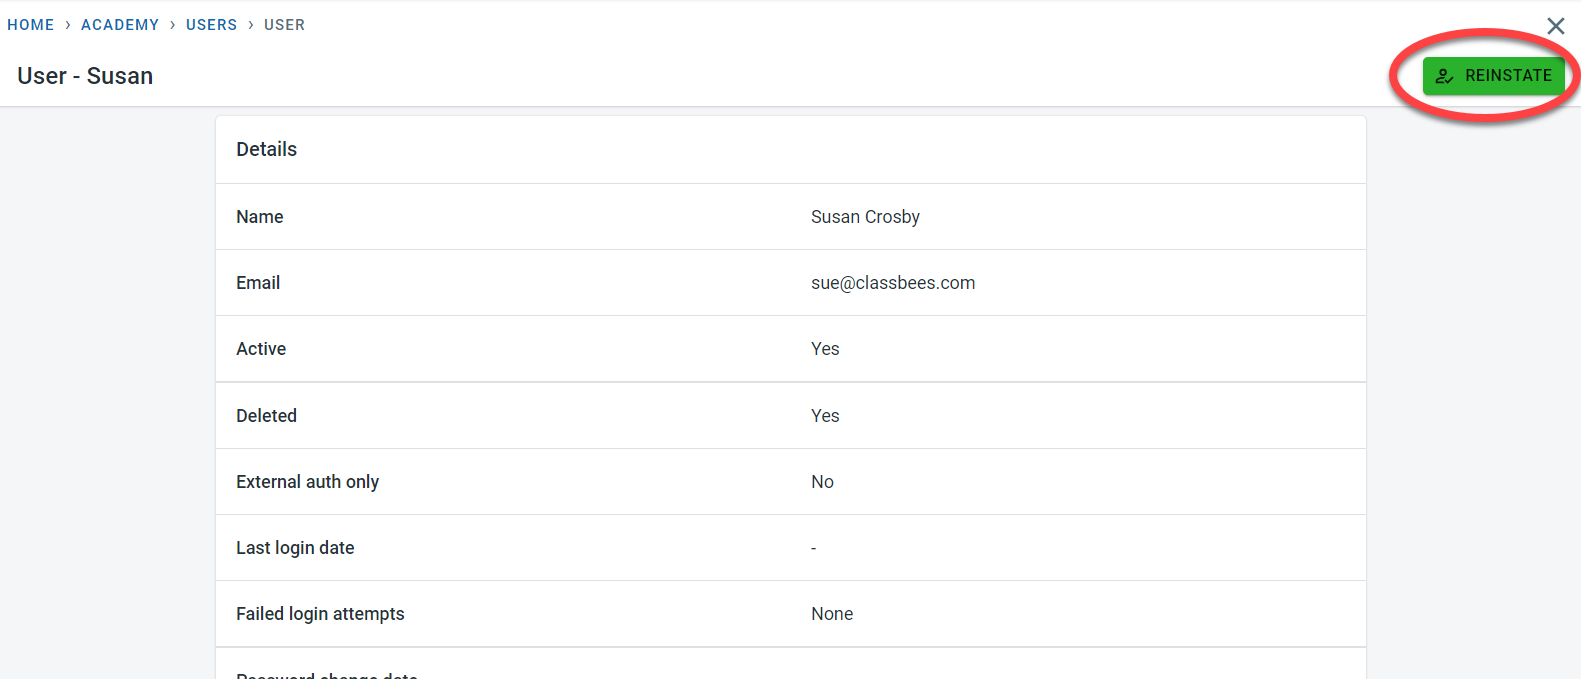
You could reinstate the user at any time by clicking on View next to the user. In the detailed view of the deleted user, select “Reinstate”